
Recipient Lists
Introduction
This guide shows how to create Recipient Lists which are one of the building blocks needed when creating and sending Publications.
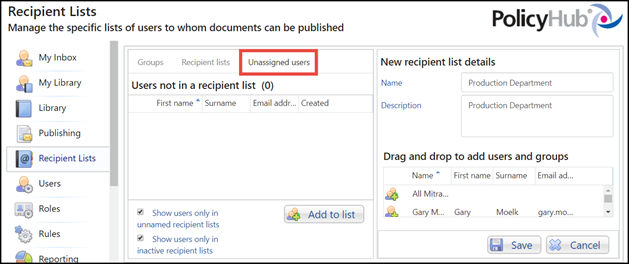
Creating a New Recipient List
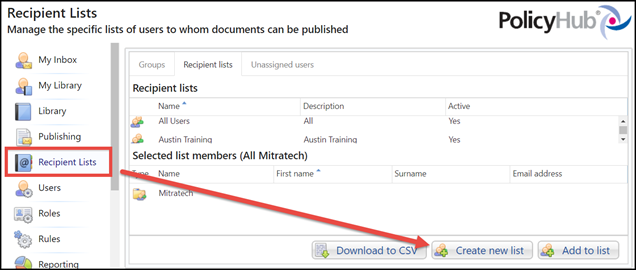
- Click on Recipients Lists in the left-hand column and in the Recipient Lists screen click the button “Create new list”:
- In the New recipient list details section on the right-hand side of the screen add a Name and Description of your list.
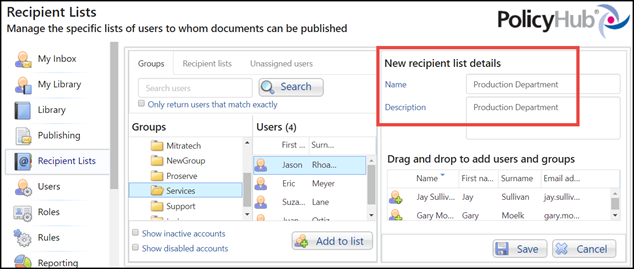
- Next you need to add people to the Recipient list by populating the box in the bottom right hand section of the screen.

-
People can be added to the list from any combination of the 3 tabs in the top left-hand section of the screen.
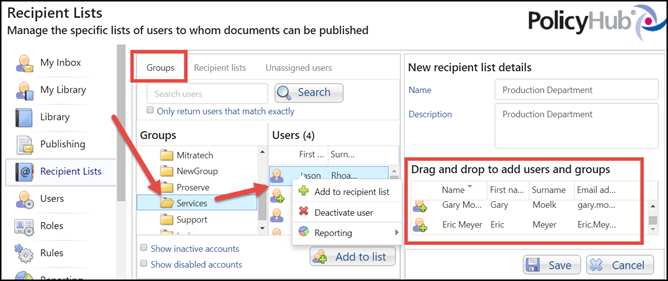
From the Groups tab (normally recommended method):
- In the Groups folder structure in the bottom center of the screen, drill down to find the folder containing the user(s) you want to add to the list. The user(s) in that folder will display under the Users list to the right of Groups.
- Find the User(s) you want to add and do one of the following:
- Drag and drop an entire group to the right

-
Right-click on the group and the Users in that group will display in the Users column. Then either drag the user over to the right OR click the drop down arrow to the right of the user and in the drop-down box below their name (as shown below) click Add to recipient list
-
You may alternatively drag an entire group into the new recipient list
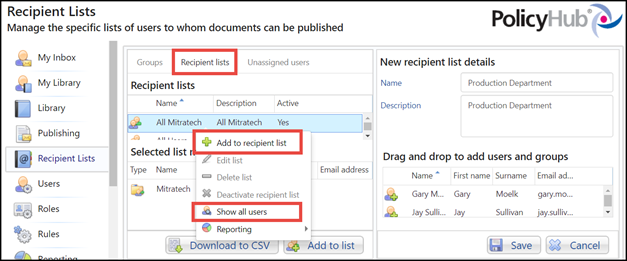
From the Recipient Lists tab:
- Find the list(s) you want to add users from and do one of the following:
- Drag and drop the group to the right and all members of the group will be added to your new Recipient list
NOTE: If you select a recipient list, the individual names will not display. You will now have a list within a list (any names added to the “parent” list will then also be part of this “child” list).
- Right-click on the list and in the drop down box (as shown below) click Add to recipient list
- Right-click on the list and in the drop down box (as shown below) click Show all users. Then either drag and drop each user to the right, or right-click on each user you want to add and click on Add to recipient list in the box that displays
From the Unassigned users tab:
- You will see listed Users not in a recipient list if there are any (this tab will not show any users if there are none unassigned (as show below):
- Drag and drop to the right and any users you want to add to your Recipient list or right-click on the user(s) and in the drop down box click Add to recipient list as shown in the tabs above
NOTE: This tab can also be used as a check to see which users were NOT yet assigned to a list.
- Click Save at the bottom of the list to save the recipient list
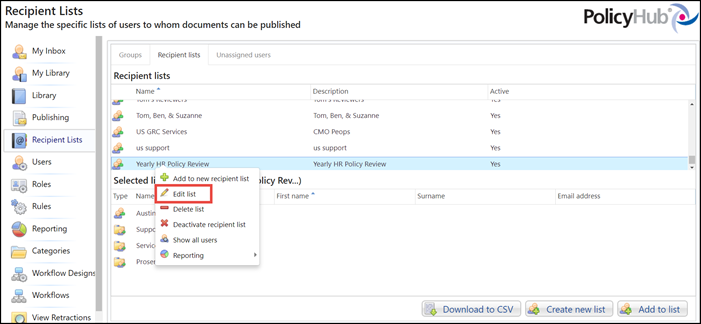
Adding New People to an Existing Recipient List
- Click on Recipients Lists in the left-hand column and in the Recipient Lists screen find the recipient list you want to add people to.
- Right click on the list and in the drop down box click the button “Edit list”:
-
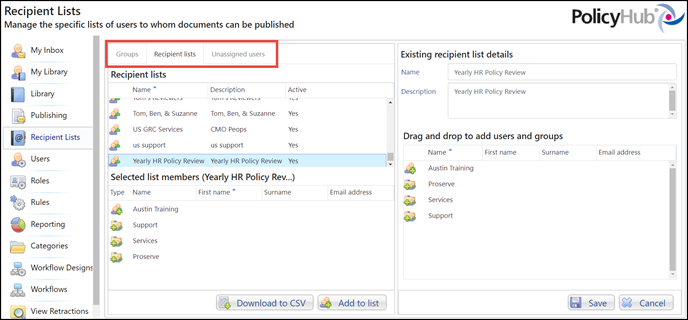
In the screen that displays, use the tabs above the Recipient lists to find new users to drag and drop to the right-hand column, as you initially did in the section Creating a New Recipient List.
Note that only the name of your list displays in the bottom right-hand side of the screen, and not all individual members.
-
Then click the Save button.
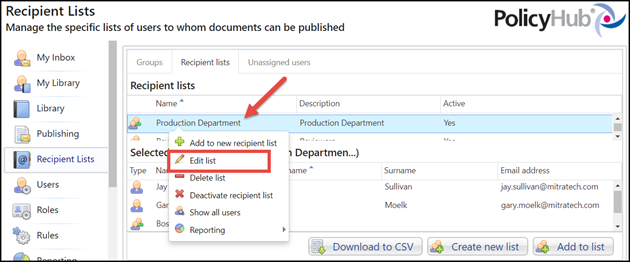
Removing People from an Existing Recipient List
- Click on Recipients Lists in the left-hand column and right-click the recipient list to which you want to remove users.
- In the drop down box, click Edit list.
-
Go to the section Drag and drop to add users and groups in the bottom right-hand section of the screen.
-
Find the user you want to remove from the list and do one of the following:
-
Right click on the user name or click the drop down button to the right of the name.
-
Click Remove user from selected recipients

-
- Click Save at the bottom of the screen.
Deactivating a Recipient List
- Right-click on the recipient list and select Deactivate recipient list:
- The recipient list will be greyed out, the Active column will say No and it can no longer be selected when publishing:
- To reactivate a list, right-click on it and select Activate recipient list:
Deleting a Recipient List
- Right-click on the recipient list and select Delete list:
- Click on Yes to confirm deletion of the list: