Risk And Action Entry Overview
Risk Entry Forms
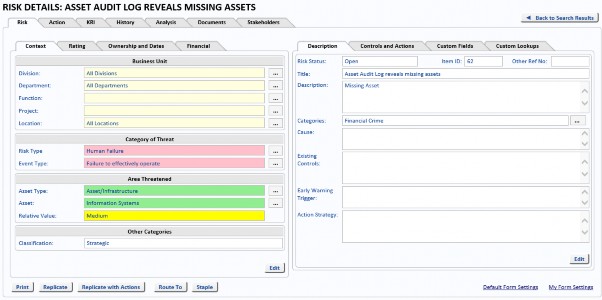
The following image shows the Tabbed Risk Form.

The Workflow Form (select the System tab, select the System Settings tab and select the Workflow tab) section of the page includes the options for selecting the type of Risk Form. For details on the Tabbed Risk entry form, refer to the OpRiskControl User Guide.
My Form Settings
The System Administrator may configure the Default Form Settings (on the Risk Details page) which selects which fields to show and hide.
Users who have permission to change their own form will see the link My Form Settings on the Risk Details page.
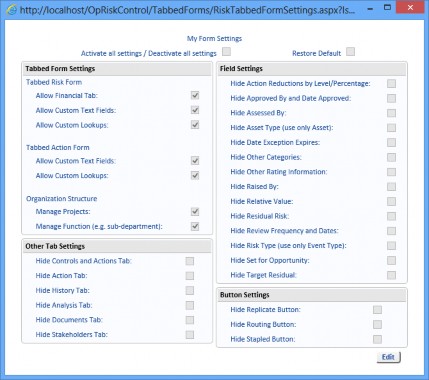
Click My Form Settings on the Risk Details page to see a panel that allows you to changes your settings. Greyed-out items have been disabled by the System Administrator.

The right and lower panels allow you to hide data items and buttons that are not needed, while the panel at top left allows you to show data items and tabs.
Note: You can reset your form back to the arrangement set up by the System Administrator at any time by selecting Restore Default (in Edit mode) and then clicking the Save button.
Default Form Settings
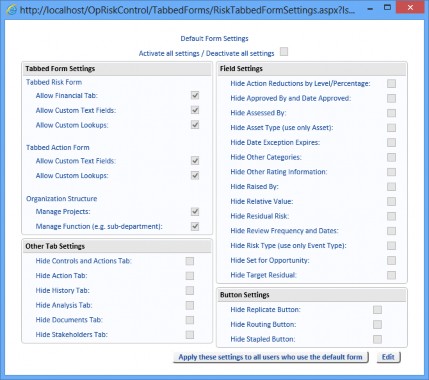
The System Administrator may restrict data items and tabs using the Default Form Settings. View a Risk, and click the Default Form Settings link on the Risk Detail page.
The Default Form Settings page is displayed.

Note: When items are disabled on the Workflow tab (select the System tab, select the System Settings tab and select the Workflow tab) they are greyed-out here and they cannot be selected.
When the Default Form Settings are changed, Users must re-apply the default settings via their own My Form Settings link (on the Risk view page) by selecting Restore Default.
Action Entry Form
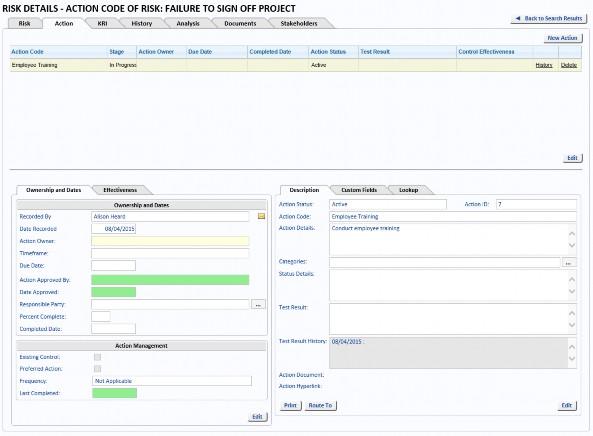
The following image shows the Action form.

When viewing a Risk, you can select the Action tab to see a list of mitigation Actions that have been attached to the Risk. If you want to add an Action, click the New Action button.


