
Manage Reference Data
Reference Data items can be selected from the menu which is displayed when the mouse hovers over the option Reference Data on the Manage tab. Alternatively, click on Reference Data on the Manage tab to display buttons. Select the item you want to view.
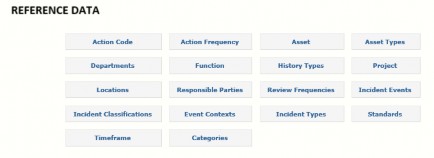
To print the Reference Data for any item, select the appropriate item from the menu and click the Print List button (as shown below Action Codes).
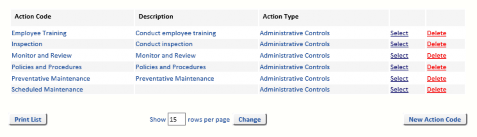
Action Code
Select Action Code from the Reference Data menu to add a New Action Code, Edit and Delete Action Codes. If an Action Code is being used on any Incident, you will not be allowed to delete it.
Note: The information displayed on this page is determined by configuring the Action Code List on the Preferences tab. Please refer to the OpRiskControl Incident Manager Users’ Guide for more information.

Action Codes are a list of common Action measures. The Action Code description automatically populates the Incident Action description where it may be edited to be specific to the Incident it is associated with. Likewise, if an Action Code has an attached document or web site link, this information is copied to the Incident Action.
Click Select to edit an Action Code.
Click the New Action Code button to add a new Action Code.
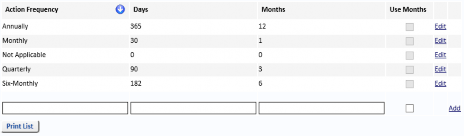
Action Frequency
You may set up action frequencies (apart from Incident review frequencies) and nominate the number of days or months between actions.
The default setting for action frequencies is Monthly notifications. The system will alert you every month with this setting.
To change monthly action frequencies, select Edit for the Months frequency desired (annually, six monthly, etc.) then select Use Months tick-box and click Save to confirm. With months selected, the system will alert you on the same day of the month, depending on the frequency selected.
Note: Application software prior to version 5.4.0.
The default setting for action frequencies was set to Days with Monthly notifications. The system alerted you every 30 days with this setting.
Assets
Select Assets from the Reference Data menu to add, change and delete records. If the reference data is being used on any Incidents you will not be allowed to delete it.
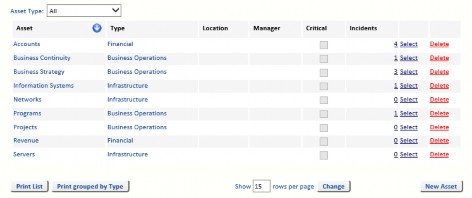
Assets may be real assets or intangible assets. They are the things that are harmed by the Incident.
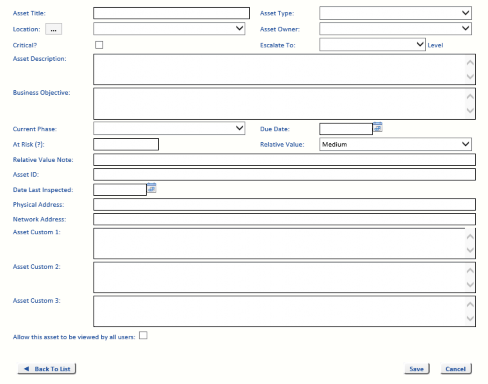
An Asset must have an Asset Type. Asset Types are often aligned exactly with the Severity table descriptions.
The rest of the data items are optional and some are provided for very advanced reporting and analysis – they are not needed for basic Incident management. Only use the following data items as described:
- Use Location only when the asset is a physical asset. Do not use Location if the Asset is a general Asset, such as Employees, or an intangible asset, such as Revenue.
- Use Owner only when there is a single User responsible for the Asset.
- Use Current Phase and Due Date only when the Asset is a Project Phase (for example, Phase 1 through Phase 3).
Many Assets may be assigned a (monetary) value, but it is difficult to assign a monetary value to other areas (e.g. patients, passengers and employees). However, you may assign any of five Relative Values from Very Low to Very High against any Asset. The default is Medium.
Asset Types
Select Asset Types from the Reference Data menu to Add, Edit and Delete records. If the Asset Type is being used on any Incident, you will not be allowed to delete it.
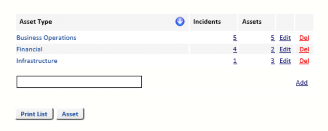
Asset Type is a higher level of classification for reporting purposes.
Categories
Categories are used for both Incidents and Actions. To add a Category, type a Category name in the Category Name text box. Each Category name must be unique. Select an owner from the Category Owner drop-down list. Setting the Category Owner is optional. Click Add to add the Category to the list. These Categories can then be added to Incidents and Actions.
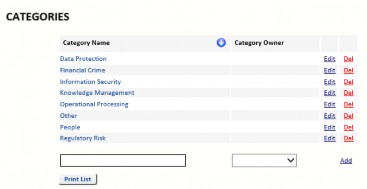
Select Edit or Delete to edit or delete the selected Category. If the Category is being used on any Incident or Action, you will not be allowed to delete it.
Departments
Select Departments from the Reference Data menu to Add, Edit and Delete records. If the Department is being used on any Incident you will not be allowed to delete it.
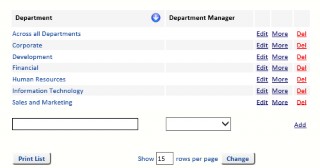
You can create an Objective for a Department by clicking on the More link text. The following form is displayed.
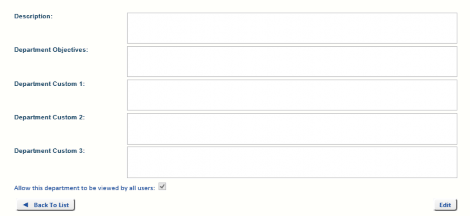
Note: A Department’s Objective can be displayed in some reports. See “Reporting” on page 20 for more information.
Function
Select Function from the Reference Data menu to Add, Edit and Delete records. If the Function is being used on any Incident, you will not be allowed to delete it.
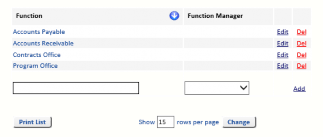
Enter the Function name and select the Function Manager from the drop-down list. Click Add to create the new Function.
History Types
Select History Types from the Reference Data menu to Add, Edit and Delete records. If the
History Type is being used on any Incident, you will not be allowed to delete it.

Some History Types are logged automatically when an Incident or Action is created or edited. Other History types can be selected when a New Item is added to the History tab of an Incident or Action.
Project
Select Project from the Reference Data menu to Add, Edit and Delete records. If the Project is being used on any Incident, you will not be allowed to delete it.
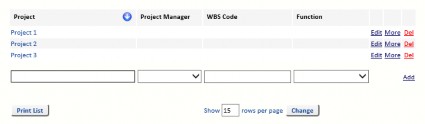
Enter the Project name, select the Project Manager from the drop-down list, enter a Work Breakdown Structure Code and select a Function from the drop-down list. Click Add to create the new Project.
Locations
Select Locations from the Reference Data menu to Add, Edit and Delete records. If the Location is being used on any Incident, you will not be allowed to delete it.

Responsible Parties
Select Responsible Parties from the Reference Data menu to Add, Edit and Delete records. If the Responsible Party is being used on any Action, you will not be allowed to delete it.

Responsible Party is used to configure a person who is responsible for an Action or ongoing control.
Review Frequencies
Select Review Frequencies from the Reference Data menu to Add, Edit and Delete records. If the Review Frequency is being used on any Incident, you will not be allowed to delete it.
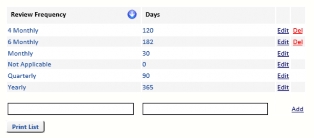
Four review frequencies cannot be deleted. Do not alter these four frequencies directly in the database. Use this form to translate the name, but it do not alter their meaning or the number of days for these four because the logic in the software expects them to be Not Applicable = 0, Monthly=30, Quarterly=90, and Yearly=365 days.
If others are added, ensure the Days are configured. Common additions are 4 Monthly=122 and 6 Monthly=182.
It does not make sense to have a Review Frequency equal to or less than the Incident Review Due Period in System Settings, otherwise the Incident is always due or overdue.
Incident Events
Incident Events define the Incidents which have been identified. Once an Incident Event has been defined, it can be used to define new Incidents.
Select Manage, then select Reference Data and select Incident Events from the menu. You can add or edit Incident Events. Only Incident Events which have not been used (indicated by 0 in the Incident column) can be deleted.
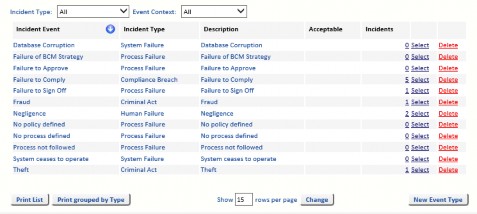
Incident Event has a short title and a long description. To simplify the system, the Incident Event is a short description of the Incident, such as:
- Chemical spill.
- Employee falling from heights.
- Fraud – subcontractor payments. To add a new Event, click New Event Type.
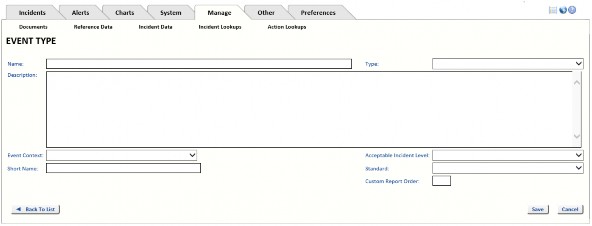
- Name – The name of the Incident Event which appears in the drop-down list of Event Types when creating a new Incident.
- Type – The Incident Type groups similar Incidents together. For example, you might have an Incident Type of Natural Hazard which groups the Incident Events Flood, Tsunami and Earthquake. The Type must be associated with an Incident Event for high level reporting.
- Description – If required, enter a more detailed description of the Incident Event.
- Event Context – Default values are Internal, External and Internal/External. See “Event Contexts” on page 74 for more information on setting the Event Context for an Incident Event.
- Acceptable Incident Level – May be allocated an Acceptable Incident Level which is merely an indicator of Incident tolerance. It does not control anything but will cause the
Incident title to appear with Not Acceptable after it if an Incident’s Rating is higher than this setting.

- Short Name – A short name for more succinct labels in the Chart Wizard.
- Standard – If required, select the associated Standard from the drop-down list.
- Custom Report Number – Custom Report Order is used if clients prefer to use other reporting tools (e.g. Crystal Reports, Cognos) and want to control the sequence of reporting rather than alphabetic order.
- Edit – When viewing an Incident Event, click the Edit button if you want to make changes to it.
- Save – After editing an Incident Event, click Save to save the changes you made and return to the Incident Event Viewer.
- Cancel – After editing an Incident Event, click Cancel to discard the changes you made and return to the Incident Event Viewer.
Incident Classification
Incidents can be assigned a Classification. The default Classifications are Operational and Strategic.
To edit an existing Incident Classification, click the edit link text beside the Classification. You can then edit the name of the Incident Classification.
To create a new Incident Classification, enter the new Classification name in the text box and click the Add link text.
The Incident Classification is displayed as Class. on the Incident Search form.
Event Contexts
Select Event Context from the Reference Data menu to Add, Edit and Delete records. If the Event Context is being used on any Incident, you will not be allowed to delete it.

Incident Contexts are used in high level reporting, especially in the Incident List Report and Incident Action Report where Incident Context may be selected in the Sort Column or the Group By criteria.
Incident Types
Select Incident Types from the Reference Data menu to Add, Edit and Delete Incident Types. If the Incident Type is being used on any Incident you will not be allowed to delete it.
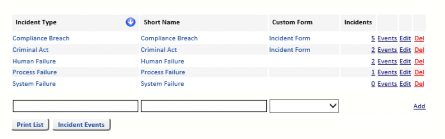
An Incident Type is the higher level of classification for Incidents and is used for reporting purposes. Each Incident Type will have a number of Incident Events.
Standards
Select Standards from the Reference Data menu to Add a Standard, Edit and Delete records. If the Standard is being used on any Incident you will not be allowed to delete it.
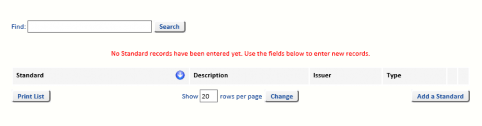
Add A Standard
Click the Add a Standard button to add a Standard document. Add a name for the Standard in the Standard field, a description, the name of the person issuing the Standard and then select a Type from the drop-down list. Click Save to save your changes, or Cancel to discard the changes.
Attach A Document To A Standard
Click on the name of the Standard. You are taken to the Document which is linked to the Standard. If no Document is linked to the Standard, you can attach a Document by clicking the New Document button. The Documents For Standard page is opened.

Click the Browse button to navigate to the required document. Click Open. If required, enter a Version. The Created date defaults to today. Click the calendar to select a different date.
Attached By defaults to the User who clicked the Attach Document button. You can change the name by selecting a different User from the drop-down list. Enter the name of the Author and a Security, if required.
Select a date from the calendar for the Revised date, if required. If required, enter a Status. Click Save to save the document details or Cancel to discard the changes. You are returned to the Documents For Standards page.
Timeframe
Timeframes are used on the Action form.
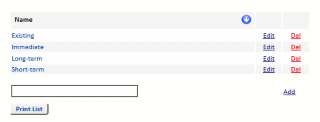
There are four default Timeframes:
- Existing
- Immediate
- Long-term
- Short-term
These can be Edited or Deleted. However, when a Timeframe has been used, it cannot be deleted. More Timeframes can be created by clicking the Add link text.