
Non-custodial Data Sources Import Setup
What is Non-custodial Data Sources Import?
Non-custodial Data Sources Import is an automated way for your site to synchronize non-custodial data source records in LegalHold from an output file from your asset management application that maintains all record-keeping systems.
Automate the process of importing non-custodial data sources
The most recent file uploaded to the path set in the Non-custodial Data Souces Import task will be imported into LegalHold at the specified date/time in the task.
Edit the Non-custodial Data Sources Import Schedule
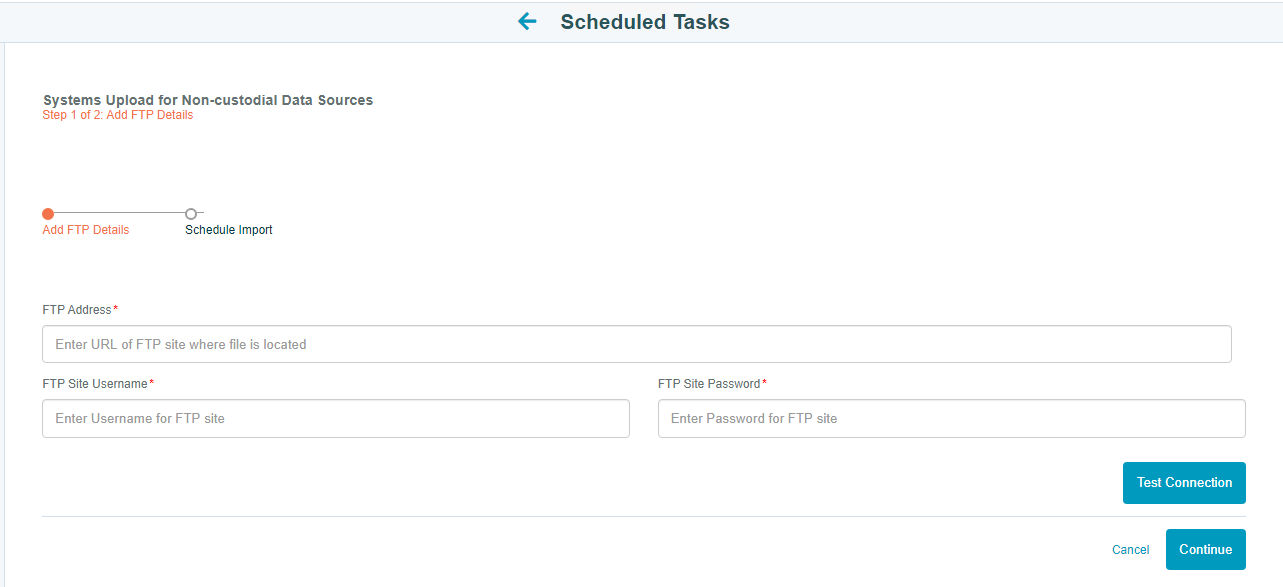
The instructions below detail how to edit the schedule that people are imported from an on-site HR system:
- From the Home Page, click on the Scheduled Task icon.
- Find Non-custodial Data Sources Import in the Task Name column, then click the edit icon in the Actions column.
Note: If the task is currently running on a schedule, you must stop the scheduled before you can edit it. Simply click the Stop icon in the Actions column, then click the Edit icon. - Enter details for the FTP account that is being used for file transfers.
- Select Continue.
- Edit the schedule then click Schedule. All fields are required on this screen.
How to set a user as a System Owner?
Please follow these steps to set a user as a System Owner or support manager.
-
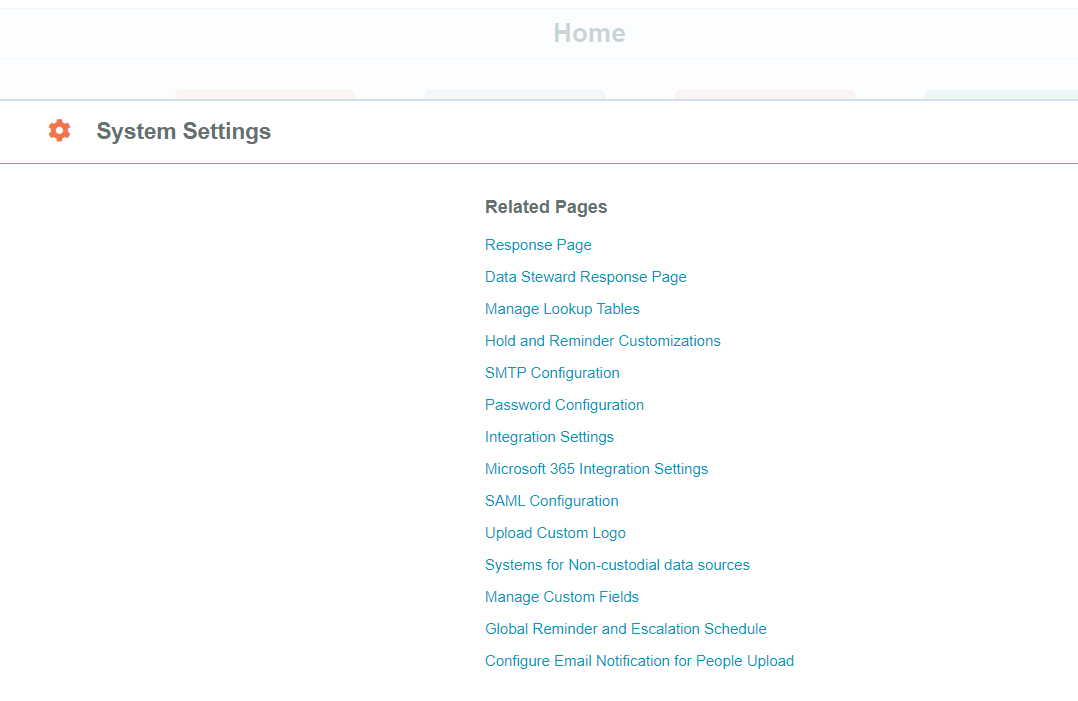
Go to System Settings → Systems for Non- custodial data sources
-
From the page appears, click Add New System to add a user as system owner or support manager.
You can also edit the existing system by clicking the pencil icon from the Actions column. And you can upload a new system by clicking the Upload New System icon.
-
Fill in the mandatory and required fields to create a system. Here you can add a user as System Owner or support manager. And then click Save.


How to choose a date format per date column ?
Please follow these steps to choose a date format per column:
- Go to system settings,
- Under Default Date Settings, click the drop down against the date field and select the required date format.
- Click Save.
