
Module Set-Up
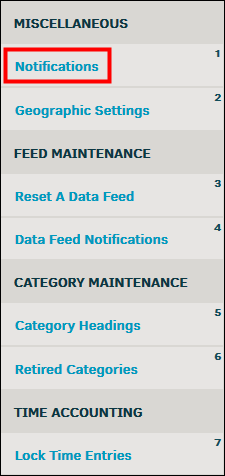
From Application Administration, the Notifications hyperlink in the Misc. Settings sidebar allows users to manage the Notifier module.
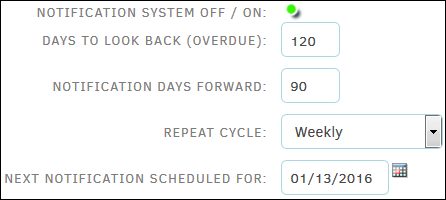
In the top section of the Notifier module, edit the notification schedule by taking the following steps:
- Click the colored indicator to turn the notification system on
 or off
  .
. - Type the number of days overdue in the first text box.
- Type the number of upcoming notification days in the second text box.
- Choose a repeat cycle from the drop-down menu.
- Click the
 icon to choose a date for the next notification.
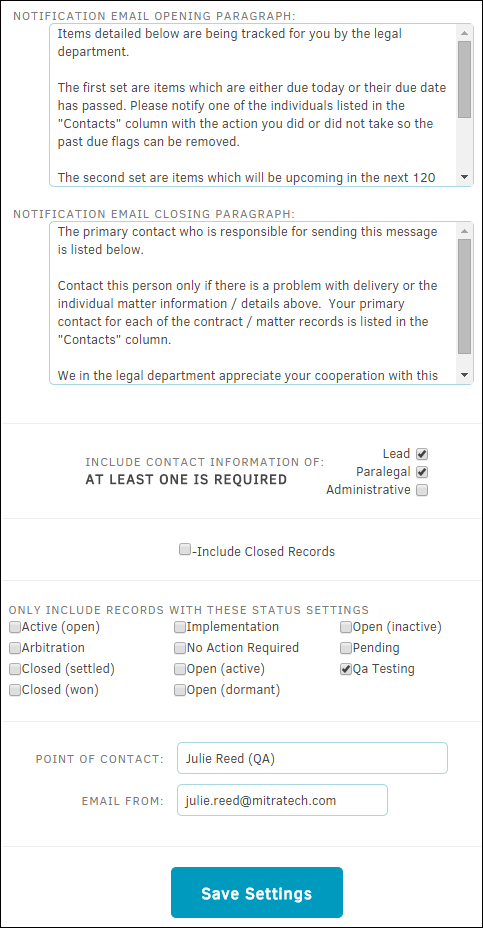
Opening/closing paragraphs allow administrators to include instructions to the recipient. Manage the text within the opening and closing paragraph by typing directly into the corresponding text fields.
In the bottom section of the Notifier module, use the checkboxes  to include certain individuals or records in the notification.
A point of contact can be assigned by typing the individual's name and email address in the text boxes at the bottom.
Click Save Settings after any changes are made.
|
Fields |
Description |
|---|---|
|
Notification System Off/On |
The system must be set to On to be activated within the application. |
|
Days to Look Back (overdue) |
Lawtrac will look back ‘X’ number of days, from the day the notifications are being run, to see if any selected date fields fall within that time-frame. This can be set to "0" (numeric zero) if you do not wish to look at any overdue dates. |
|
Notification Days Forward |
Lawtrac will look forward ‘X’ number of days, from the day the notifications are being run, to see if any selected date fields fall within that time-frame. |
|
Repeat Cycle |
Select how often you want the notification emails to be sent. Note: The Daily (Weekdays) option sends emails every day except for Saturdays and Sundays. |
|
Next Notification Scheduled for |
Set this date for the first time you want to send notices. This must be set for either "today" or a date in the future; it should not be set for a past date. Note: When the notifications are run, the “Next Notification Scheduled for” automatically updates based on the “Repeat Cycle” selected. In the scenario presented, once the notifications are run on March 25, 2013, the “Next Notification Scheduled For” is updated by one week (seven (7) days) to April 1. If you want to ensure the notifications are run on a specific date, you can manually change the “Next Notification Scheduled for” AFTER you’ve run the current month’s notifications. |
|
Notification Email Opening/ Closing Paragraphs |
Include any descriptive text that will help your recipients understand the information they are receiving and what, if anything, you want them to do with the information. |
|
Include Contact Information of |
At least one selection is required. You may select contact information for any, or all, of the designated roles to appear on the email. The terms (Primary, Paralegal, and Administrator) appear as they are used on your site. |
|
Include Closed Records |
By default, the contract notifications only queries open matters, but closed matters can be included if necessary. Note: You may need to query closed matters if you close a contract matter for the purpose that the Legal department has completed its work with the contract (it’s been reviewed and approved from a Legal standpoint). Your internal client/key personnel, however, still considers it an active contract and may need to review it for possible renewal, renegotiation, etc. If this is the case, it is best practice to include closed records in contract notifications. |
|
Only Include Records with These Status Settings |
You can select as many status entries as necessary. The status terms that you see will be those in use on your site. |
|
Point of Contact |
As noted in the Module Guidelines on your screen, the email notification will include the name and contact information for up to three (3) individuals assigned to the matter record. In addition, however, we recommend a general contact be added—this would be the individual responsible for sending the notifications, and may or may not be associated to any matter records. |
If Lawtrac is hosted in-house, the point of contact looks similar to the following image.
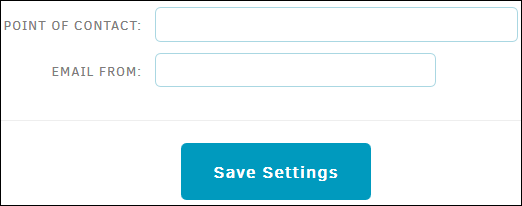
When Lawtrac is hosting your site, your data resides on a “Lawtrac.com” server. When an email address does not match the server address, many email systems view it as spam and will not allow the email to be delivered. So, a “customer.com” email coming from a “Lawtrac.com” server may get caught in a spam filter. At the end of this document, in Appendix A, we have included a note from our Development Team that you can share with your IT department to alleviate the referenced issue and allow the email to come through your system.
Note: If you must use the noreply@Lawtrac.com email address, please include the contact name and email address of your company representative in the body of the opening or closing paragraphs.
Once all the settings are in place, click the Save Settings button.