Field level-role Notification
Field level-role Notification
Step 1:
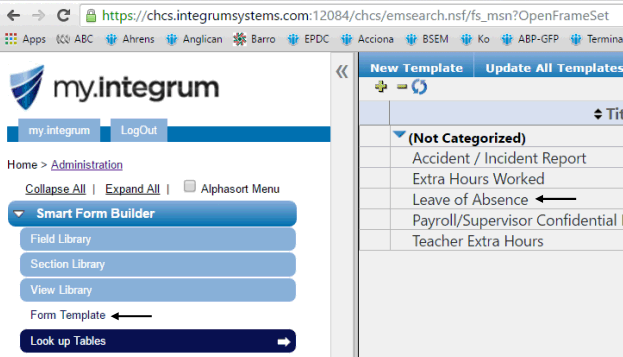
Go to Smart Form Builder and Select the template: (leave of absence)
Step 2:
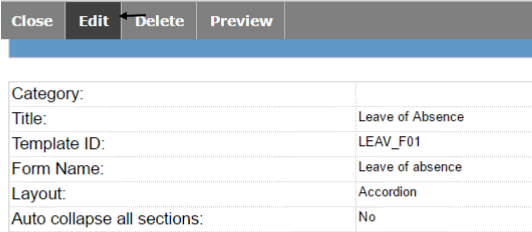
Select edit form the main bar:
Step 3:
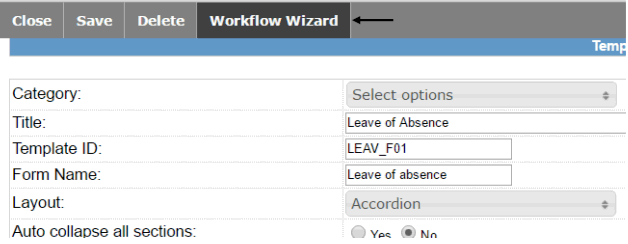
Select WorkFlow Wizard
Step 4:
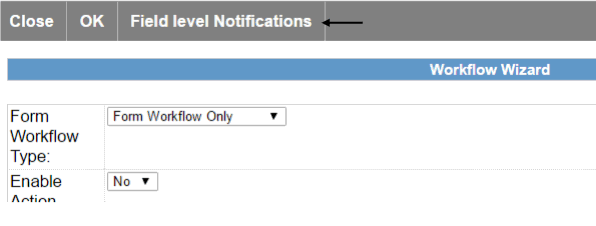
select filed level notifications
Step 5:
select Add Field Level Notification
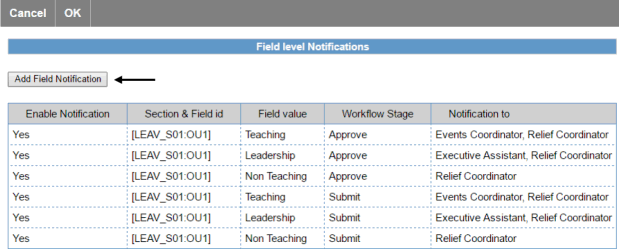
Step 6:
Enable notification, customize message, make sure you include the field value, select a role or roles and a workflow stage.
When selecting the field value right click and select the relevant field (In your case is in Leave details and in team)
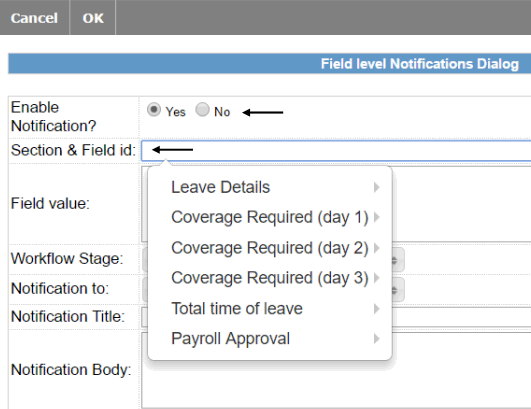
In the field value box Type The value exactly as it appears in your field.
Then select the Work flow stage depending on your need (Submit, approve, reject or sign off)
Notification to: Select from the list the Role(s) to be notified.
In the Notification title and Body customize the message. In these text areas you could include fields from the form using the right click and selecting the it.
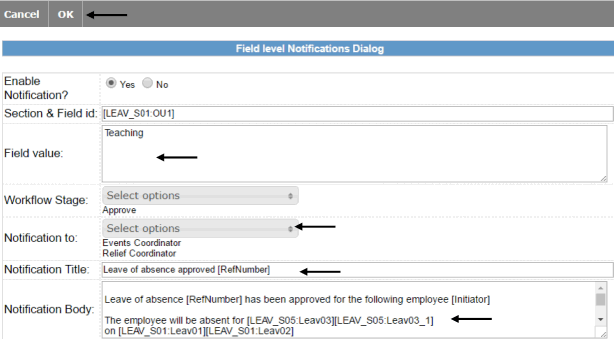
These changes Must be saved by selecting OK in the top bar of this window and the following one and selecting Save in the last window.
Note: you need to repeat the step for each value included in your OU1 (In this case Teaching, Non-Teaching and Leadership)

