Creating the Imported data reports
The below steps will show you how to create a new report based on a CSV import
NOTE: You would need a Super User Access
Convert Excel file into CSV format
- Copy the required columns and values into an excel file but save the file as a CSV (Comma Delimited)
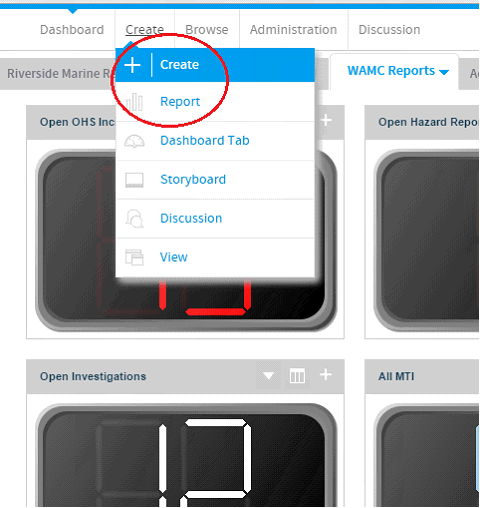
Open the BI and click on create the report

-
In the next window, select CSV Import under Create Using drop down list
-
On the next screen keep the default “A regular Report” option
-
Select the proper Data Source relevant to your system
-
Select the View Category. For the Precision field value, select Low Precision.
-
Click on Choose File button, select your CSV file and then click on Upload button to upload it.
If the file is large it may take a while to complete this step.
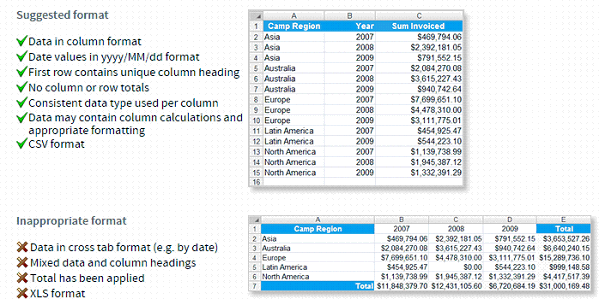
It would be very helpful to read the “Suggested format” instructions underneath before continuing.

-
After the data has been imported, you will be presented with the below screen

You can change the title of the columns now by replacing the existing values in the headers

You might have to adjust the date fields and set them to Metric under Timestamp columns
This will ensure that the values are imported as date

When ready click on the Continue button to move to the Report Builder window

-
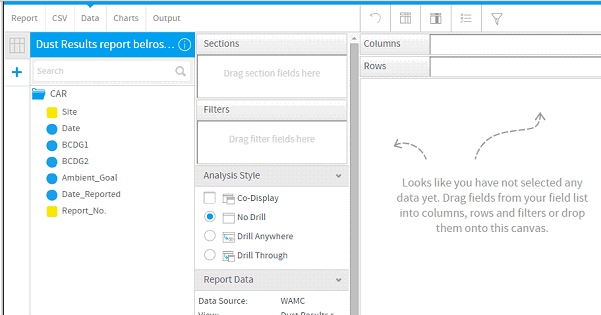
Start by dragging the fields from the Fields pane on the left into the Filters box
-
To use for filtering and drag the fields that you want to see in the report into the Columns box at the top
-

Then Click on the Charts tab to build the chart
Creating an Overlay Chart
- Click on this link for more details on how to create an Overlay Chart
http://wiki.yellowfin.com.au/display/USER71/Combination+Charts

Updating an existing CSV report
-
Open the report that was created from a CSV import
-
Click on Edit then File

You will see a new window titled CSV View
The pop-up window will allow you to either Append, Overwrite or Delete the existing data

- The default selection is Append.
- Click Choose File button to select the file with new values
- Once done a new Continue button will appear


