
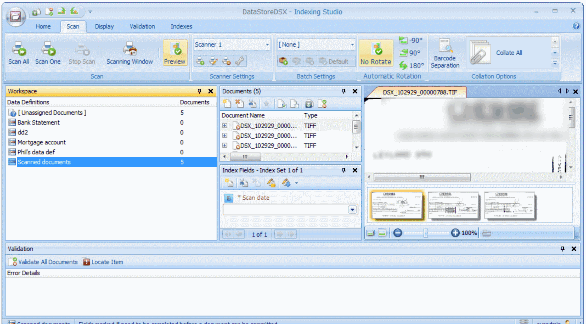
Indexing Studio
Note: Indexing Studio cannot be used with documents with boundaries. Therefore,
Data Definitions with document boundary conditions defined are not available from within Indexing Studio. See “Document Boundaries – General Details” for more information on configuring document boundaries.
Also, Indexing Studio cannot be used with Transaction Fields. Therefore, Data Definitions containing Transaction Fields are not available from within Indexing Studio. See “Transaction Group” for an explanation of how Transactions Fields are used. See “Transaction Fields Tab” for more information on configuring Transaction Fields.
There are two ways to get documents into the Indexing Studio application:
- Importing files
- Scanning documents.
Open Indexing Studio and log in.
Import: Select Files
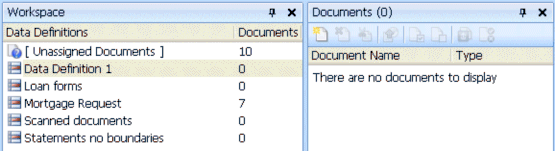
Select the Data Definition (if known) in the Workspace View before Importing the files, or select Unassigned Documents.
When the Path is Known
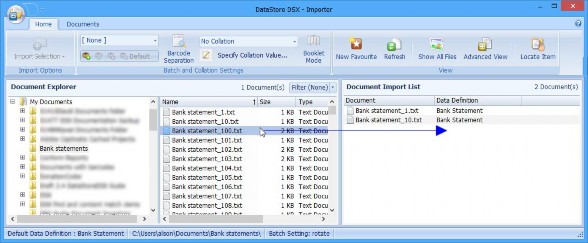
- Click the Files button, in the Import section of the ribbon's Home tab, to open the importer window.
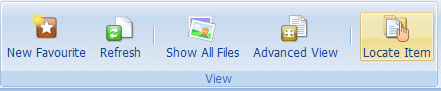
- From under the Importer window's Home tab, in the ribbon's View section, click Locate Item. (When selected, the button is highlighted.)
- In the Importer's text box, enter a folder path to locate the folder's contents, or a file path to locate the file to be imported.
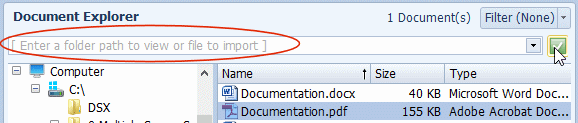
Note: The drop-down text box will display all previously entered paths (up to a maximum of ten).
- Click the green Locate icon (displayed under the Filter button) to view the required folder’s contents or file.
- If required, click the Filter (None) button and select the Choose extensions to filter... option then, in the File Extension Selection window, select only those file extensions you wish to be displayed. (Cleared file extensions are not displayed.)
Import a Single Item
- To Import a single item, do one of the following:
- Select and double-click the required item to import it.
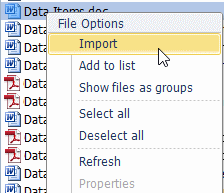
- Right-click the required item and, from the Options Menu, select Import.

- Your selected item will be imported and displayed in Indexing Studio's Documents pane.
- If an item cannot be imported, an error is displayed. See “Import Files” on page 214 for more information.
Import Multiple Items
- To import more than one item:
- Select your required items.
- To select a consecutive list: click on the first item, hold down the keyboard’s Shift key, then click on the last item.
- To select a non-consecutive list: click on the first item, hold down the keyboard’s Ctrl key, then click on each additional item you require.
- Right-click one of the items and, from the Options Menu, select Import or Add to List.
- When you select Import, your selected item will be imported and displayed in Indexing Studio's Documents pane. (If an item cannot be imported, an error is displayed. See “Import Files” for more information.)
- When you select Add to List, the Advanced View window will open, enabling you to add more items from your selected location or from different locations.
- To import your selected documents from the Advanced View window, see “Import Files”
Browse to the Item
- Click the Files button, in the Import section of the ribbon's Home tab, to open the importer window.
- Select the source folder (of the documents to be imported), from the tree view in the File System pane.
- To select the document(s) to be imported, do one of the following depending on whether or not Advanced view is selected:
- Advanced View is selected: Click the Advanced View button, on the ribbon's Home section then drag the selected documents on to the Document Import List.
- Continue adding documents (to the Document Import List) from other folders, as required.
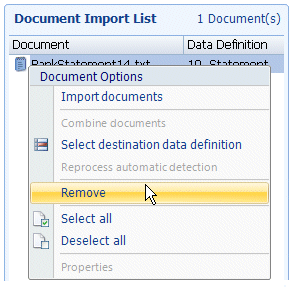
- To delete a document from the list, select the document and click Remove on the Import Options section of the ribbon.
- Click Import Selection (on the ribbon's Import Options section). There are two options:
- Import Documents – Imports the selected documents directly into Indexing Studioand closes the importer window.
- Import Document and Delete – Imports the selected documents directly into Indexing Studio, then deletes them from the folder and closes the importer window.
- Advanced View is not selected: Select the required files and, from the document explorer list, click Import Selection (on the ribbon's Import Options section). There are two options:
- Import Documents – Imports the selected documents directly into Indexing Studio and closes the importer window.
- Import Document and Delete – Imports the selected documents directly into Indexing Studio, then deletes them from the folder and closes the importer window.
- Advanced View is selected: Click the Advanced View button, on the ribbon's Home section then drag the selected documents on to the Document Import List.
Import Files
Having assembled the required documents and set their Data Definitions, click Import List or Import Selection (as appropriate), on the Import Options section of the ribbon's Home tab, to import all the documents on the list.
- If all the documents in the import list are successfully imported, the Importer pane closes. However, if any documents in the import list cannot be imported, an error message will be displayed.
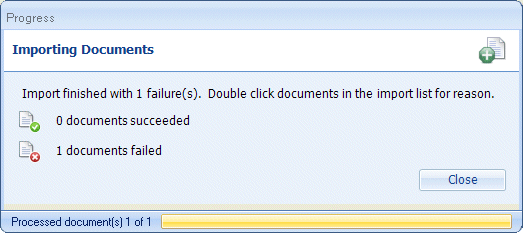
- Failed documents are shown with a cross against them in the Document Import List.
- Double-click the document name to view the reason why the document could not be imported.
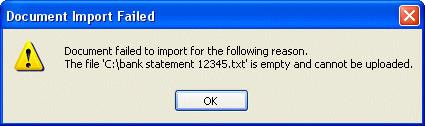
- Correct the problem and click Import List.
- If the problem cannot be fixed, select the document in the Document Import List, right- click it and select Remove.
- Close the Importer window. Click on the icon in the top left corner of the importer window and select Close.
Note: When the importer closes, the imported documents are displayed in Documents View.
- Documents which have been imported with an associated Data Definition will either have a tick next to them or a cross.
If all the documents have a tick, they have been Indexed (either because the option Import document content fields on import was selected or via an Index Assistant configured as part of the Data Definition). Should you want to change the Index Field values, see “Indexing Documents." A cross indicates the file has not yet been indexed (or has not yet passed Validation). See “Indexing Documents” for information on how to Index the documents.
- If you want to move the selected documents to another Data Definition:
- Right-click on the file and select Move to data definition.
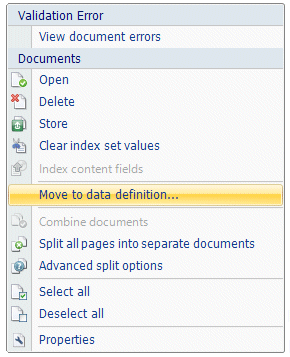
- Select an appropriate Data Definition from the list or select Unassigned Documents to keep the document in Indexing Studio but without yet assigning a Data Definition.

- Right-click on the file and select Move to data definition.
- If you no longer want to Index the imported document, remove it from list of imported documents.
Caution: Take care when deleting a file from the Documents list in Indexing Studio as it can only be retrieved by re-importing or re-scanning the file.
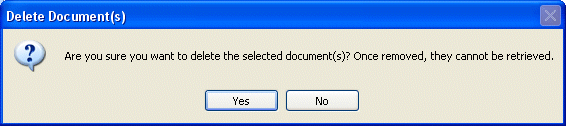
- Right-click on the file and select Delete. A confirmation window is displayed. Click Yes to remove the file from Indexing Studio or No to keep it.
Scan Documents
Licence required: Scanning requires a licence. If you do not see the options described here, contact support@mitratech.com about purchasing a licence.
- On the Scanning ribbon, click Scanning Window.
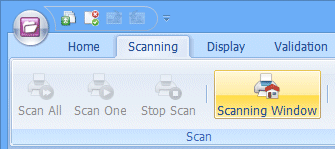
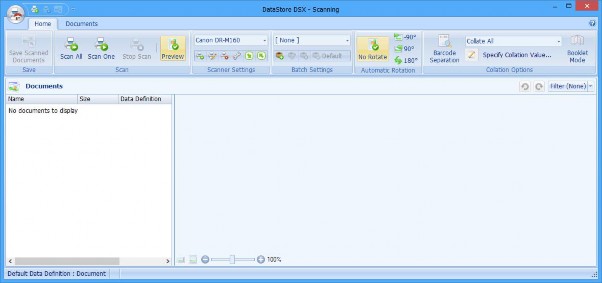
- The Scanning window is displayed.
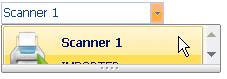
- If a scanner has been configured, select it from the drop-down list.
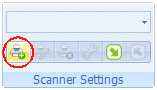
- Otherwise, add a scanner.
Add a Scanner
- Click the Add Scanner button.
- The Scanner Setting window is displayed.
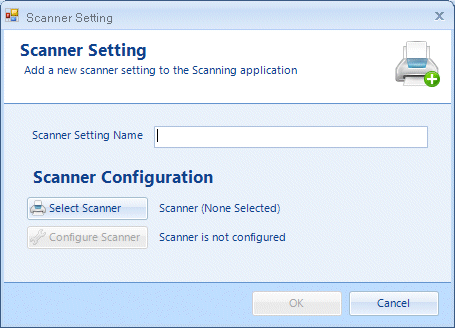
- Scanner Setting Name – Enter a name for the new scanner setting.
- Select Scanner – Click to see a list of supported scanners. Select Show only connected scanners to list only those scanners which are currently connected and powered on.
Note: If the connected scanner is not displayed in the list when Show only connected scanners is selected, clear the box and choose the scanner from the list shown.
- Configure Scanner – Click to display the configuration window for the selected scanner, then configure the settings. (If required, see the scanner’s user guide for information on configuring the scanner.)
- Click OK to save the scanner settings or Cancel to discard the new scanner settings.
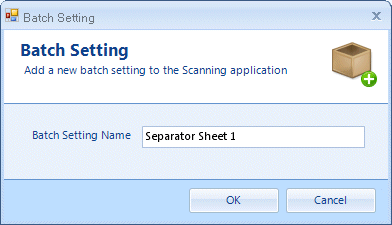
Configure Batch Setting
In this example, configure a batch setting which simply looks for the DataStore®DSX Job Separator sheet 1 and uses that to determine the end of each document.
- Click the Add Batch Setting button.

- Enter a name for the new Batch setting, in this example, Separator Sheet 1. Click OK.
- The Batch Settings window is displayed. Click on the Add Criteria button.
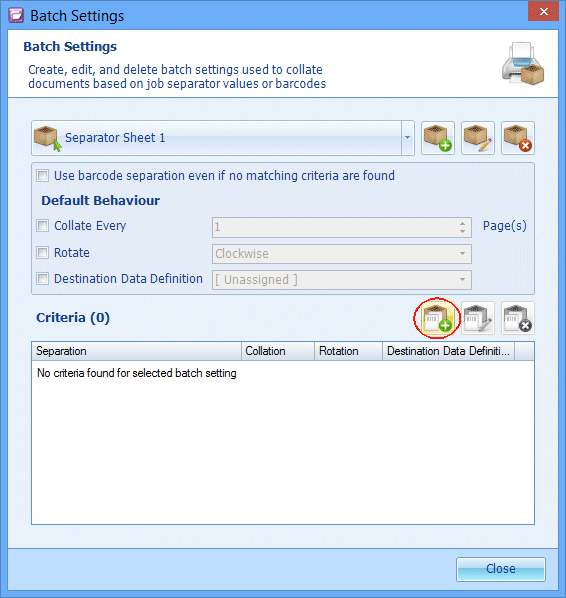
- Ensure Job Separator Sheet is selected and set to 1.
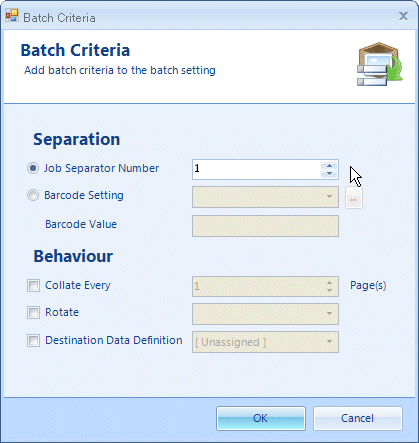
- Click OK on the Batch Criteria window. Click Close on the Batch Settings window.
Scan
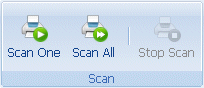
- Select Scan One to scan a single sheet from the selected scanner’s feeder tray or Scan All to scan everything in the selected scanner’s feeder tray.
- In this example, assume there are many documents in the feeder tray of the scanner. Between each document is a DataStore®DSX Separator sheet 1. When the separator sheet is scanned, further pages are put in to a new document.
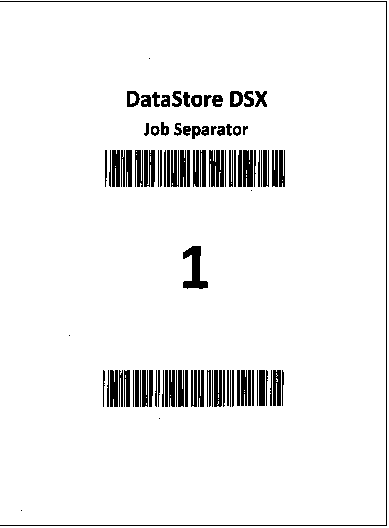
Note: When a separator sheet is used with duplex scanning, the back of the separator sheet is excluded from the scanned documents. This prevents the new document from starting with a blank page.
Scanning a Booklet
Licence required: Scanning requires a licence. If you do not see the options described here, contact support@mitratech.com about purchasing a licence.

The Scanning ribbon in Indexing Studio also supports Booklet Mode.
When a booklet is removed from the binding and made ready for scanning, the first page and the last page are on the same sheet of paper.
This example shows how the front and back of the first sheet is displayed in an 8 page booklet.

When the Booklet Mode button is selected, the scanned sheets are automatically split in to two pages and reordered so they are displayed in the correct order.

In this example, an 8 page TIFF document is displayed in Indexing Studio, with the pages ordered from 1 to 8. This document can then be indexed using the required Data Definition and then stored.
Note: If, this icon
is displayed when scanning in Booklet Mode, not enough pages were scanned. The scanner might be scanning in Simplex (singled-sided) mode. Change the scanner setting to Duplex (double-sided) mode and scan the booklet again.
Changing Data Definition
To change the Data Definition of all of the documents, select the Documents tab and, on the ribbon's Data Definition section, select a new Default Data Definition from the drop-down list, then click the Set For All Documents button.
To change the Data Definition of individual documents, select the Documents tab and, on the ribbon's Data Definition section, select a new Default Data Definition from the drop-down list, then select the required documents and click the Set For Selected Documents button.
Indexing Documents
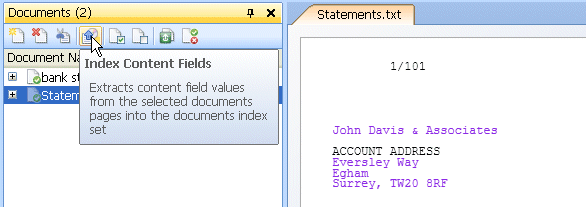
The documents are now ready to be indexed and stored. Indexing of documents which have been assigned a Data Definition with only Content fields simply requires the user to click the Index Content Fields button. Indexing documents which have been assigned a Data Definition with one or more User Supplied Fields require the user to enter any appropriate information.
Indexing Content Fields
- Select the document you want to index. If the option Index document content fields on import is selected, the document is Indexed as it is imported. If this option is not selected, got to step 2.
- Click the Index Content Fields button. The information which has been automatically retrieved from the document for indexing is shown in lilac.
- If there are no User Supplied Fields, the document can now be validated. See “Validating Documents”
Indexing User Supplied Fields
- Select the document you want to index.
- The Index Fields pane displays the fields which need entries. Mandatory User Supplied Fields have a red asterisk (Scan date in the example here).
- Enter the values for the User Supplied Fields. When all the required information has been entered, the document can be validated. See “Validating Documents”
Note: To use Held Values, use the Configure button (on the Home ribbon) to open a window which enables you to set Held Values for any of the fields. Use the Hold button next to a field to store the Index Field value. (Click the Held button next to a field to disable the Held Value for the field.) When Held Values are configured, all the documents imported have the Held value populated in the User Supplied Fields. See “Held Values” for more information.
If Content Fields are configured with Held Values and the Option Index document content fields on import is selected, the Content field values override the Held Values. If required, use the Cascade button to replace the Content field values with the Held Values.
Indexing Date and Time Fields
An Index field will remain empty when the data found at the defined Position on the page (for Content fields) or entered by the user does not meet the validation rules.
Time accuracy Date and Time fields require a year, month, day and time value. The format must follow the rules for the selected Locale (see “Locale”). When the Locale is set to English (United Kingdom), the following times are valid:
- 28th June, 2012 11:50:00
- 28/06/12 1:00pm
- 28 Jun 2012 17:45
Note: If no seconds are specified, 00 is assumed. However, hours and minutes must be specified.
However, the following times are not valid:
- 28th June 11:50:00 – no year has been specified
- 28th June, 2012 11.50.00 – colons must be used between hours, minutes and seconds, not full stops
- 28/06/2012 – no time has been specified
- 06/28/2012 17:00:00 – not valid in the UK as dates must be in the format DD/MM/YYYY for English (United Kingdom)
- 28/06/2012 17:00am – not a valid time
Note: It is not valid to use AM or PM with 24-hour clock times.
Similarly, Day accuracy Date and Time fields must have a day, month and year value specified. Month accuracy Date and Time fields must have a month and year value specified. Year accuracy Date and Time fields simply require a year value. When too much date information is entered (for the accuracy of the index field), the extra information is truncated. For Month accuracy Date and Time fields:
- 21/12/2001 is changed to December 2001
- 21st December 1999 is changed to December 1999
- #now is stored as the current month and year.
Note: #now can be used in all Date and Time Index fields and is truncated as necessary according to the accuracy of the Date and Time field.
#today, #yesterday and #tomorrow can be used in Day accuracy Date and Time fields only and are stored as today’s date, yesterday’s date or tomorrow’s date, as appropriate.
Extracting Text and OCR Field Values
Indexing Studio users can extract values from text and PDF documents by selecting the text in the document. Text can be extracted from images by selecting the region containing the text. OCR is then used to extract the text from the image.
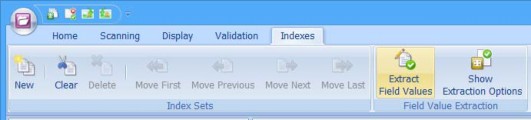
- Select the Indexes ribbon and select Extract Field Values. The button is highlighted.
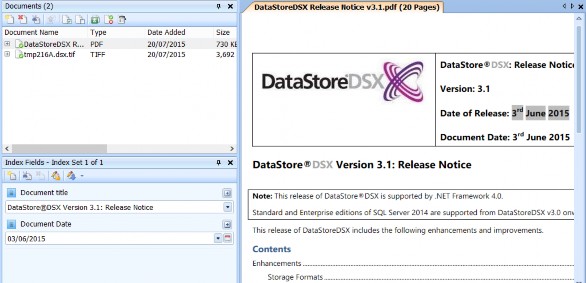
- Select the Index Field you want the extracted value to be placed in and select the text you want to be extracted. In this example, the Document Date field is selected and the date is selected in the PDF document. The date is extracted and put in the Document Date field.
- The second document is a scanned booklet which was saved as a TIFF file. Select the TIFF file.
- Field values can be extracted from BMP, JPG, PNG and TIFF images using OCR. With the Extract Field Values button still selected, select the field you want the extracted text to be placed in. In this example the field Document Title is selected. Use the mouse pointer to select the region of the image containing the text you want to extract.
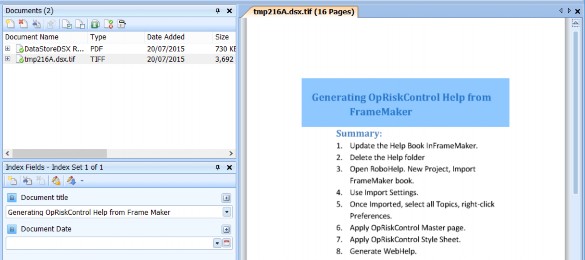
- The text in the selected region is extracted using OCR and placed in the selected Index Field.
Validating Documents
Once all required User Supplied Fields and Content Fields have been populated for each document, the documents can be validated. The validation process determines which documents are ready to be stored and which documents cannot yet be stored due to an error.
Note: It is not necessary to validate documents before Storing them. Validation provides a way to see if there are any document errors prior to storing. However, documents are automatically validated when they are stored.
A cross against a document does not necessarily mean it has failed validation, just that it has not yet passed validation.

If a document fails validation, a reason is displayed at the bottom on the window.

Note: The message ‘The document has no index field values at document or page level’ indicates the document must be indexed before it can be stored. See “Indexing Documents” on page 225 for information on how to index documents.
Storing Documents
The imported files are now ready to be Stored.
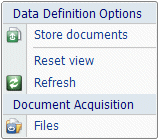
- To store all documents associated with the Data Definition, right-click the Data Definition and select Store documents.
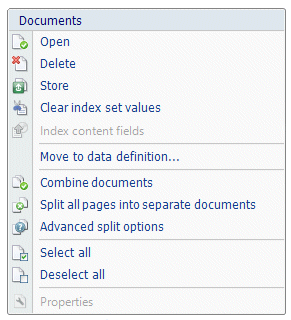
- To store documents individually, right-click the appropriate document in the Documents pane and select Store.
- When the Indexing Studio storage confirmation is set (see “Show ‘Storing Documents’ confirmation”) a window is displayed asking you to confirm you want to store the document(s).
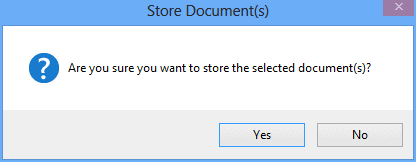
- Click Yes to Store the documents or No to cancel the store process.
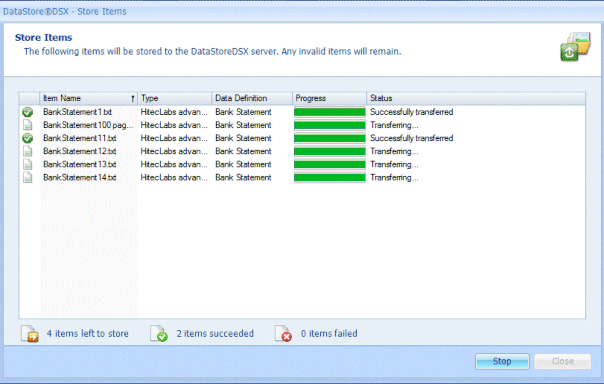
- The status of the Store process is displayed. Successfully stored documents are displayed with a tick, whilst unsuccessfully stored documents are shown with a cross.
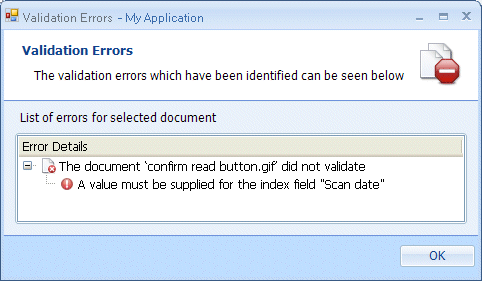
- Click Close and select an unsuccessful document. Right-click and select View document errors.
- The errors are displayed. In this example, the User Supplied Field was not completed. Since this is a Mandatory field, the Store process failed. Complete the field and then store the document. Correct the errors for the remaining document in the same way.
Once the documents have been imported, indexed and stored, they can be searched. See “Search Documents”