
WebDAV Configuration
WebDAV enables users to automatically open Word documents without having to first download them from the server. There are three WebDAV configurations:
- Windows Endpoint
- Forms Endpoint
- File Explorer Endpoint
A Windows WebDAV endpoint enables users who log in to DataStoreDSX using Windows authentication to use WebDAV to edit documents returned in Searching Client. Similarly, a Forms WebDAV endpoint enables users who log in to DataStoreDSX using Forms authentication to use WebDAV to edit documents returned in Searching Client. See “Creating a New Document Version in Searching Client” for an example.
A WebDAV file explorer endpoint enables users to connect to a mapped web location, open folders and edit documents which are stored in DataStoreDSX. The files which are stored in
DataStoreDSX are available to users according to DataStoreDSX permissions and access rights. Each new edit increases the document version by either a minor or a major version.
WebDAV File Explorer Configuration Example
The steps required for this example are:
- Create a Data Definition which has no document boundaries or transaction boundaries and at least one mandatory field which requires the user to manually enter the mandatory field value(s).
- Configure the File Explorer Endpoint to use the newly created Data Definition.
- Create a mapped web location which users can connect to and view and edit stored documents.
- If you cannot open the mapped web location, ask your I.T. manager to review the firewall settings.
- If the folder appears to be empty when you expect to see files and folders, refresh the view by pressing the F5 key.
Note: The DataStoreDSX WebDAV Explorer view does not support delete, copy, rename or new. When a user attempts to perform any of these commands, the command will fail. For example, when a user attempts to delete a file from within the WebDAV explorer view folders, DataStoreDSX replies to Windows with Forbidden and the action is not completed. If a file is no longer displayed after an attempted deletion, refresh the folder view to display the file.
Windows 7 Pre-Requisites
Microsoft has a known WebDAV performance issue on client Windows 7 machines (which will be accessing DataStoreDSX documents via WebDAV instead of via Searching Client) which are set to automatically detect settings and which are on a network which has not been set up to use the Automatically detect policy.
To see the details of this issue, click on this link: http://support.microsoft.com/kb/2445570
Performance is greatly improved by following these steps:
- Start Internet Explorer.
- Click Tools and then click Internet Options.
- Click the Connections tab and then click LAN Settings.
- De-select the option Automatically detect settings.
- Click OK.
- To verify that performance has been improved, open the mapped web location and browse through the available folders.
Create the Data Definition
- In Management Studio, click on the New drop-down list and select Data Definition. The Data Definition Editor is opened.
- Enter the name of the Data Definition. In this example, enter Company Documents in the Name field.
- Click on Category, click on the ellipsis button (...) and select the Category you want the Data Definition to belong to. The Category is used to set the access rights for the Data Definition.
- Add a new Text field and give it the name Department.
- Clear the option Values are extracted automatically (not externally provided) because the index value will be entered manually when the document is stored.
- Select the option Mandatory (field must be completed for item to be valid) because, to use this field as part of the WebDAV file explorer, the field must be mandatory.
- Add a second Text field and give it the name Document Title.
- Clear the option Values are extracted automatically (not externally provided) because the index value will be entered manually when the document is stored.
Note: It is recommended you leave the option Single field value selected for each field. Although multiple field values are allowed, the result is duplicate files are created in different folders. When a field which is used as a folder name is stored with multiple field values, multiple folders are created. When a field which is used as the file name is stored with multiple values, the first field value is used as the file name and other field values are ignored. This is done to ensure the same document is not stored multiple times in a folder.
- Select the option Mandatory (field must be completed for item to be valid) because, to use this field as part of the WebDAV file explorer, the field must be mandatory.
- Save and then Publish the Data Definition. Close the Data Definition Editor.
WebDAV File Explorer Configuration
- In Management Studio, under the Configuration Options, select WebDAV Service Settings and select the File Explorer Endpoint tab.
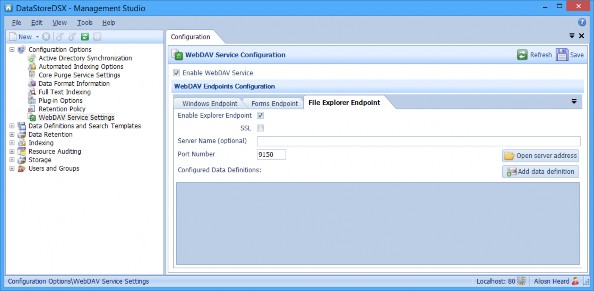
- Ensure Enable Explorer Endpoint is selected.
- In this example, SSL is not used, so leave the SSL option cleared.
- The Server Name is optional. If WebDAV is running on the same machine as the DataStoreDSX server, then leave this field blank. However, if the WebDAV server is a different machine, enter the machine name in the Server Name text box.
- Leave the Port Number set at 9150 unless your IT department tells you to change it.
- Click Add data definition to begin the folder configuration.
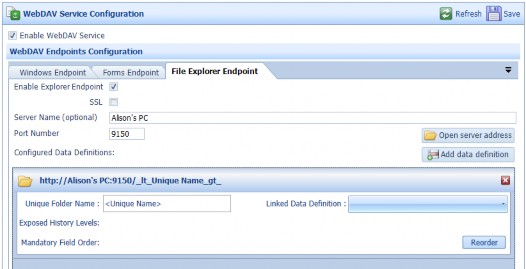
- Click on the drop-down list beside Linked Data Definition and select the Data Definition you created earlier (Company Documents).
Note: Only Data Definitions which have versioning enabled, contain mandatory fields which must have their values entered manually, have no document boundaries and have no transaction boundaries are included in the list of available Data Definitions.
The documents which are stored with this Data Definition must be stored in a folder which has a unique name. Windows ignores the case of the text entered so it considers the folder names Documents, documents and DOCUMENTS to be the same. In this example, in the Unique Folder Name text box, type in Company Documents.
This folder name should contain letters, numbers and spaces only. If the following characters are used, they are displayed as shown:
/ becomes _fs_

\ becomes _bs_

: becomes _cc_

* becomes _sc_

? becomes _qm

< becomes _lt_

> becomes _gt_

| becomes _pc_

" becomes _dq_

+ becomes _pl_

tabspace becomes _tb_

% becomes _pt_

# becomes _ha_

& becomes _ap_

, becomes _cm_
- These characters are also converted when they are in an index value which is used for folder or file names. In addition, . becomes _td_ (only when the full stop is the last character in an index value) and space becomes _ts_ (only when the space is the last character in an index value).
- Exposed History Levels show the Data Definition revisions which are currently selected. Only documents stored with the selected revision(s) of the Data Definition can be retrieved from the configured folder. To add more revision levels or to change revision levels, click Edit levels.
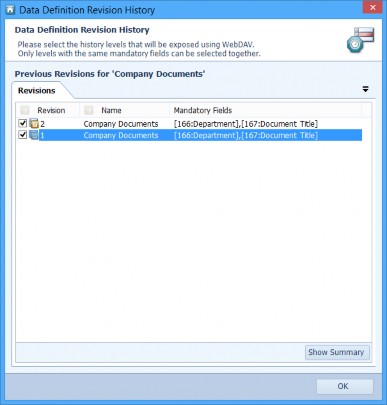
- In this example, there are two revisions of the Data Definition Company Documents. Both revisions have the fields Department (with id 166) and Document Title (with id 167). As these field names and ids match in both revisions, both revisions can be selected, enabling all documents which are stored with either revision to be retrieved from the configured folder. However, when revisions contain different fields, they cannot all be selected. Click OK to close the Revision History window.
- Mandatory Field Order shows the order of the fields. This determines which index field values are used as folder names and which index field values are used as the file name. The last field in the list is always used as the file name.

In the example above, the folder will be named with the contents of the index field Department and the file will be named with the contents of the index field Document Title. Therefore, a document which is indexed with the Company Documents Data Definition, revision1 or 2 with the value Finance in the Department index field and the value Claiming Expenses in the Document Title index field will be stored as Company Documents\Finance\Claiming Expenses.docx because the Unique Folder Name was set to Company Documents.
- Click Save to save the WebDAV Service Settings.

Reorder Fields
- To reorder the fields, click Reorder. Move the field you want use as the file name to the bottom of the list and order the other fields as required. The field at the top of the list will be used to name the sub-folder to the folder Unique Folder Name (see above).
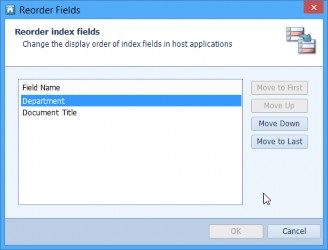
- Click OK to save the changes and close the window.
- Click Save to save the WebDAV Service Settings.

Date Index Field Values
Date values are not used in the same way to create folder and file names as Text, Whole Number or Currency Index Field values.
Note: When Windows explorer view is used to view folders or files which have been named using a Date and Time field value with Time Accuracy, the folder and file names are shown using the DataStoreDSX server time (not UTC), regardless of client time differences. For example, when the time 10:54:46 is stored on a DataStoreDSX Server which is one hour ahead of the client time zone, the folder (for example) will be displayed as /115446/.
When a Date, Month or Year Accuracy field is used to store a document on a DataStoreDSX server which is in a different time zone, the date entered on the client machine will be unaltered by the time difference.
Folder Name
When a Date and Time Index value is used as a folder name (that is, the date field is not the last mandatory field in the list), dates are split into their component parts of year, month, day and time (subject to the Accuracy setting). For example, for a folder index value of 2014/01/30 for the 30th January 2014 (Accuracy is set to Day), three levels of folders will be created in the explorer view. The folder Unique Folder Name will contain a list of years, Each year folder will contain a list of months (applicable to the parent year) and each month folder will contain a list of days (applicable to the parent month and year).
In cases where Time Accuracy is set, the time is presented as its own individual folder beneath the selected year, month and day in the format HHMMSS with no colon or dash between hour, minutes and seconds. For example, a document stored with date index value of 30th January 2014 10:54:46 would be stored in the folder structure 2014/01/30/105446/.
File Name
When a Date and Time Index value is used as a file name (that is, the date field is the last mandatory field in the list), dates are not be split into components. Instead, the date field is used directly as the file name using the format YYYYMMDDHHMMSS, (subject to the Accuracy setting). For example, the Time Accuracy date value 30th January 2014 10:54:46 would create a file named 20140130105446 plus the extension. However, if the Date and Time Index field’s Accuracy is set to Month, the file name will be 201401 plus the extension.
Verify the WebDAV Service Configuration
- To verify the WebDAV Service configuration, open Indexing Studio and store a document using the Data Definition Company Documents. Enter Finance for the Department field value and Expenses Policy for the Document Title field value.
- In Management Studio, ensure the required users have been granted the required access controls to allow them to retrieve documents stored with this Data Definition.
- On the WebDAV Service Configuration screen, select the File Explorer Endpoint tab and click the Open server address button.
- The location is opened, showing the folder Company Documents.
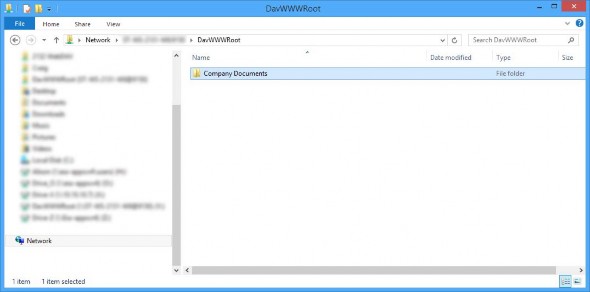
- Open the folder Company Documents and the next folder, Finance to see the document you stored with the name Claiming Expenses.docx.

- If you do not see the expected folder structure, make sure you have entered the correct Server Name and that you have the correct access controls to the Data Definition used to store the documents.
- When multiple files are stored with the same file name, the second and subsequent files which are named the same have a number appended to the file name. This number is incremented each time another document is stored with the same file name.
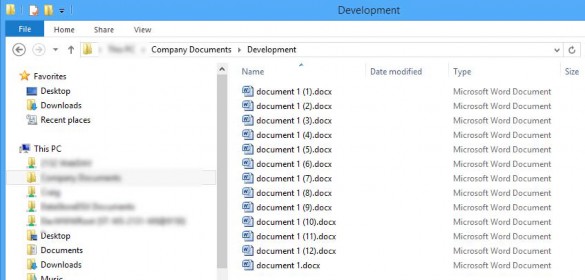
Note: When multiple index sets or multiple values are used to name a document and the folder names and the file name are duplicated, the duplicate values are ignored and the document is stored just once.
Set Up a Mapped Web Location
Create a mapped web location on each computer belonging to the users you want to give access to the location.
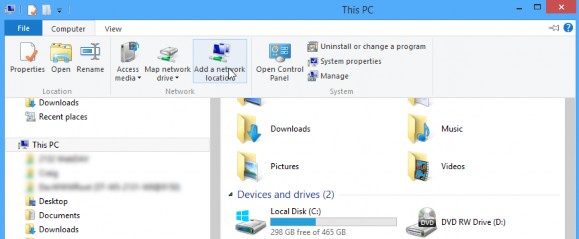
- Select This PC from the Start menu. Click on Computer in the menu bar and select Add a network location.
- The Add Network Location Wizard is opened.
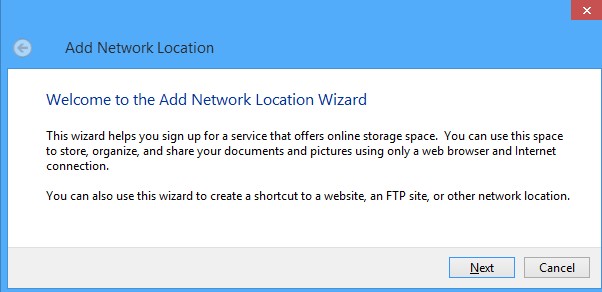
- Click Next.
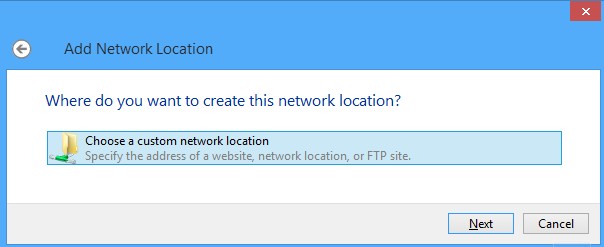
- Select Choose a custom network location and click Next.
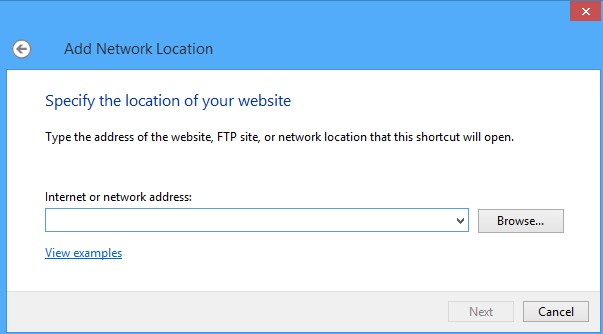
- Type in the path to the WebDAV explorer location which was configured earlier in Management Studio.

- In this example, type in http://Alison’s PC:9150 to allow the users on this computer to access all the folders which are configured in Management Studio. Alternatively, to allow the users access to the Company Documents folder only, enter the path http://Alison’s PC:9150/Company Documents. In this example, type in http://Alison’s PC:9150/Company Documents.
- The next screen enables you to enter a name for the location.
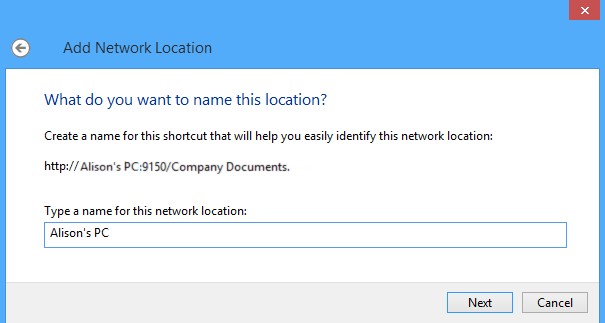
- In this example, name the location Company Documents. Select the default name and replace it with Company Documents. Click Next.
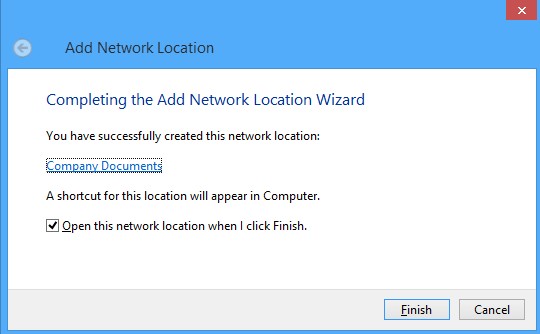
- The last screen shows the named network location. Click Finish to close the wizard and open the network location.
- If the configured network location cannot be opened, your IT department might have to change firewall settings to allow the PC to connect to the DataStoreDSX server. Also, verify the person logged in to the local PC has a DataStoreDSX account which has access to the selected Data Definition. See “Create ACLs for Data Definitions” for examples.
- Repeat these steps for each PC belonging to the users you want to be able to edit documents from the WebDAV file explorer location.
Edit Documents from the Mapped Web Location
Documents can be opened and edited from the mapped web location.
When the document is saved, the version is automatically incremented by a minor version. This enables users to edit documents and create new minor versions without using Searching Client, or checking out files.
Check Out Documents opened from the Mapped Web Location
Documents can be checked out from within Word, enabling users to edit documents and check in new versions without using Searching Client.
The user can decide whether to change the document version by a minor version or a major version.
- To edit a document, double-click on it in the WebDAV file explorer window to open it in Word. Click on the File tab. You can check out the file from DataStoreDSX using the Manage Versions button.
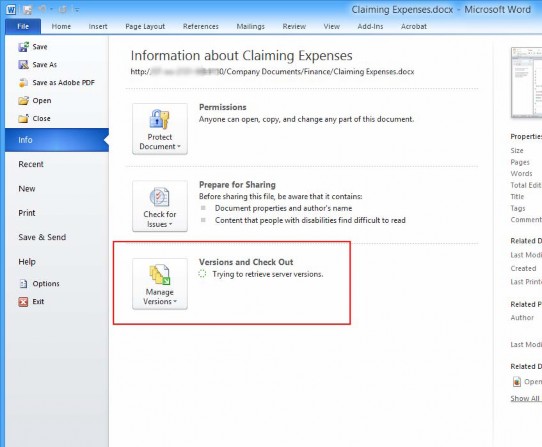
- A menu is displayed. Select Check Out.
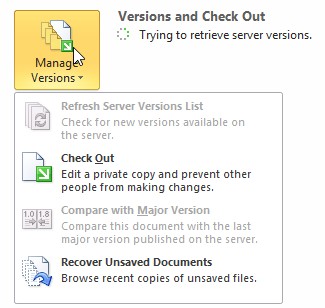
Note: The Check Out option is only available to users who have the access control permission Store new document version set to Allow. See Table 17, “Terminology: Data Definition Access Control List (ACLs)”
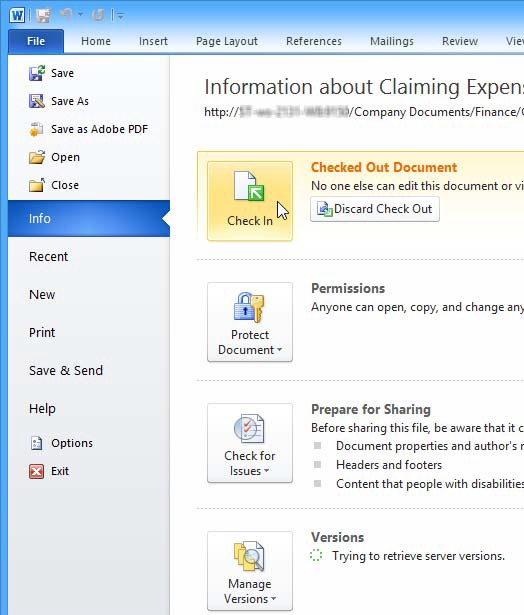
- The document can now be edited and checked in with a different version number.
- Make the required edits, save the document then click the File tab and click the Check In button.
- A window is displayed enabling you to change the minor or the major version. Select the version you want to Check-in the document as, then click OK.
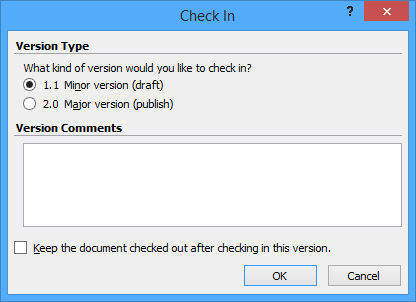
- The document is now checked back in to DataStoreDSX enabling other users to check it out and edit it.
Editing the Unique Folder Name
When an existing configuration is edited on the File Explorer Endpoint tab on the WebDAV Service Settings page, the old folder is replaced with the new folder. All documents which have been indexed with the selected Data Definition revisions will be displayed in the new folder and the old folder will no longer be displayed.
When users are using mapped network locations linked to the Unique Folder Name, renaming the folder can cause their mapped web location link to no longer work.