
Content Field, Custom Field Type
Here's everything that you need to know about Content Field, Custom Field Type.
Note: This example shows how to use the Custom Field Type created earlier to Index the month the document was created. If you want to follow this example, first create the Custom Field Type: Postcode as described in the example “Custom Field Type for Postcodes”
- Create a new field. Click on Index Fields then right-click and select New Field.
- In this example, create an Index Field for the postcode of the account holder (continuing the bank statement example). Name the Index Field Postcode, set the Type to the Custom Field Type Postcode. It is a Page-level index. Enter the Field name, Type and Index level information.
- Decide if you want the field value to be stored. Although you will probably want to store most Index Field values, you might not want to store them all. Is stored enables you to define which Index Field values are stored (i.e. saved) in the database. For example, you probably want to store the Index Field Postcode. In this case, you would select the Is Stored tick-box. However, sometimes you want to create a field purely to locate a Document’s Boundaries and you may not want to store the Index Field’s value.
- In the Behaviour Properties section, clear the Mandatory (field must be...) tick-box as, in this example, the Postcode is not a mandatory field.
- Next, select Single Field Value tick-box to set one value per field, as, in this example, there is only one postcode.
Help and ToolTip Properties
In the Help and ToolTip Properties section, if required, type in the Help Text and ToolTip Text into the appropriate text boxes.
Display Properties
Changing the Display Properties is optional. In this example, leave them at the default values.
Validation
In this example leave the Validation settings at the default values.
Input Source
With the Postcode field selected, select the Input Source tab.
- In this example, the Field Index is automatically extracted from the document so select Values are extracted automatically (not externally provided).
- Leave the remaining Input Source parameters left set to their default settings.
- When the Values are extracted automatically (not externally provided) tick-box is selected, the Positions tab becomes available in the Sample Documents tab. The Positions tab is used to define the field’s start column and line number and end column and line number. Use the mouse pointer to select the default positions box and place it over the postcode on the Sample Document. Resize the box to enable the maximum length postcode to fit inside it.
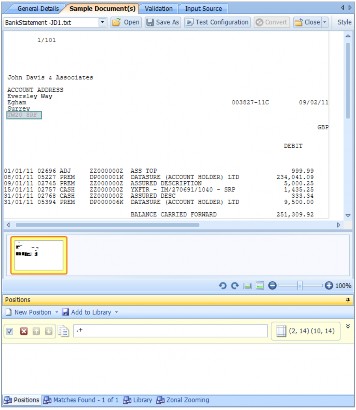
- Enter a Regular Expression for the Postcode. As the CFT contains the complicated Regular Expression for the Postcode and the Position area contains only the Postcode, use .+ to take everything found in the Position area. Enter .+ in the Position text box (as shown above).
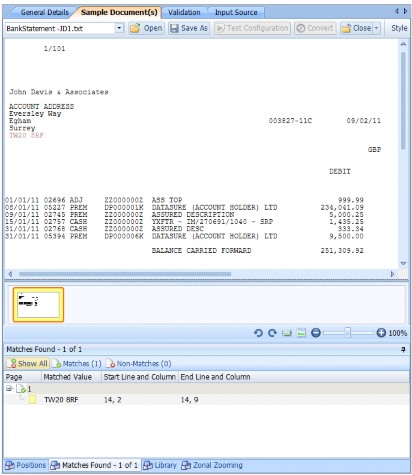
- Test the Position. Ensure the Postcode Index Field is selected, click the Positions ribbon and then click on the Start Match button.
- The results from the Index Field test are shown on the Matches Found tab.
- Continue creating Index Fields for the Data Definition. Click on the Home tab and click the Save button at the top of the pane to save the Index Fields.