Document Details Screen
Viewing the Document Details screen
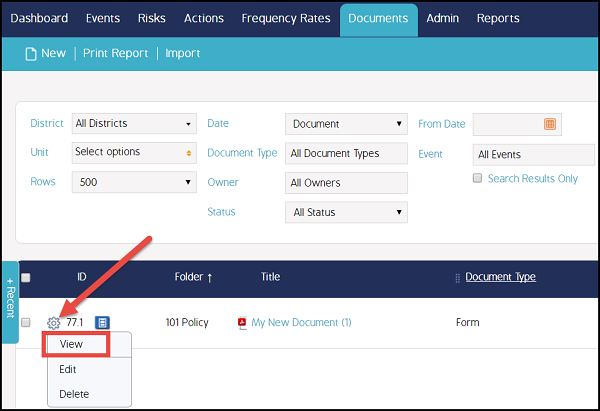
Navigate to the Document Module and find the document you want to view.
|
Click the cog wheel next to the document and select View.
|
or |
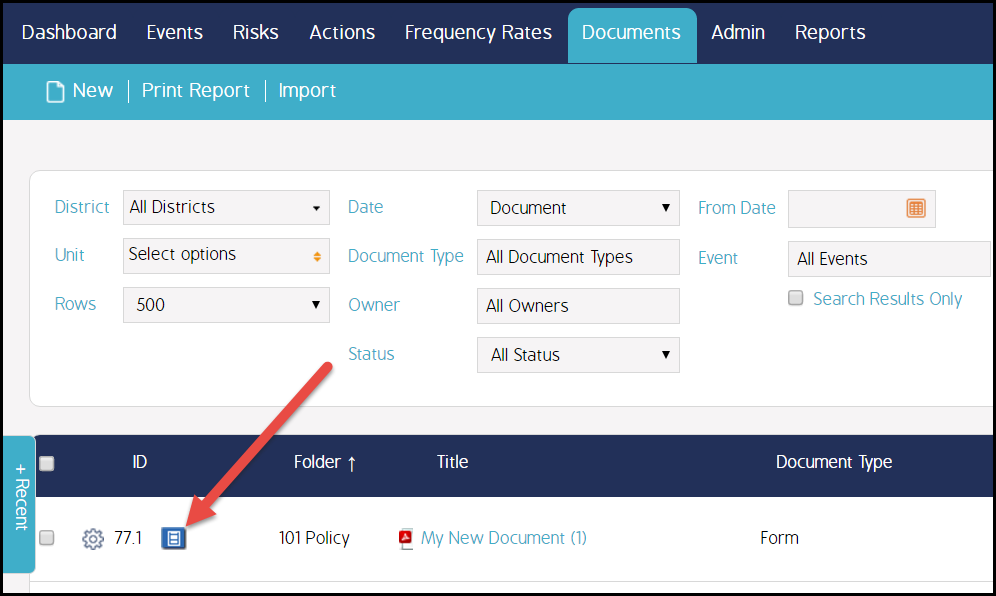
Click the blue Document icon.
|
The Document Details page will appear.
Navigate the Document Panel
This section details the information and actions that can be accessed and completed from the Document Panel screen.
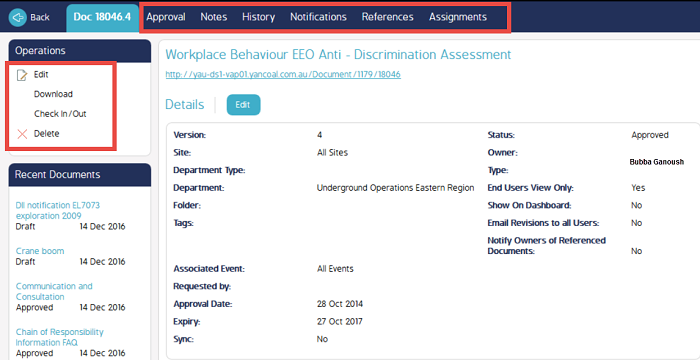
From this screen (above) you can execute the following actions:
- Edit the document by clicking the edit button.
- View all document details in the center of the screen.
- Edit, Download, Check in / Check out, or Delete the document from the Operations menu (detailed below).
- Navigate the Panel Menu (detailed below) to view all approvals, notes, history, notifications, references, and assignments associated with the document.
Operations Menu
The operations menu, outlined on the left side of the screen, allows users to Edit, Download, Check in/out, and Delete the document that is opened.
|
Delete Click the delete button to delete the file. |
|
|
Check in/out When a document is checked out no other users can make edits to the document until it is checked back in. Simply click the Check in/out link, and click Ok. This process is the same for checking a document out and checking it back in. |
|
|
Download Download a view-as-is version of the document directly to your local device by clicking the Download button in the Operations Menu. |
|
|
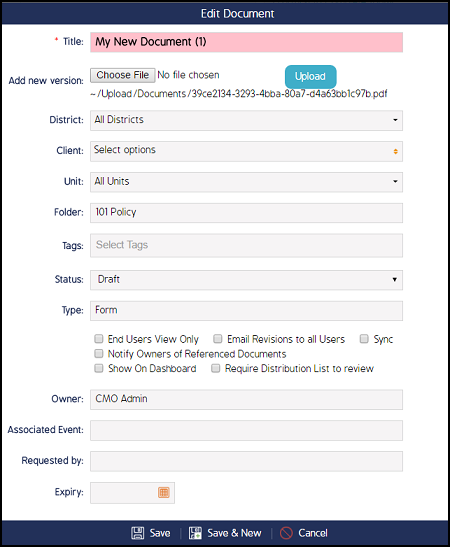
Edit Click the Edit button from the Details screen or Operations Menu. Either option will land you on the Edit Document screen (below). From here, users with the correct permissions can edit any of the information seen on the Edit Document screen. |
 |
Top Banner Menu Details
The Document Panel menu, outlined at the top of the screen, allows users to define approval paths, add and review notes, view the document history, and more. Each tab is detailed in the table below.

Tab Name & Description |
Available Actions |
|
Approval Set up an approval workflow by typing names into the Approver field. Use the Type dropdown menu to select if the workflow will be parallel, meaning the approval will be sent to all listed approvers at one time, or serial, meaning the document will be approved in order by which the approvers are entered. Click Save to save all changes. |
 |
|
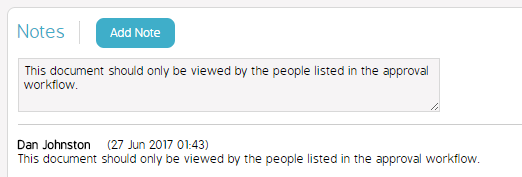
Notes Manually add notes and attach them to the document. |
 |
|
History View the history of all changes that have been made to this document. Click the X button to delete the change. Click the Access Log button to open the full log in another screen. |
 |
|
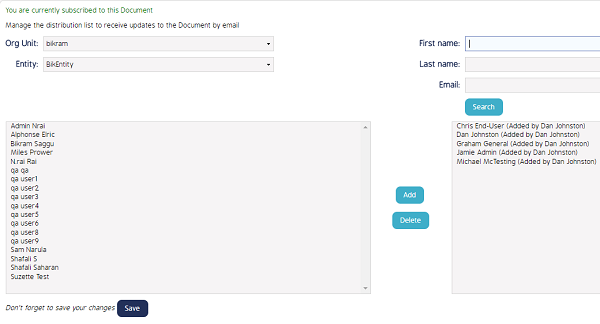
Notifications Manage the distribution list of who will receive email updates any time a revision is made to the document. Highlight user(s) name(s) and click the Add button to subscribe the users to notifications. Highlight multiple users by holding down the Ctrl key on your keyboard. Manually add a user by typing in their First name, Last name, and Email address on the right side of the screen. Click Save when all changes have been made. Changes will not be saved if the save button is not clicked. |
 |
|
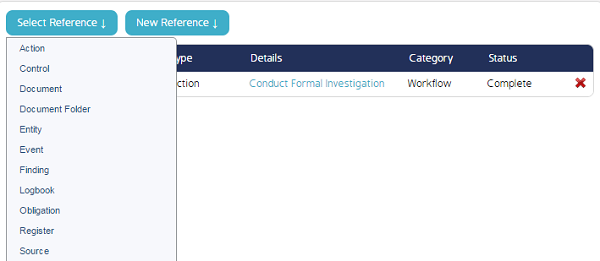
References Attach an existing, or new, reference to this document. View all references on the table seen on this screen. |
 |
|
Assignments Assign user groups to access the document. Click the Add Assignments button to add a new assignment. |
 |


