Ability to link Action to update multiple Obligation Compliance Statuses
Ability to link Action to update multiple Obligation Compliance Statuses
The CMO user can now update the compliance status of multiple obligations using a single action. Sometimes a single action can meet the requirement of multiple obligations. If a company has multiple obligations and a single action can meet the requirement, the user can link one Obligation-Action to update multiple obligation compliance statuses.
Add Obligations to an Action
The following steps help the CMO user to add obligations to an action.
1. Login to CMO application.
2. Go to Actions.

3. Click on any existing action or select New button to create an action.


4. Open the desired action to which obligations must be added.
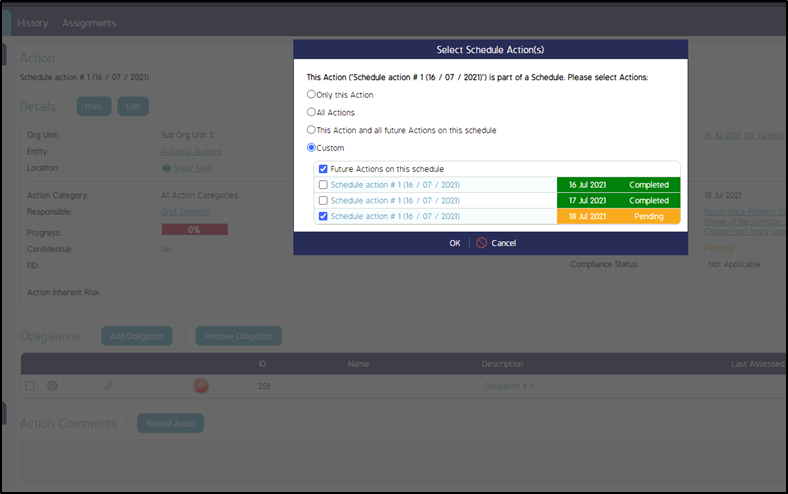
5. When the user selects Add Obligation button and the when the action is of Schedule type, the system displays a dialog to select ‘scope’ of scheduled actions to be affected (this dialog doesn’t appear for standalone actions):
6. Once actions are selected, the system prompts the user to create a new obligation or select from existing:
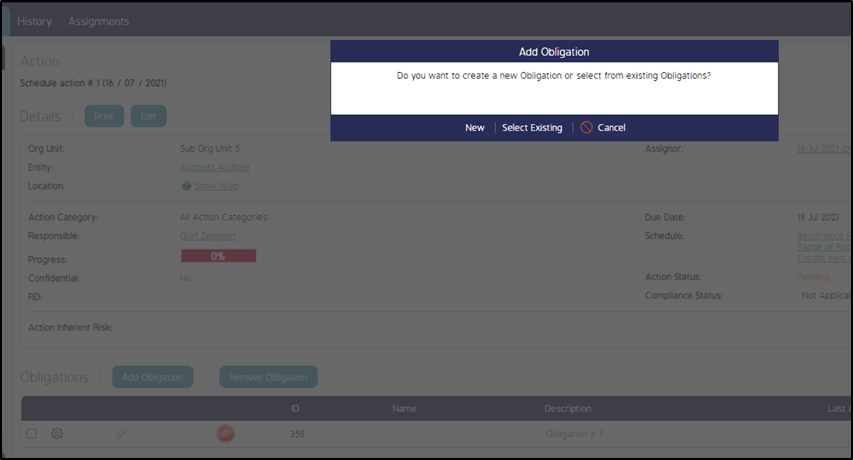
7. If the user selects New then CMO opens Create Obligation dialog. Once the user selects Save, the system links newly created obligation to all selected actions.
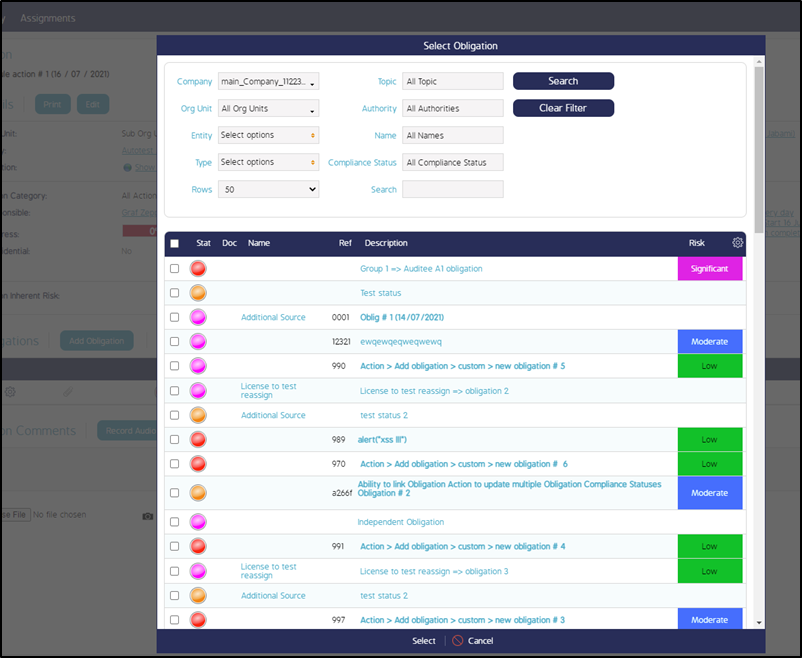
8. If the user selects Select Existing, the system opens Select Obligation screen.
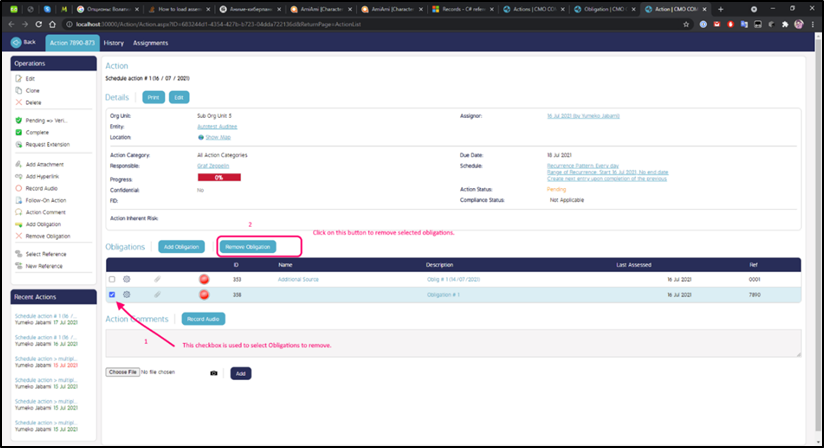
9. To remove links between obligations and actions, the user may select obligations using a checkbox in the grid and selects Remove Obligation button in Obligations section:
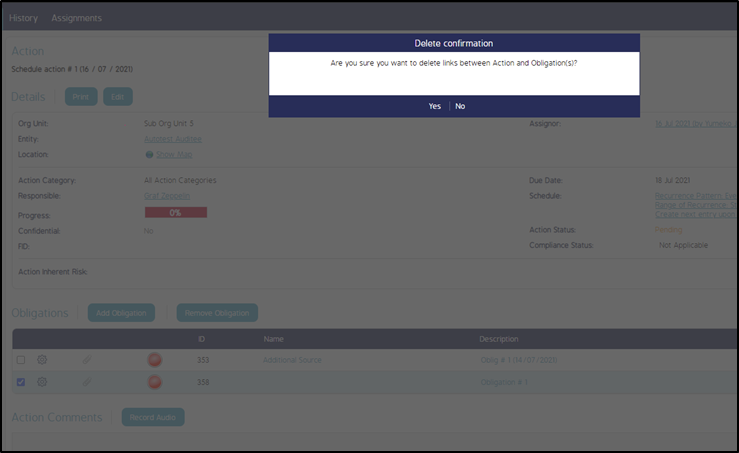
10. In this case CMO will show confirmation dialog:
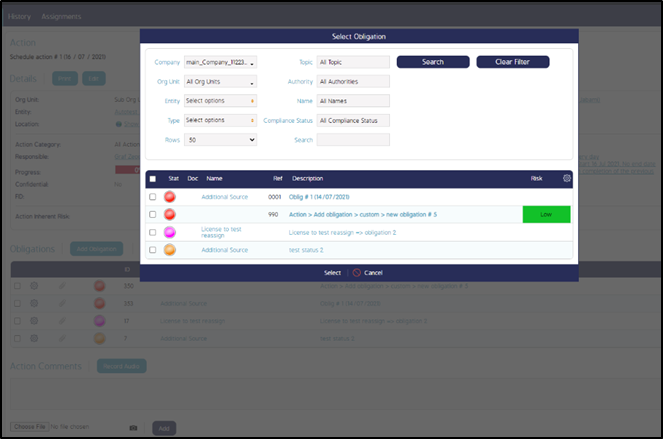
11. When the user selects Remove Obligation button (on Obligations section) without selecting obligations in the grid or when the user selects Remove Obligation in page menu (top left side of the page) or in context menu, they system asks user to select obligations to be removed (this dialog shows only obligations linked to the action):
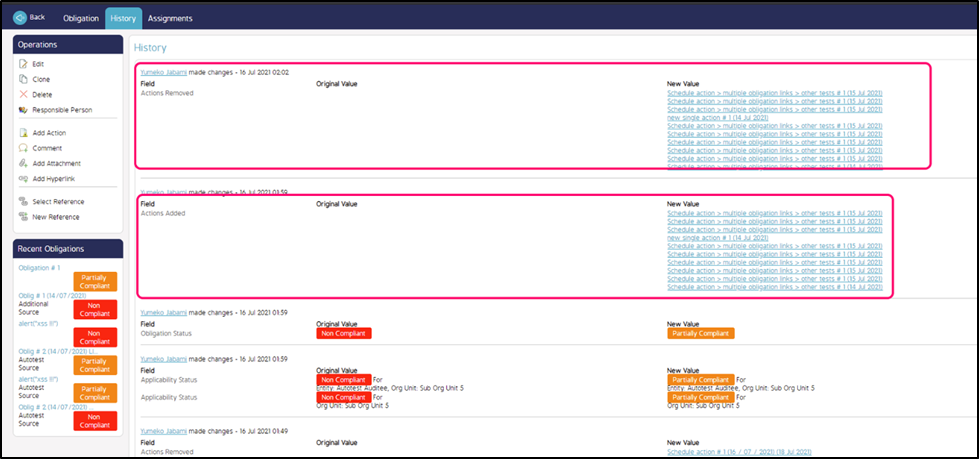
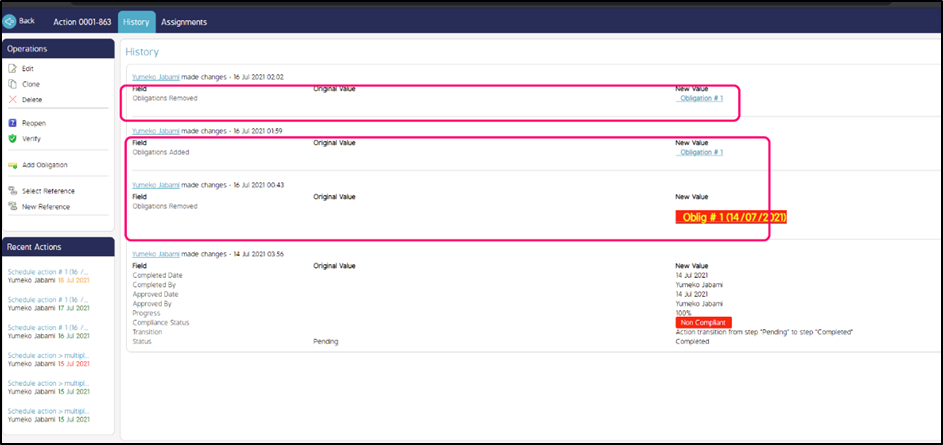
12. All obligations added / removed to the actions are logged into the action history can be viewed using History tab on Action View page:
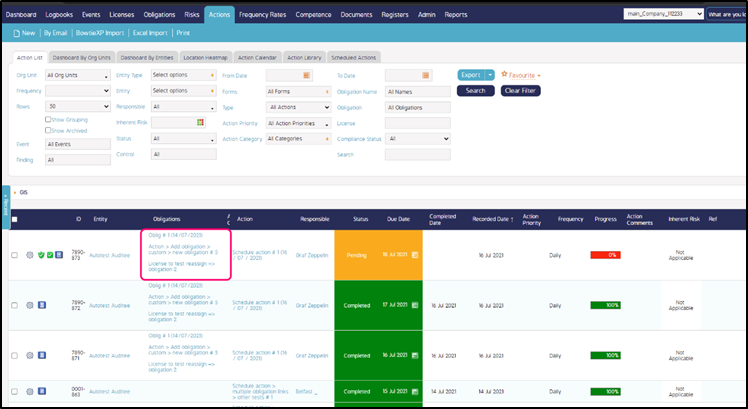
13. The Obligations column on Action Register now shows all linked obligations (every obligation is displayed in a separate line):
Actions Related Changes
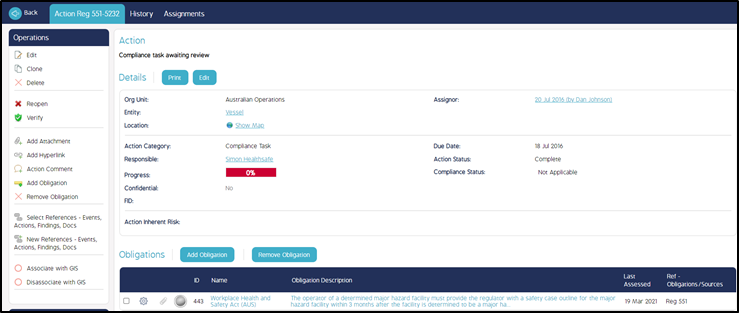
Obligations’ section has been added to the Action View page.
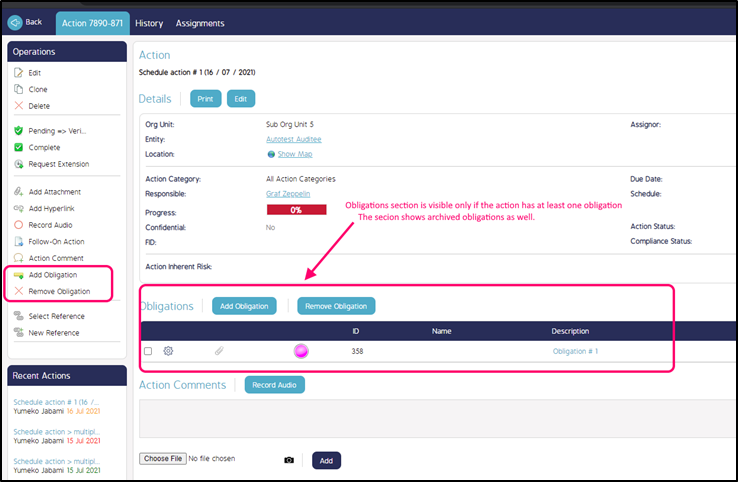
The section shows all obligations related to this action (including archived Obligations).
In addition to the left side menu of Action view page and buttons on Obligations section, the Add Obligation and Remove Obligation buttons are available as part of the context menu:

Note: ‘Remove Obligation’ button is visible only when the Action has linked obligations.
Obligations related changes
A Remove Action button has been added to Obligation View page (page menu and Actions section) and to the obligation context menu:
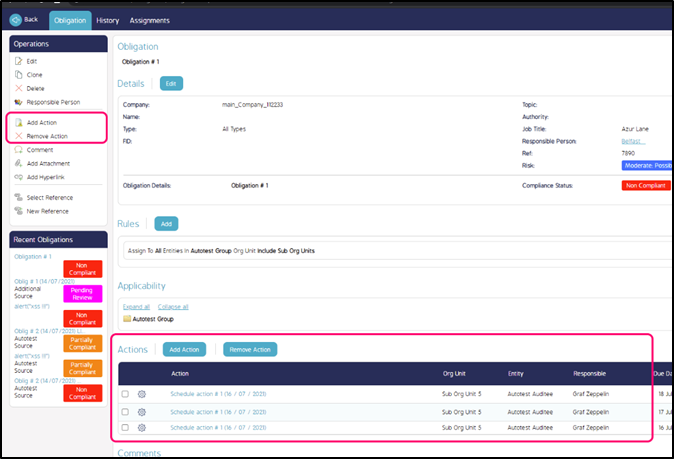
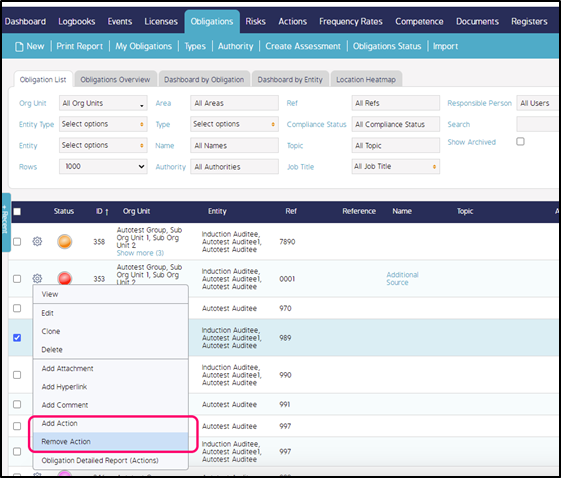
The Remove Action button is available only when the Obligation has linked actions.
When the user clicks on the Add Action button, the system prompts to create new or select existing.
If the user selects New, the system shows Create Action dialog. They system links every created action to the obligation.
Note: If a Schedule Action has been created, then all future actions from this Schedule will be linked to this obligation as well (unless user manually unlinks them).
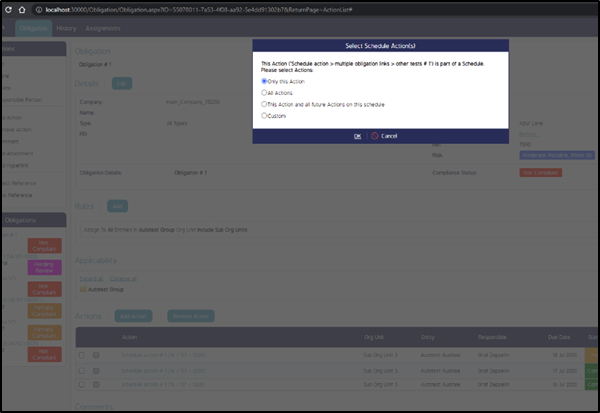
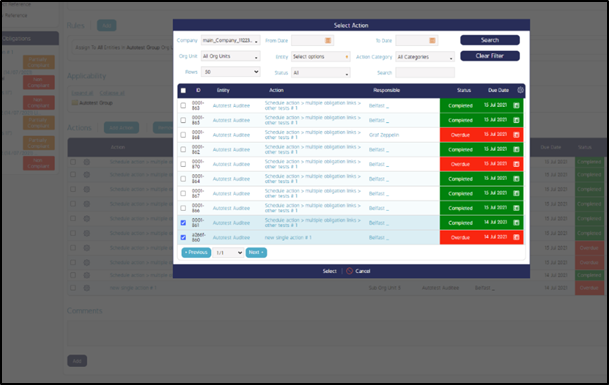
If the user selects Select Existing, the system shows a dialog to select actions:

If the user selects an action(s) which is a part of Schedule, the system prompts to specify scope for the related Schedule (CMO repeats this procedure for every selected Schedule):
The user may use checkboxes (on the grid) to select actions to unlink from the obligation.
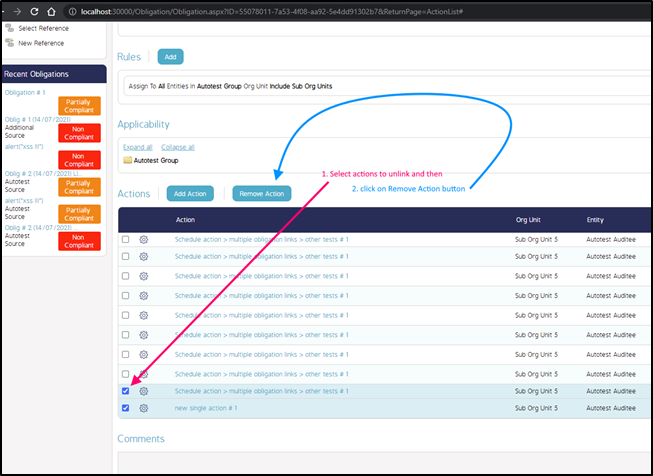
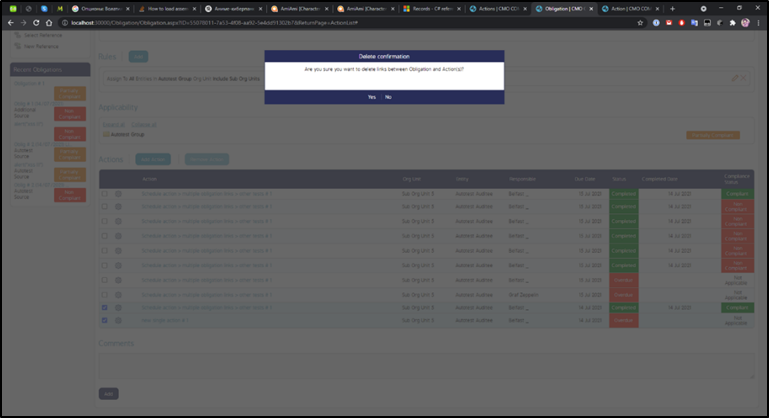
In this case, the system shows a confirmation dialog:
Also, the user may select Remove Action button without selecting actions. In this case, the ystem shows a dialog to select actions to unlink:
The system also shows this dialog when a user selects Remove Action in the context menu or in the page menu.
If selected action(s) belongs to a Schedule type, the system prompts to specify scope for every Schedule (using the same dialog which has been mentioned before).
All actions added / removed to the obligation are logged into the obligation history and can be viewed using the History tab on the Obligation View page: