
Actions Module in Mobile App
Introduction
The Actions module functions as a register for users to know what actions they're responsible for at the site they're working at. The offline Actions register helps users manage existing actions and create new ones on the go. This section details how to create new Actions, add attachments to specific Actions, complete Actions, and create Action Reports on mobile application.
All Action fields in the web application are available to users on a mobile application, including statuses and multi-action workflows. It is also important to note, that the Role Permissions regarding Actions set in the web application will be mirrored on the mobile device.
Syncing Actions:
When synced, CMO mobile pulls down Actions that the user has created, Actions that the user is responsible for, and any Actions associated with Events that the user is associated with.
Managing Existing Actions:
This includes editing, assigning Actions (to yourself or others), changing activity priority, changing the due date, changing the progress, and adding/editing comments. All of these actions are available on the mobile application.
Assigning Actions to other users on mobile:
Mobile devices do not communicate with each other. If a user is assigned to an Action, the Action will not be available on the web or mobile until a sync is initiated. For example, if User A assigns an Action to User B, User A must perform a sync before User B will see the assigned Action. In order to see the assigned action, User B will need to perform a Sync to Mobile after User A syncs from Mobile to Web.
Processes Available in this Module
This section details the various processes that are available to users in the Action Module in the mobile application.
Create New Action
Users can create ad hoc Actions for himself/herself or for other users. Assigning Actions to yourself is useful for setting up recurring Actions.
- Log into the CMO mobile app.
- Go to the home screen and click on the Actions button.

3. The user lands on a new Actions Register screen with a list of Actions that are Completed, Overdue, Pending etc.
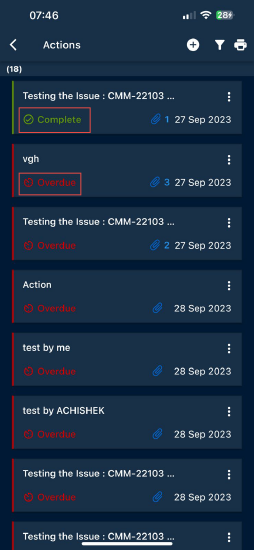
4. Depending on the status of the Actions, the User can perform certain actions on the form from the Action Register page.
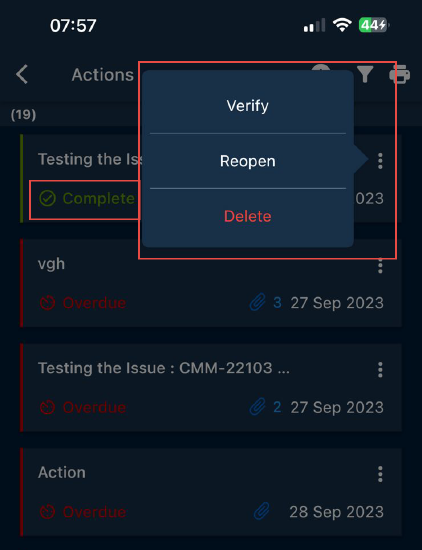
- If an Action form is completed, the user can perform the following actions:
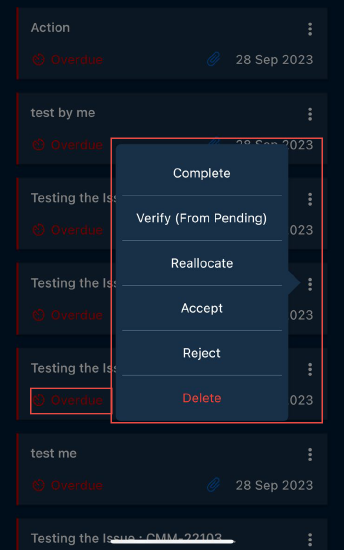
- If an Action form is overdue, the user can perform the following actions:
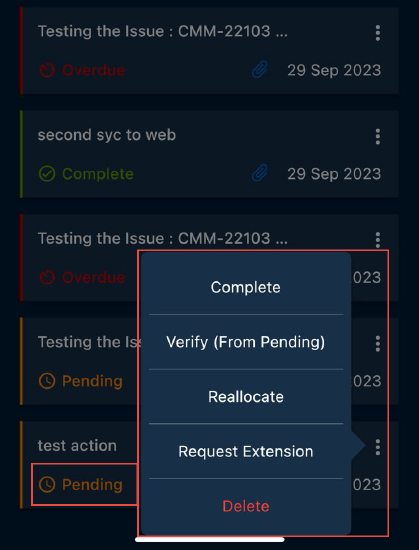
- If an Action form is pending, the user can perform the following actions:
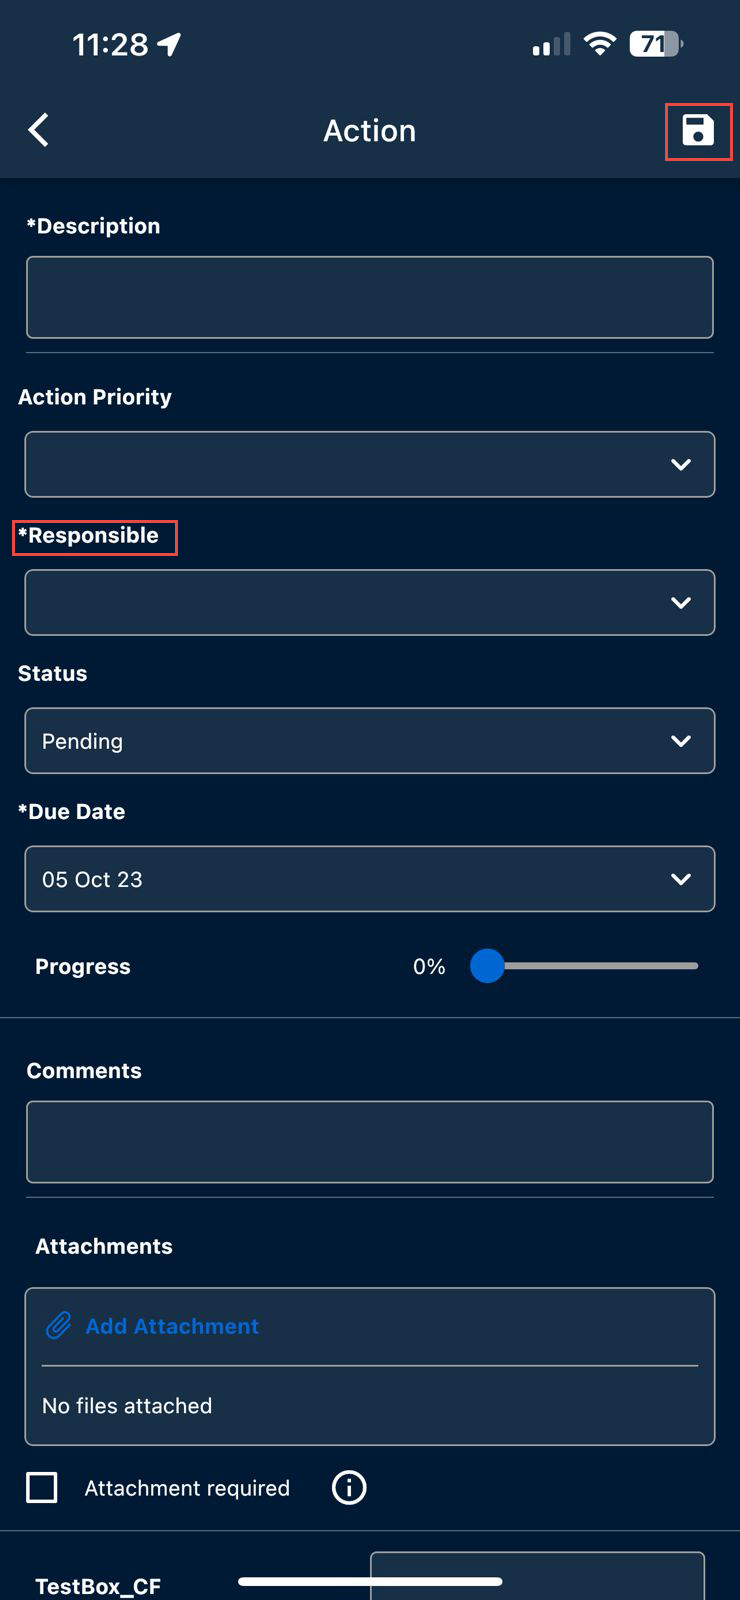
5. The user can create a new Action from the Action Register page. Click on the add  icon to create a new Action. The user lands on the new Action screen. Fill in the mandatory fields and assign a Responsible role by clicking the Responsible field. Click Save when finished.
Adding Attachments to Existing Actions
- Log into the CMO mobile app.
- Go to the home screen and click on the Actions button.
3. The user lands on a new Actions Register screen with a list of Actions that are Completed, Overdue, Pending etc.
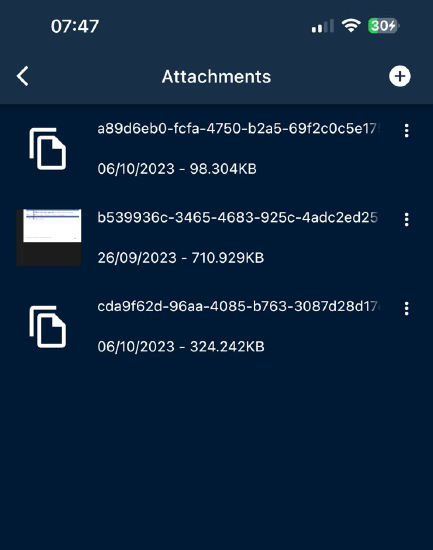
4. Click on the attachment icon  on the desired Action for which the attachment has to be made. The user lands on the Attachments screen.
Note: If any attachments are already existing (attached while creating an Action) the number of attachments made is displayed next to the attachment icon.
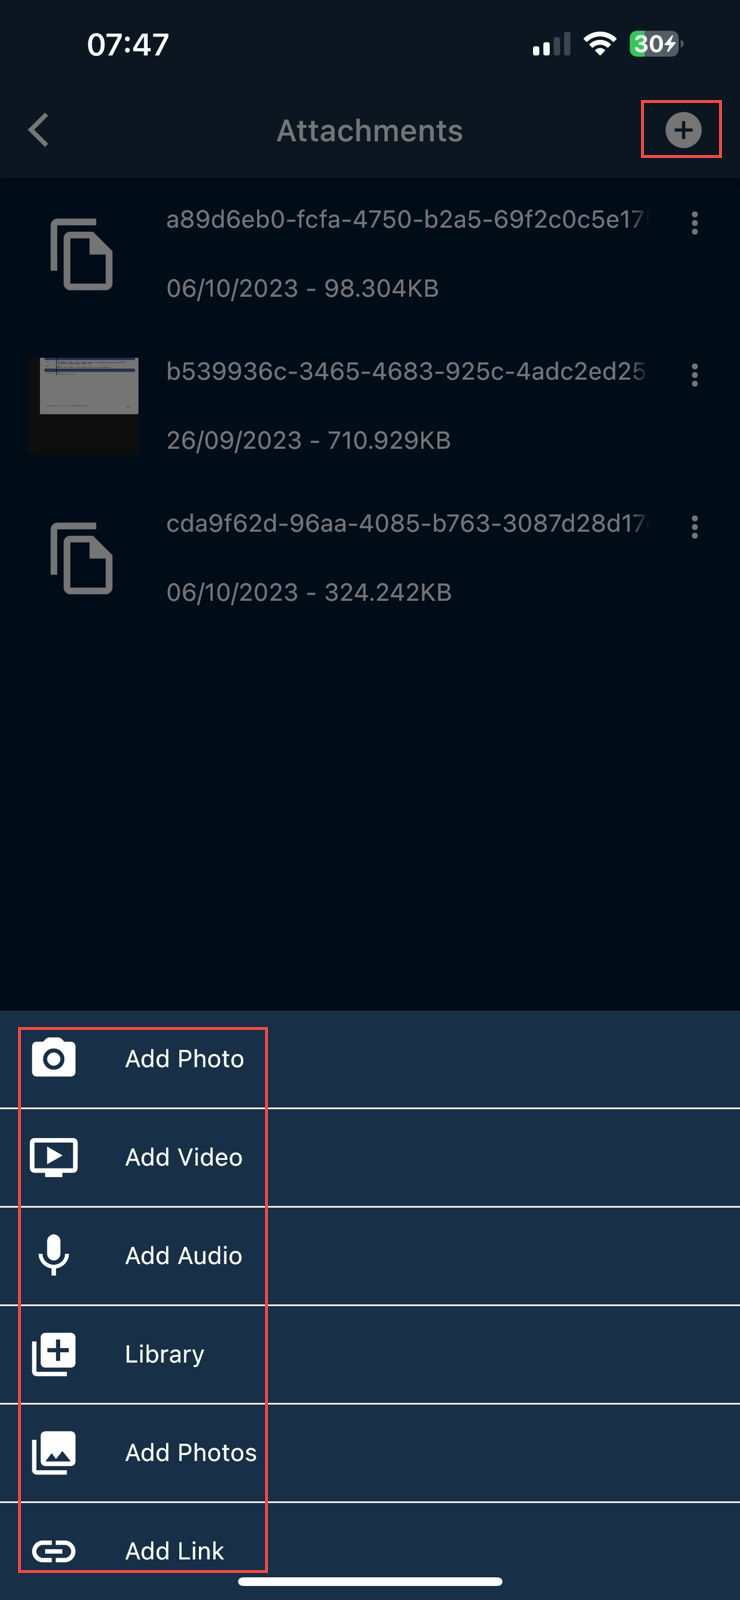
5. Click on the add icon to add more attachments. When clicked, the application displays options to add different types of attachments.
Filter Actions
- From the Action Register page, click on the filter
 icon. The user lands on the new filter page with list of filter options.
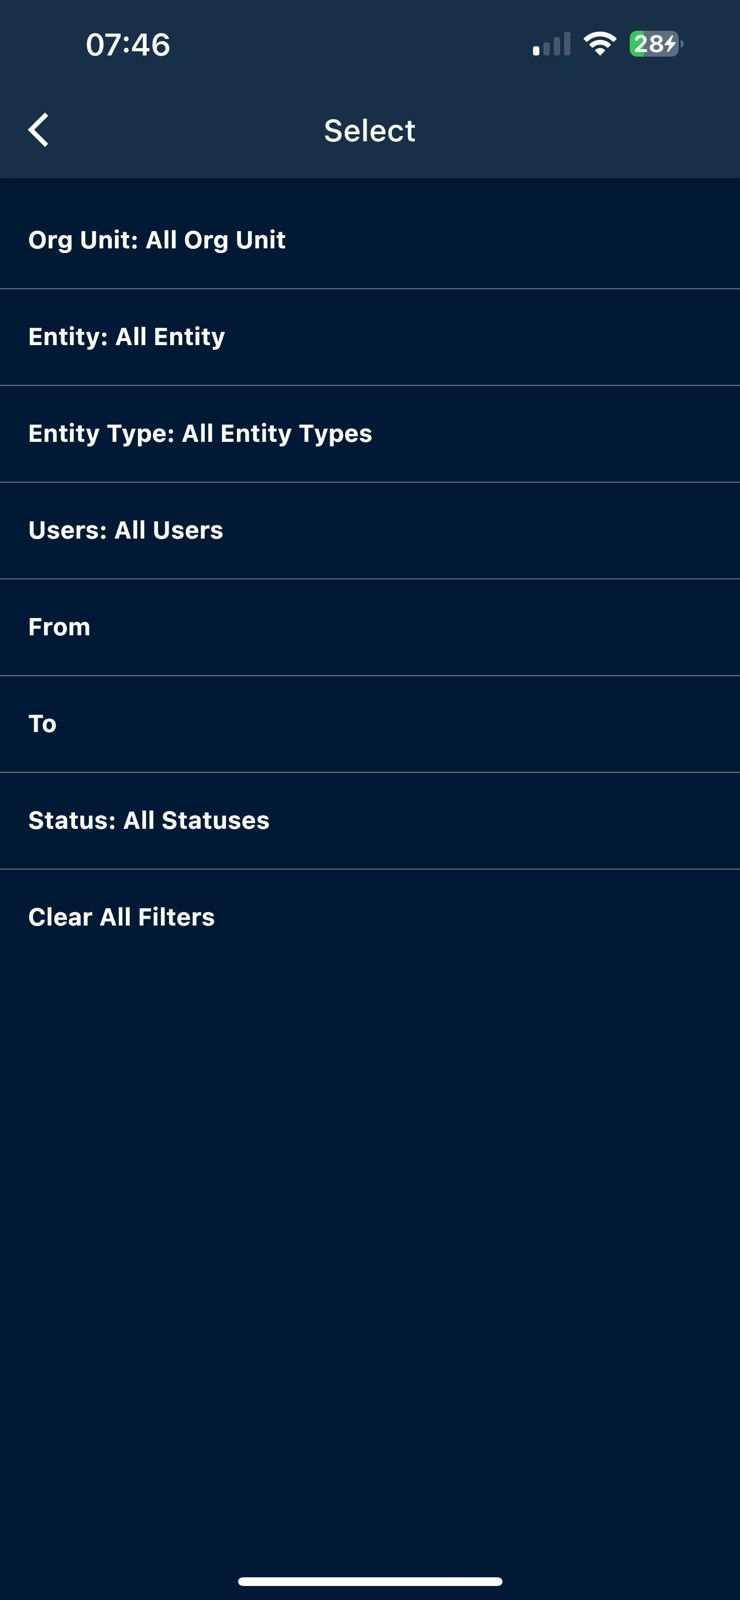
2. The user can select the options displayed and based on the filter options, the application displays the list of Actions on the Action Register page.
Create Action Report
This report includes details for all Actions stored on the mobile device.
Click the print  icon on the Action Register page. A new report is generated.