
Edit Scheduled Actions
Scheduled Actions are edited and managed differently than standalone Actions. This page details how to edit Action details that are part of a scheduled series (single and multiple Actions) and how to edit the recurrence schedule (date range and pattern).
Please note, the CMO system does not prevent two users from editing or modifying the same Action at the same time. However, a server error will appear if both users try to save changes. For example, if User A and User B are both working on Action X and user A deletes the Action, User B will receive an error message when they try to save any changes. If this error occurs, contact support using the Support Portal or with your provided Support Phone Number.
Edit Scheduled Action Details
You cannot change the interval type when editing a Scheduled Action from the Edit screen, you can only edit the Action details. The instructions below detail how to edit Scheduled Action details.
- Log in and navigate to the Action module.
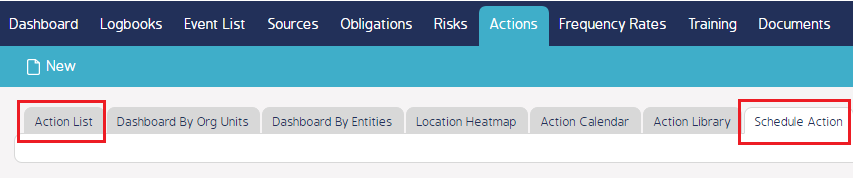
- Locate the Scheduled Action in either the Action List or Schedule Action register.
- Click the Action Name to open the Action Details screen.
Note: Clicking cog wheel > Edit option will also take you to the Edit Action screen.
- Click the Edit button to open the Edit Action screen.
If multiple Scheduled Actions were created, then users will be prompted to choose if they want to edit all Actions in the sequence or a select few.
- Select All Actions if you want to edit the details for all actions in the scheduled sequence.
- Select Custom if only select Action details will be edited.
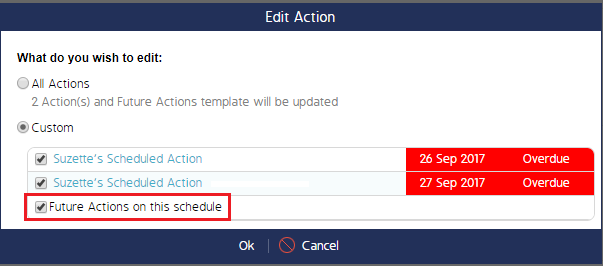
If Custom is selected, check or uncheck the Actions that you want to edit and click Ok.
The Future Actions on this Schedule option allows users to edit Scheduled Action details/templates that are set at future dates and only applies to actions that have the Upon Prior Completion and Based on Interval scheduling types. The Allow Edit Future Action Templates role permission must be enabled for users to see this option.
- Edit the necessary details in the Edit Action screen and click Save.
Edit the Recurrence Pattern (schedule)
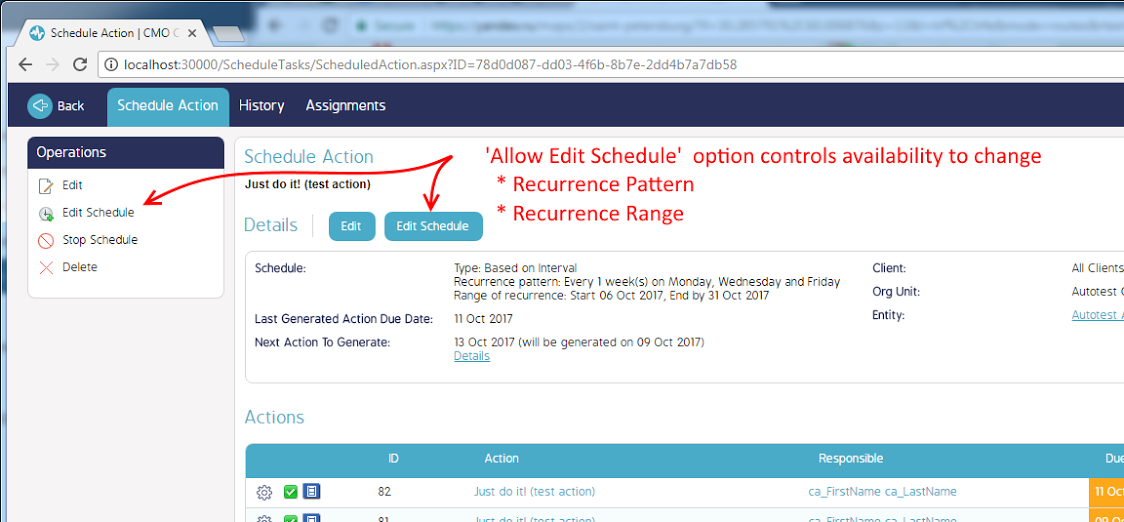
Users have the ability to edit the Action schedule separately from the Action details. When editing the schedule, users can change the recurrence Pattern and Range, but they cannot change the schedule type. For example, if the original Action's schedule type is set to Based on Interval, then users will not be able to change the schedule to Between Defined Dates but they will be able to change it
Note: The Edit Schedule function is only available if the Allow Edit Schedule role permission is enabled. When enabled, users can edit the recurrence pattern and range of scheduled Actions, and they will be able to see the Edit Schedule menu options.
Follow the instructions below to edit the schedule intervals:
- Log in and navigate to the Action module.
- Locate the Scheduled Action in either the Action List or Schedule Action register.
- Click on the Action Name to open the Action Details screen (see in the image above).
- Click the Edit Schedule button. The Schedule Interval screen will appear.
From here, reconfigure the respective Range and Pattern details.
Note: The Edit Schedule will appear slightly differently depending on the type of schedule the Action is set to (Ex: Between Defined Intervals or Upon Prior Completion).
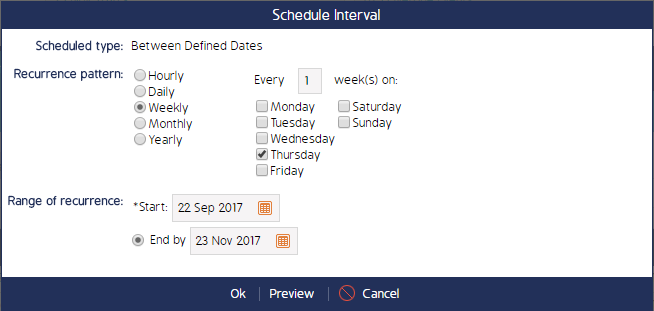
- Click the Preview button to view the updated schedule, then click Ok to save the changes.
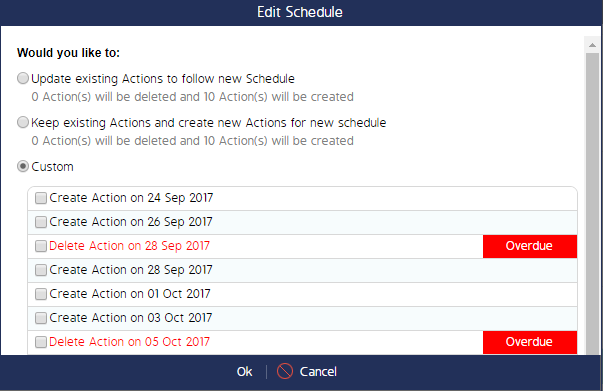
- When users exit out of the Edit Schedule screen, they'll be prompted to apply the edits to the existing actions in the schedule, to create a new set of actions with the edited schedule, or to choose between all existing actions in the schedule.
The three options are detailed in the image below. If Custom is selected, a list of all actions for the schedule will appear on the screen. Users can manually pick and choose the Actions this new schedule will apply to.
- Click Ok to save the changes.