
How to Create a Network Alliance I-9
This shows how a user can create an I-9 with the Network Alliance workflow.
Goal
In the Network Alliance workflow, employees receive an email to complete Section 1 remotely and schedule an appointment at a Network Alliance center. During the appointment, they will meet with an authorized employer representative from Network Alliance who will complete Section 2.
This is how the user creates the I-9 and sends the email to the employee to begin the Network Alliance workflow.
Steps
- On the employee profile, click the Create I-9 button.
- Select the Network Alliance Remote I-9 option.
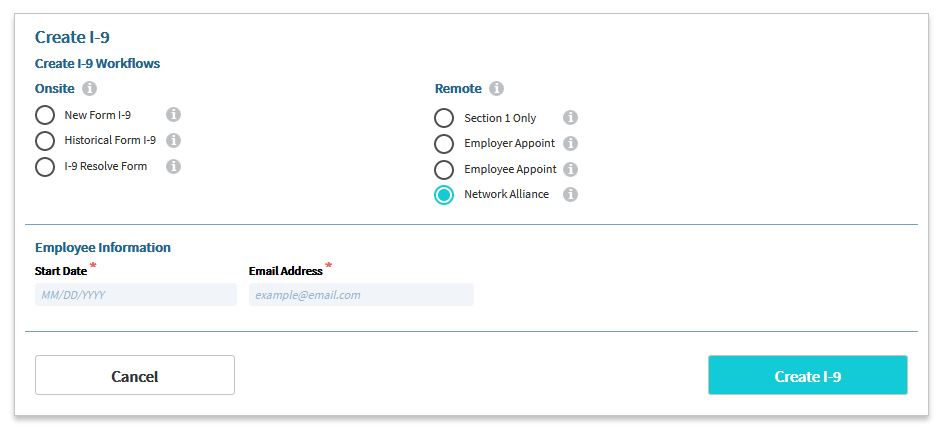
- Enter the employee’s start date and email address.
- Click Create I-9.
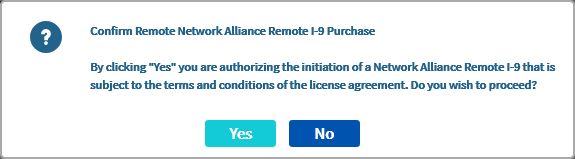
- The system will ask the I-9 Manager to confirm that they want to create a Network Alliance Form I-9. Each Network Alliance Remote Form I-9 transaction has a per usage fee, which will be defined in the service agreement.
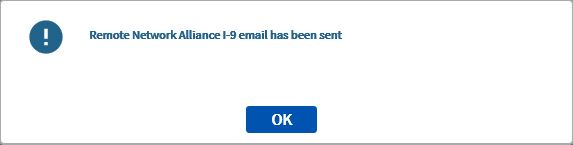
- Once confirmed, the system will send an email to the employee with instructions for completing the Form I-9 and scheduling an appointment with the Network Alliance Remote I-9 provider.
What's Next?
See How to Schedule a Network Alliance Appointment for the employee's next steps.
If the employee needs the email to be resent, see How to Resend a Network Alliance Email.