
Logging in for the First Time
If you are doing an upgrade installation, user accounts from the previous version are still available so you can skip this section.
To verify that TeamConnect has been properly installed, you must also perform the initial TeamConnect application configuration steps. To do so, you must do the following:
- Login to the system as user TeamConnectAdmin.
- If this is a new installation, change the default TeamConnectAdmin password to a secure password.
- In Admin Settings, click the About link and upload the license file.
- Create a group account with the full rights of system administrators.
- Create a contact user account, typically for your TeamConnect system administrator, and make that user a member of the group account that you just created.
(optional) Configure the TeamConnect Login Screen (for SSL only) - Log in with that user.
(optional) Verify that the online help can be displayed.
Because the TeamConnect installation files may have been customized before you received them, certain screens may differ slightly from those shown in the following steps. However, if they differ significantly, or if described functionality is missing, carefully ensure that you have followed all of the installation instructions.
To log in to TeamConnect for the first time
- Ensure that the TeamConnect servers are properly configured and running. For more information, see the previous chapters, if necessary.
- Open an internet browser window and input the following address:
http://Hostname:port/TeamConnect/login
ReplaceHostname:portwith the IP address and port of the machine on which TeamConnect is deployed.
If you have deployed TeamConnect to one managed server, this is the IP address and port of the managed server. If you have deployed TeamConnect to a cluster, this is the IP address and port of the administrative server on which the cluster is defined. If you have set up a proxy through an alternate web server, this is the IP address of the web server.
The TeamConnect login screen should appear. - Log in as the following:
User Name:TeamConnectAdmin
Password:PASSWORD(case sensitive)
Input these values into the Username and Password fields, and click Login. You are requested to change your password.
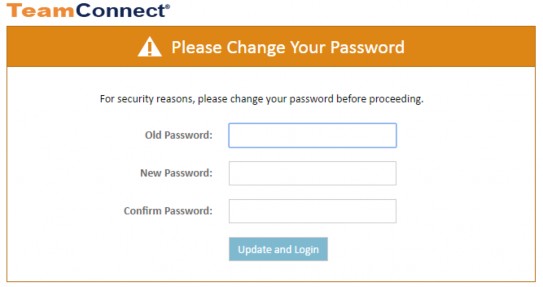
- Enter the appropriate values in the password fields and click Save and log in.
This logs you in as the TeamConnectAdmin user. This user has limited rights within TeamConnect, and should be used only for licensing and to create new users.
Logging in to TeamConnect for the first time takes longer than usual. TeamConnect generates its JSP interface files on the server at the first login. Subsequent login, regardless of the client, do not take as long.
To setup users:
- When you install a new instance of TeamConnect, only the TeamConnectAdmin user should log in. The first task for this user is to upload a licensing file into TeamConnect so that ordinary users can also log in.
- Obtain the licensing file from your Mitratech Support representative.
- After you have received the licensing file, go to Admin, Admin Settings, and About. There you must click a button, Upload License, that prompts you for the location of your license file and uploads it. Then you may begin using TeamConnect with all users.
It is good practice not to use TeamConnectAdmin to log in on a regular basis, so these next steps will set up other usernames with administrator rights, and you can log in with those usernames.
- Create a Group with comprehensive rights.
All rights in TeamConnect are based on user groups. Your system administrator cannot acquire comprehensive rights unless they belong to a group with those rights.
Refer to Creating or Editing Groups to learn how to create a new group, and how to assign rights to that group. Assign all possible rights to the new group. Save the Group record. - Create a User to represent the system administrator.
Refer to Creating or Editing Users to learn how to create a new user account, and how to assign that user to the group that you created in the previous step. Save the User record.
You must associate the User record with a Contact record. Since TeamConnect has just been installed, there aren't any Contact records in existence yet, and you will create a new Contact (with the system administrator's name) as part of the process of creating the user account. - Test your work by logging out of TeamConnect (using the Log Out link in the upper right of the page), then logging in with the username and password of the User account that you just created. This user should have access to all parts of TeamConnect, including the Admin tab and the Setup link, which are both visible on the user's home page.