
User Roles and Permissions
Access to features and functions throughout the TAP system is controlled through the granting or denying of permissions based on the roles with which a user is associated. The Permissions page of the Administration module lets you define user roles, and assign access and application permissions for each defined user role.
Accessing the Application Permissions Page
To access the Permissions page:
- Click the Administration
 button in the TAP Toolbar to access the Administration module.
- The Users page is displayed by default.
- Permissions comprises of Application Visibility and Application Permissions.
- Click the Application Visibility link in the PERMISSIONS menu to display the Menu Items Visibility page.
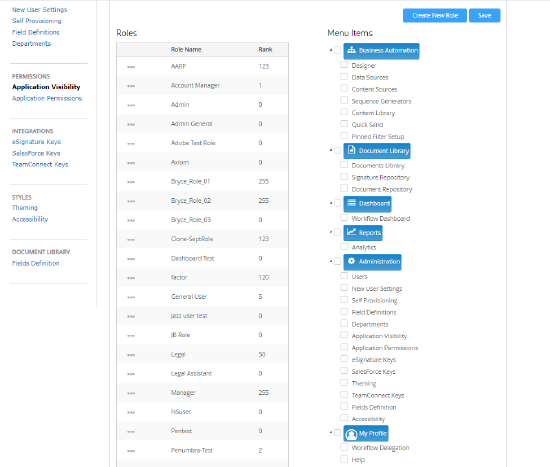
The Application Visibility page is comprised of two functional areas:
- USER ROLES - lets you define and manage user roles for your TAP system. User roles are used to define the specific features and functions available to a given user based on the users role assignments. A user may be associated with one or more user roles.
- MENU STRUCTURE - lets you determine the TAP modules and the major functions within each module available for each defined user role.
Managing User Roles
User roles are used to define the specific features and functions available to a given user. The USER ROLES list shows all currently defined user roles for your TAP system. You can create multiple user roles for your TAP system to reflect departments and staff positions within your organization. Users may be associated one or more with user roles.
Adding a Role
You can add a new user role to your TAP system.
To add a user role:
- Under Permissions, Click on Application Visibility.
- Click the New role button.
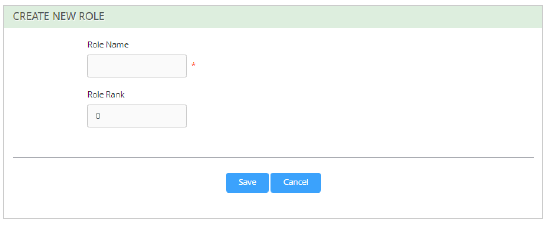
- The screen refreshes to display the ROLE DETAIL dialog.
- The screen refreshes to display the ROLE DETAIL dialog.
- Enter a name for the user role in the Role name text box.
- Use a Role name that is descriptive of the function of users assigned to the role; e.g., "Administration," "Human Resources," etc.
- The Role name can be 50 characters maximum, including spaces.
- Enter the rank for the role in the Role Rank text box.
- The Role Rank is used to establish a hierarchy of roles, so as to avoid overruling the permissions of higher ranked users.
- Enter a Role Rank value from 0 to 255, as desired. The default value for Role Rank is 0.
- When all information for the user role has been entered, click the Save button to save the new user role.
- The ROLE DETAIL dialog closes, and the USER ROLES list refreshes to display the added user role.
- If you enter a Role name that is longer than 50 characters, the ROLE DETAIL dialog does not close. Edit the Role name as necessary, then click the Save button to save the new user role.
- If you enter a Role Rank with a value greater than 255, the message "Role rank must be number from 0 to 255" displays. Enter a valid value in the Role Rank text box, then click the Save button to save the new user role.
- The ROLE DETAIL dialog closes, and the USER ROLES list refreshes to display the added user role.
Editing a Role
You can edit the Role name and Role Rank for an existing user role.
To edit a user role:
- Under Permissions, Click on Application Visibility
- Click the ... for the desired user role and click on Edit icon in the USER ROLES list .
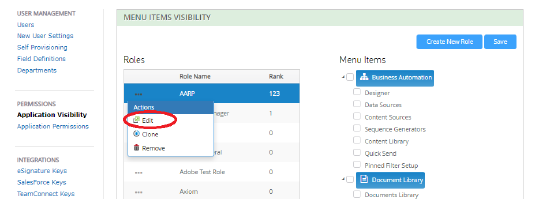
- The screen refreshes to display the ROLE DETAIL dialog. The dialog is pre-filled with the current values for the user role.
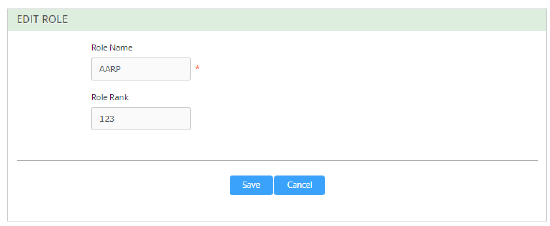
- Edit the Role name and Role Rank, as desired.
- When all desired information for the user role has been edited, click the Save button to save your.
- The ROLE DETAIL dialog closes, and the USER ROLES list refreshes to display your changes.
- If you enter a Role name that is longer than 50 characters, the ROLE DETAIL dialog does not close. Edit the Role name as necessary, then click the Save button to save your changes.
- If you enter a Role name that is longer than 50 characters, the ROLE DETAIL dialog does not close. Edit the Role name as necessary, then click the Save button to save your changes.
- The ROLE DETAIL dialog closes, and the USER ROLES list refreshes to display your changes.
Deleting a Role
You can delete an exiting user role from your TAP system.
NOTE
When you delete a user role, the deleted role is automatically removed from the Assigned roles in the User Record for all users associated with the deleted role.
To delete a user role:
- Access the Application Visibility Page.
- Click the ... icon and click on Remove in the USER ROLES list for the user role you wish to delete.
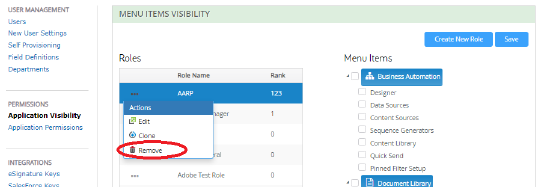
- A confirmation dialog displays the message "Do you want to remove this item?"
- Click the Yes button to complete the deletion.
- The confirmation dialog closes, and the USER ROLES list refreshes with the selected user role removed from the list.
Assigning Menu Access
Access to modules and sub-functions within the TAP system is managed by granting or denying access based on the user role(s) with which a given user is associated.
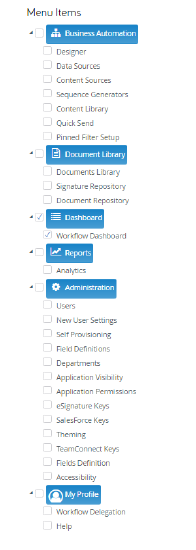
The MENU STRUCTURE field on the Application Visibility page shows a "tree menu" of the TAP system modules, with the primary functions associated with each module shown in a "branch" below the module icon:
 - Dashboard
 - Administration
 - Business Automation
 - Document Library
 - Reports
To view the MENU STRUCTURE:
- Click the
 icon next to an expanded branch in the menu to collapse the branch.
 - Click the
 icon next to a collapsed branch in the menu to expand the branch.
To assign menu access for a user role:
- Access the Application Visibility Page.
- Click the name of the User Role in the USER ROLES field for which you wish to configure menu access.
- The selected User Role is highlighted.
- The MENU STRUCTURE field refreshes to display the current menu access assignments for the selected User Role.
-
Use the check boxes associated with each module and sub-function to grant or deny access to the currently selected User Role.
NOTE
If a check box for a subfunction within a module is selected, the check box for the module must also be selected.
Managing Application Permissions
The APPLICATION PERMISSIONS page lets you assign "granular" privileges for features and functions within the TAP system based on the user role(s) with which a given user is associated.
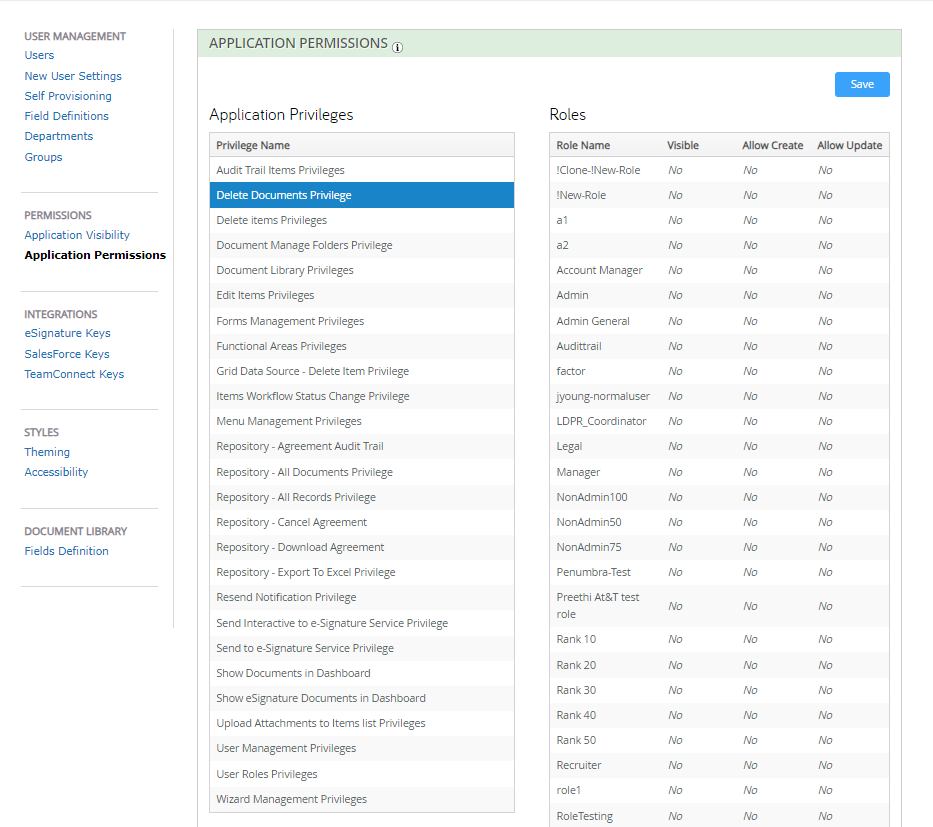
The left column for the APPLICATION PERMISSIONS field shows a list of "granular" privileges. The list is sorted alphanumeric order, by Privilege Name.
- Controls for navigating the list are shown in the lower left corner of the list.
- If desired, you can filter the list to display a subset of privileges.
The right column of the field shows a list of currently defined user roles. Yes and No drop-downs associated with each Role Name let you grant or deny specific access permissions for a privilege:
- Visible - Content associated with the privilege is visible as "read only" for the user role.
- Allow Create - Content associated with the privilege can be created by the user role.
- Allow Update - Content associated with the privilege created by other users can be updated by the user role.
- Allow Delete - Content associated with the privilege can be deleted by the user role. Label this permission as 'Delete Process Documents Privilege'. This must be set to 'Off' by default for all users.
To assign application permissions for user roles:
- Access the Application Permissions page.
- Click the Privilege Name in the APPLICATION PERMISSIONS field for which you wish to assign application permissions.
- The selected Privilege Name is highlighted.
- The user roles list refreshes to display the current application permission assignments for each Role Name listed.
- Use the Yes and No drop-downs associated with each Role Name to grant or deny permissions for the selected privilege.
- When permissions for the currently selected privilege have been configured for all user roles, click the Save button to save your changes. Save should be clicked after each privilege setting.
- Repeat steps 2 through 4 to assign application permissions for additional privileges.