
How to use images, GIFs, and video in TAP
Using Images and Video in your TAP Workflow
Many features in TAP provide opportunities to use company branding or bring a smile to your internal employees face with a gif or video. For example, notifications, thank you pages, and Custom HTML can be customized with in-line CSS and HTML, but even without knowing how to write CSS or HTML you can beautify them and add your company flavor.
How do you set up images or videos in TAP?
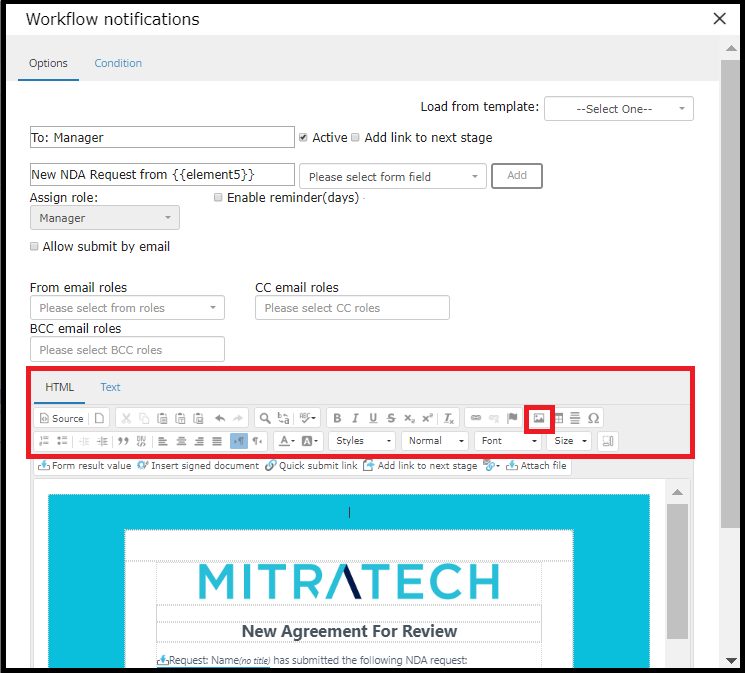
When you open notification, Thank You Page, or Custom HTML, you will notice a key with different options for editing the style of your content. In the image below, the large red box shows properties that are consistent between notifications, Thank You Pages, and Custom HTML.
The easiest way to add an image or gif onto your screen is to copy and paste it.
However, if you click the image icon within as indicated by the small red box, you will have more control over the image or gif that you wish to insert.
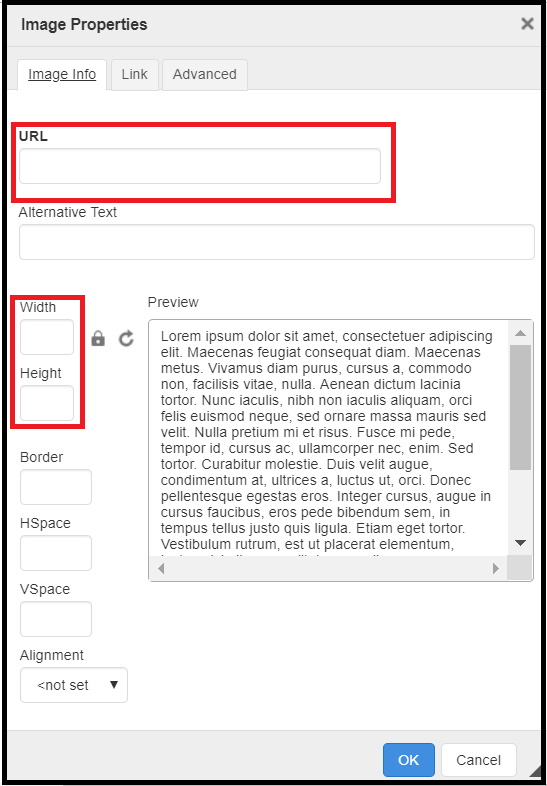
After clicking on the image icon, a second dialog box will appear. Here, you will be able to paste the URL where the image or gif resides, and then modify the size of the image with the pixel calculator below.
Note that if you copy and paste an image from your TAP Staging environment to your TAP Prod environment, the URL must be manually changed. Otherwise, your Prod Environment will direct to an image that it cannot find, because that image has been hosted on a different environment. (Why? Because when an image is hosted on Staging, the URL is different from Prod. TAP’s database is not “refreshed” from Staging to Prod, or vice versa, so the images hosted on one will not be identical on the other).
When copying and pasting an image URL, best practice is to host that image on the TAP environment in which the notification/thank you page/custom HTML resides.
Content Library
The Content Library is a module within TAP that allows you to host images on your TAP environment. It’s useful to do this because any image hosted on TAP will be stable. If the image is hosted on the internet, and for whatever reason is taken down, then an error will be displayed when your TAP notification/Thank You Page etc calls on that image.
To host an image in the Content Library, first save your image to your computer.
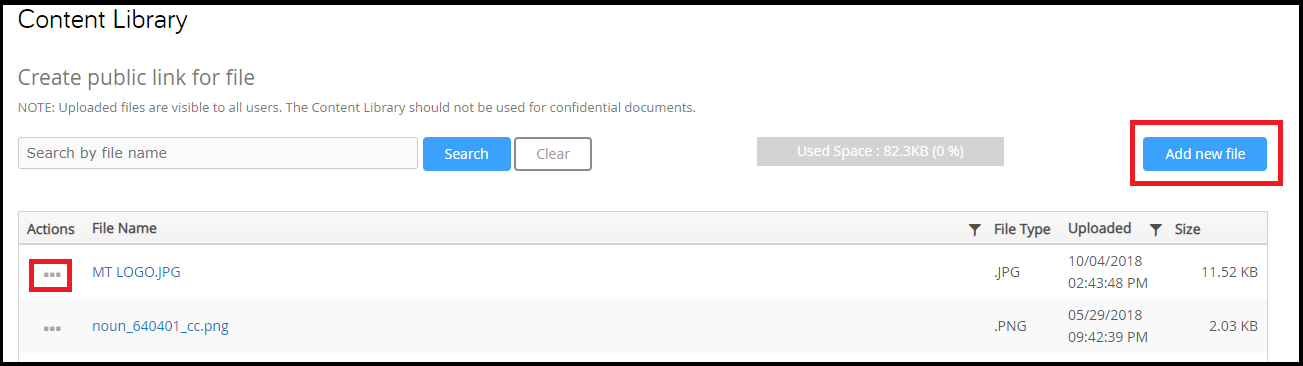
Then, go to Business Automation > Content Library.
From here, click Add New File, and then browse until you find the image that has been saved to your computer. Select that image.
After naming and saving the file, return to the Content Library Home. Select the Actions dropdown on your line item and click Copy Link.
By clicking Copy Link you have copied the image URL to your clipboard. Return to the workflow in question and open up your Notification, Thank You Page, or Custom HTML. Proceed as directed above by pasting the URL into the image URL.