Configuring Task Parameters for the XML Mapper Tasks
The XML Mapper Importer and Exporter tasks are generic scheduled import/export scripts provided by Mitratech.
To Configure the XML Mapper Exporter Task:
- Open Suite Manager.
- On the Suite Manager control panel, click the
 Scheduler component in the Tools & Utilities area.
 - On the Scheduler window, select XML Mapper Exporter from the Task dropdown field.
- In the Schedule area, create a schedule for the task.
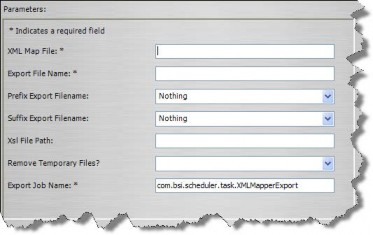
- In the Parameters area on the Schedule Information dialog box, type the path and name of the file to be used to map information to an XML file.

- Type the path and name of the file that will be created with the mapped fields.
- Select an option (such as Date & Time) to be used as a prefix for all exported files, then select an option to be appended to the name of the exported file.
- Type the path and name of the XSL file used to convert the data from XML to another format.
- Select Yes to remove any temporary files that are created during the process.
- Click Save and Close.
To Configure the XML Mapper Importer Task:
- On the Scheduler window, click New.
- On the Schedule Information dialog box, select XML Mapper Importer from the Task dropdown field.
- In the Schedule area, create a schedule for the task using the information in “Scheduling a Task” on page 347.
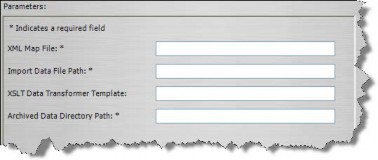
- In the Parameters area on the Schedule Information dialog box, type the path and name of the file to be used to interpret information from the import file.

- Type the path to the directory in which the data to be imported resides.
- Type the path and name of the XSL template used to convert the data from the original files into Suite.
- Type the path to the directory where files will be moved after processing (files that were not processed successfully due to errors are designated as such).
- Click Save and Close.

