
Publishing DSX Clients
Background
Upgrading or installing DSX clients for Click Once deployment needs to be carried out in a specific order to be successful. For the first time install, the website has to be set up and the http address to the different sites noted.
This procedure will not work in cases where files have been changed or added. Such changes will require a rebuild of the application manifest which is not covered by this document.
For updates, it is important to find the Certificate that the applications were originally signed with. Without it the applications will not update and the applications will have to be uninstalled and reinstalled.
Configuration
There are a number of ways that the deployment sites can be set up, in the example below each application (Searching Client, Indexing Studio and Management Studio) are setup as separate sites, many clients create just one site called DSXDeploy and have subfolders containing the applications. For this document I will use the separate site method.
Stand Alone Process
With the service set up and running the applications need to be set up to connect to the server. One way this could be done is to set up the stand alone applications in ..\Mitratech Ltd\DataStoreDSX\DSX_Client\Applications and copy the configuration file to the ClickOnce deployment folders.
For each of the applications there is an application configuration file (for example HitecLabs.DataStore.SearchingClient.exe.config) and a number of protocol files (for example TCP-custom.config). It is important to reconfigure the application configuration file to add or change the following
· Comment out the following to enable help.
<HitecLabs.DataStore.Help.Properties.Settings>
<setting name="DSSearchingClientHelpURL" serializeAs="String">
<value>http://SLO-X027-2K16/DSXHelp/Searchi...hingClient.htm</value>
</setting>
</HitecLabs.DataStore.Help.Properties.Settings>
· Add the following specifying the server address either by Name, IP address or FQDN
<setting name="AvailableServerHosts" serializeAs="Xml">
<value>
<ArrayOfString xmlns:xsi="http://www.w3.org/2001/XMLSchema-instance" xmlns:xsd="http://www.w3.org/2001/XMLSchema">
<string>server name, IP or FQDN</string>
<!-- i.e Backup@10.10.10.111 -->
</ArrayOfString>
</value>
</setting>
· Amend the following for the PDF Toolkit.
<setting name="PdfResourcePaths" serializeAs="Xml">
<value>
<ArrayOfString xmlns:xsi="http://www.w3.org/2001/XMLSchema-instance" xmlns:xsd="http://www.w3.org/2001/XMLSchema">
<string>.\Resources\CMap</string>
<string>.\Resources\Font</string>
<string>.\Resources\Unicode</string>
</ArrayOfString>
</value>
</setting>
Select one of the protocol files, in the example below TCP-custom.config is selected. TCP-custom.config configures the client to use the TCP protocol and will prompt for a username and password. TCP-Windows.config will configure the client to use the TCP protocol but will use Windows credentials to log into DSX. Using <!-- at the start and --> at the end comment out the line.
<!-- Username provided authentication over tcp -->
<client configSource="Tcp-custom.config" />
<!-- Windows Authentication -->
<!--<client configSource="Tcp-Windows.config"/>-->
The protocol configuration file needs to be amended, more than one can be modified if it is a requirement to switch login methods or protocols. The configuration file defines the endpoints for the application, all the endpoint addresses need to be changed from LocalHost to the servers name, IP address or FQDN. The port address is to be left unchanged.
Click Once process
Once the local clients are set up and working, the configuration files can be copied from the
C:\Program Files\Mitratech Ltd\DataStoreDSX\DSX_Client\Applications
To the
C:\Program Files\Mitratech Ltd\DataStoreDSX\DSX_Client\ClickOnce
folder tree. There will already be configuration files in the folders but these will have a .deploy extension. These can be overwritten but multiple copies of the configuration files (one with a .deploy extension and one without) will cause the publication process to fail, for the deployment to succeed, there must only be one set of configuration files and they must have a .deploy extension. (for example, TCP-Windown.config.deploy) Alternatively, the existing files can be modified in the same way as the Stand Alone applications.
I will use Indexing Studio as an example for the rest of the document, the same process applies for Searching Client, ViewingClient and Management Studio as it does for Indexing Studio, just replace IndexingStudio with SearchingClient or ManagementStudio or ViewingClient as applicable.
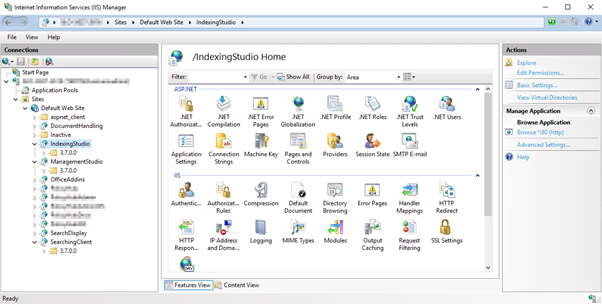
Run MageUI.exe as an Administrator and open the Manifest file for Indexing Studio.
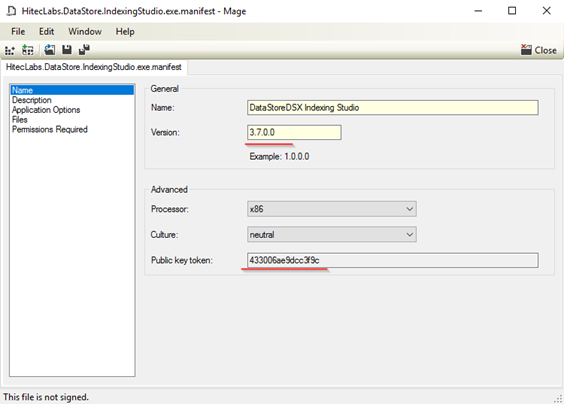
Select HitecLabs.DataStore.IndexingStudio.exe.manifest from \DataStoreDSX\DSX_Client\ClickOnce\IndexingStudio\3.x.x.0
If the configuration files are correct there will be no errors displayed, in which case save the file.
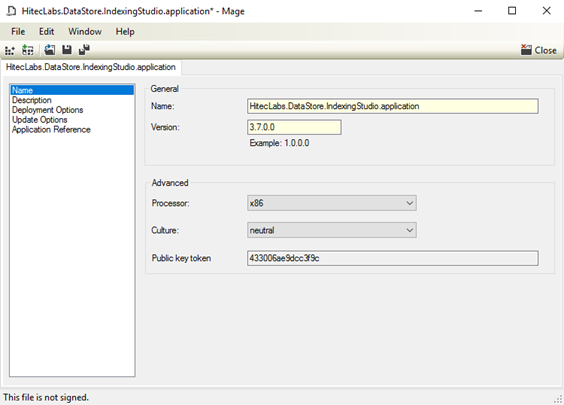
Something to note is the Public Key Token box on the Name panel, the number in this panel will change when the file is published as the number is derived from the certificate.
A possible change would be to the Version, the number will need to be incremented to ensure that it updates.
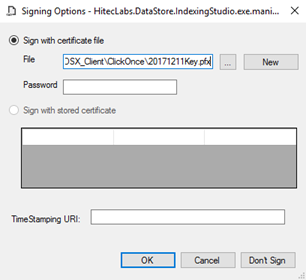
When the manifest is saved, the following dialog box is displayed, if this is an upgrade then the File must be the Certificate file used for the last version. If this is a new installation then the New button can be clicked and a new Certificate file created. If a new certificate is created then it must be kept in a safe place, it can also be used for all the publication on this server.
Once the manifest is saved, close the manifest. Note that the Public Key Token has changed.
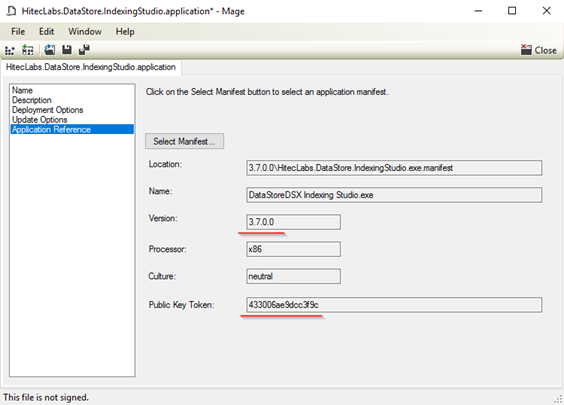
Now the application needs to be published. Open the HitecLabs.DataStore.IndexingStudio.exe.application from DataStoreDSX\DSX_Client\ClickOnce\IndexingStudio.
Staring from Application Reference at the bottom of the list, select the manifest that has just been published. Note that the public key token has changed, if the version number was changed the change will be displayed here as well.
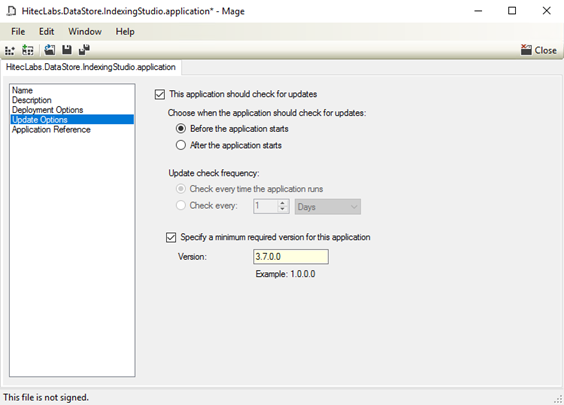
Going up the list, the Update Options can be left untouched, however, if an automatic update process is desired then the ‘Specify a minimum required version for this application’ should be selected and a version number be entered.
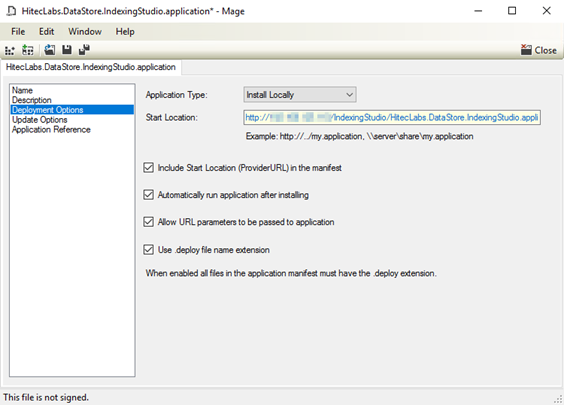
In the Deployment Options, the Start Location is very important, it has to point to the .application file. If it does not the application will not deploy or update. All other options can be left untouched.
The Description settings can be left untouched, which leaves the Name settings. Here the Version number will either be the default is this is a new installation or incremented for an update. For example, an update could increment the value from 3.7.0.0 to 3.7.0.1, it needs not be more than that. At this point the .application file can be saved, the process is the same as it would be for the .manifest, and the same certificate should be used for the .application as the .manifest.
Note that the Public key token changes as well.
What's Next
With the publication complete, the application can be deployed by running the .application file from the DSXDeploy website. If there are errors go back and republish the manifest and application again. If this is part of an upgrade then the version number must be increased, when run the new version will be detected and the application automatically upgraded.