Options
Processes
To view Processes which have been created in OpRiskControl, select the Options tab, select Processes then select the required Process from the menu. Alternatively, import a previously exported Process using the Import a Process option.
Note: Only Processes which were created in OpRiskControl and exported can be imported using this option.
Process Management
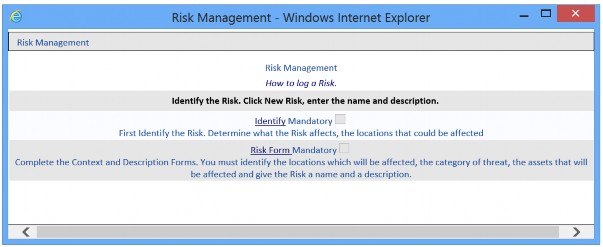
The Process Management option allows you to add a Process, with steps, to help Users as required. The Processes can then be accessed by clicking Processes on the Options tab.

Enter a Process Name and a Description and click Save.

To add Steps, click Edit.

![]()
Add a description to the Process Group Name and click Add and then click Steps.

If required:
- select the Mandatory tick-box if the step is mandatory.
- select an Owner from the drop-down list.
- select an Anniversary month and day. and then click Add.
Add more steps as required. A second step has been added to the above example. When a User clicks on Processes and selects Risk Management, the Risk Management Process just created is displayed.

Global Edit
The Global Edit button opens up a form which allows to make edit to all the Processes in Process Management.
Note: Make a backup of your database before using this facility.
In the first column, enter the old word (the word or phrase you want changed). In the second column, enter the new word (the word or phrase you want to see instead of the old word).
Click Go beside the row you want to change. A tick indicates the changes have been made.
Export
A Process can be exported to create a backup. Click Export to export the process to a zip file. The default name is Process-id_string.zip, where id_string is a series of numbers. This zip file can be imported at a later date, see “Processes” on page 111 for more information about importing a Process.
Edit
To make changes to a Process, select the Options tab, then select Process Management. In the Process Name box, click on New Process to show the list of Processes and select the Process you want to edit. Click Edit to make changes to the selected Process or Delete to delete the selected Process.
To change the text in the Process Group Name box, select Edit. To change or add information to the steps, click Steps next to the Sequence you want to edit and then click Edit beside the Step you want to edit (or Del to delete the Step).
Click the More link text beside the Step and click Edit to change the extra information such as whether the Step is Mandatory, the Anniversary Month and day and to Acknowledge an Anniversary, if required. Click Save to save the changes. Click Simple Mode to hide the extra information.
Risk Templates
Select the Options tab, select Risk Templates and then select the required menu option.
Risk Templates can be created using any number of Risk Types selected from the Risk Types. Therefore, if there are a common set of Risks across a number of areas, you can create a Template of those Risks, and then automatically create those Risks for each project. It would then be the task of each project manager to discuss, rate and manage the Risks in their area using the pre-populated information.
Another example is that you could create a Risk Template for each Business Unit in a typical hospital or company, and then create the Risks (using the Risk Template) for each Business Unit. Then, all the Risk Manager needs to do is review their list of Risks, delete those that are not applicable, and add others that are.
Manage Templates
Select the Options tab, select Risk Templates and then select Manage Templates from the menu.
Create A New Template
Select New Risk Template from the drop-down list and then click Edit. Enter a name for the new Risk Template in the text box and click Save.

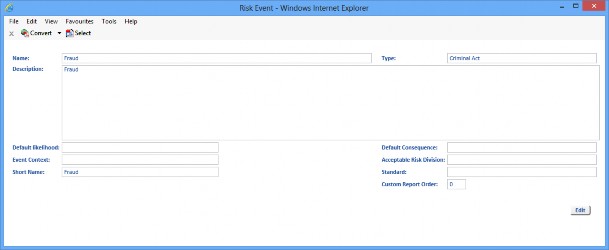
On the Risk Templates page, select a Risk Type and then a Risk Event from the drop-down lists, and click Add to add the selected Risk Event to the Risk Template. Continue adding Risk Events to the Risk Template until the Template is complete. Click the Risk Event name to open the Risk
Event. Risk Events can be edited by clicking the edit button. See “Risk Events” on page 96 for more information about editing Risk Events.

Edit An Existing Template
Select the Risk Template you want to edit from the drop-down list and then click Edit.
You can delete a Risk Event from the selected Risk Template by clicking the Delete link text beside the Risk Event.
To add new Risk Events, select a Risk Type and then a Risk Event from the drop-down lists, and click Add to add the selected Risk Event to the Risk Template. Continue adding Risk Events to the Risk Template until the Template is complete. Click the Risk Event name to open the Risk Event. Risk Events can be edited by clicking the edit button. See “Standards” on page 101 for more information about editing Risk Events.
Create Risks From Templates
After you have a set of Risks as a Risk Template, you can create them in bulk for various contexts across the organisation.
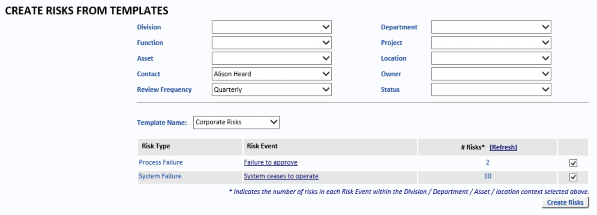
Select the Options tab, select Risk Templates and then select Create Risks From Templates from the menu.

Select the Risk Template you want to use to create the Risks from the Template Name drop- down list.
Risks can be created only when values have been provided for these fields:
- Asset
- Location
- Owner
- Status
Select the Risks Events for which you want to use to create a Risk (the Risk Events with a tick against them will be used to create Risks when you click the Create Risks button).
Click the Create Risks button.
Risks which were created using a Risk Template have the Source field set to Template.


