
How to use Document Security
Document Security Guide
A how-to guide to using document Security functionality
Document Security refers to the ability to mark a Smartform record as Private or Confidential if required at the template level by setting up the appropriate configuration.
1. Keyword Setting
Only System administrators have the access rights to create or update this keyword.
1.1 Set up a brand-new Keyword
This option is to be used if the keyword was never created in the system
Navigate to
→ Main Systems Navigation
→ Keywords
→ New Keyword
→ Readers Field Setup and jump to step 1.3

1.2 Update an existing keyword or check if updated correctly
This option is to be used if the keyword has been already created but not correctly configured; hence requires to be updated.
Navigate to the below -
→ Main Systems Navigation
→ Keywords
→ Click the arrow to expand ‘Readers Field
→ Click Enabled and jump to step 1.3

1.3 Detailed Keyword Configuration
1.3.1 Keyword Configuration in Edit-mode
Follow the steps in the screenshot below.

1.3.2 Keyword Configuration in Non-Edit Mode

2. Smartform Template Setting
Only System administrators have access to make the configurational change mentioned below.
Navigate to
→ Main Systems Navigation
→ SmartForm Builder (New)
→ Form Template
→ Select the template to apply Confidentiality.
Update the following information as highlighted in the screenshot below

- Next navigate to the Workflow Wizard window
- Scroll to the very bottom of the page
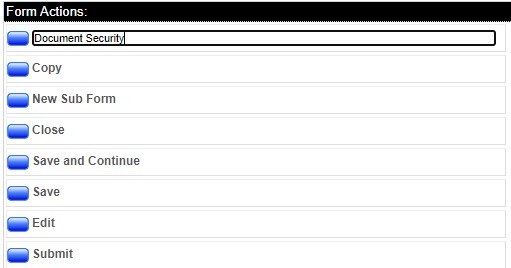
- Drag the ‘Document Security’ Action button as shown in the screenshot below

- After dragging
- Double click to have the field renamed, if required as shown in the screenshot below
3. Output Example
- Raise a record from the template where Document security has been enabled as shown in the snip below:
- As per the above configuration, we now see the additional ‘Document security’ Action button added in on the top ribbon
- The record is by default selected to be Public (as configured in Step 2).

- Switch the radio button to make it Confidential
→ It will auto-select the default ACL group as configured in step 3.

- You can simply click OK or change selections if required to change the ACL or individual employees who should have visibility of this record.

- Click the empty box to load the employee-picker look-up.
- Select one or more employees if required, as shown in the screenshot below

- The final selection may look like the screenshot below.
- Click OK and continue filling out the form and finally
- Click Submit

4. Limitations of the current functionality
Following are some of the limitations of the current functionality:
- Only the Form MR and Initiator will receive notifications as configured in the workflow. No additional individuals or ACL groups will receive any notification of the confidential record, in addition.
- Only the Form MR or Superusers will have EDIT rights to the record, all the others will only have Read-Only access to the record.
- The form will not have any marking or watermark to identify it as a confidential record. It will appear as a normal standard record like any other who has viewing rights to it. However, you can always click the ‘Document security’ action button to see if it is Public or confidential.
- The Smartform view will also not have any indication to mark or highlight Confidential records differently.
- The individuals or ACLs selected to have view rights of the confidential record must have ‘View all’ in their portal pages assigned, otherwise, they won’t have any way to reach the record.
- The additional individuals and ACLs won’t have Edit rights to this record, however, can be configured if required at a template level by configuring Group edit rights by ACL as shown in the screenshot below.

- All the Confidential records can be exported in Excel at the view level – Currently, there is no setting to ignore them from the list.
- All the confidential records also navigate to Yellowfin BI for reporting and hence we recommend using them in Private reports and dashboards to control access.
NOTES
- When reverting the changes back note that the Historical Records / active ''Open'' Statuses will stay as confidential and any new Records that are created will NOT be confidential.