
Initiator Lookup Functionality
Initiator Lookup Functionality
Elements required:
1. A Lookup list file is required to associate site names with FormMR and to prepopulate any fields with default values.
2. If a mass import of data is required, an import file is required to create the records using the Import SMARTForm function.
Lookup list file structure:
3. The lookup file must meet the following criteria:
a. Column A Heading: Initiator (Site Name).
b. Column B Heading: FormMR. FormMR list must match what is set up in the employee list.
c. Column C onwards: These can be fields in the form that need to be pre-populated when a new record is created. Field headings must be formatted as “sectionID_fieldID”.
d. A frequency field must be created to be used in Auto-scheduling. The syntax should match the examples in col G below: “FrequencyLabel |FrequencyNumber”, ie “Monthly |30”. Note that there is NO SPACE between the pipe character | and the number. It must match the system field:

e. The file must be saved as a .csv. E.g:

Template Configuration:
4. The initial configuration takes place in the template and Workflow Wizard.
5. On the template, activate “Scheduling”:

6. Access the workflow wizard and update the [Select Form Mgt Rep from] field by selecting “Look-up Table”:

7. Once the value is selected, a new option will appear underneath to attach the lookup list .csv file

8. After the file is attached, a prompt will request that the workflow be saved. At this stage the attached file will not be visible. Select [OK] on the menu to save the workflow:

9. The file will now be visible and there is a [Remove] option if the file needs to be updated with new content:

10. Set up the Auto-scheduling fields as required, ie Freq Field (see above) will update system Due For Completion date:

11. Update the rest of the workflow, including adding a command button to manage scheduling:
12. Save the workflow and the template.
13. The lookup file can take up to 10 minutes to be processed by the server, so will not be available for use in the initiator field immediately. This includes changes and updates to the file, for example when a new site is added, or when a different FormMR is assigned.
Updating the lookup file:
14. Default FormMR values in the lookup file can be changed based on business needs.
15. Edit the workflow, and select the [Remove] command next to the current upload field:

16. The interface will reset, and you will be able to upload the new attachment .csv with the new FormMR:

17. Follow the steps outlined above by saving the workflow and template.
18. For historical open/scheduled records to be updated, please allow at least 1 hour. This may become longer as more records are added.
Example: New Record with Lookup Functionality
19. Once configured, open a blank record; workflow status will be Draft:

20. In the initiator field – renamed as “Site” – enter the site name required. If whole words match, the list will show the options:

21. Select the appropriate site. The FormMR will prepopulate and any default values from the lookup file will be entered. Note the Frequency field which is required for auto-scheduling new records:

22. Update the form as required, including assigning a due date, and submit it into the workflow.
23. The new record will now be in Open workflow status.

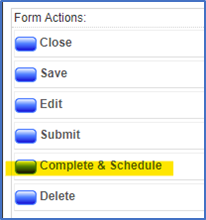
24. At the appropriate time, edit the record and “Complete & Schedule” to close the current record and create a new record with a new due date based on the frequency field.

25. A message will confirm the status of the process:

26. In the data view, the first record will be in “Complete” status, and the new scheduled record will be “Open”. The “Due for Completion” field will reflect the schedule in the lookup table:

27. If the scheduled record is opened, edit is selected and changes are made, and then saved, the status will change from “Scheduled” to “Open”. If the record is only opened, edit is selected, but no changes are made and “Save” is not used, the status will remain “Scheduled”.
Mass import file structure:
28. If a mass data import is required to create multiple records at once, a second lookup file is required to be used by the Import SMARTForm functionality
29. The mass import file must meet the following criteria:
- Row 1: Field/Template Label.
- Row 2: Field/Template ID.
a. Column A Heading: must match template ID.
b. Column B Heading: left blank for auto-generated reference numbers.
c. Column C Heading: left blank if not associated with parent documents elsewhere.
d. Column D Heading: must match template title.
e. Column E Heading: workflow status (ie are the records imported as open or scheduled)
f. Column F Heading: Initiator name (site name, must match lookup field above).
g. Column G Heading: FormMR name (must match lookup field above and the employee list)
h. Column H Heading: Due for Completion date
i. Column I Heading: left blank if FormMR is set to an individual
j. Column J Heading: custom text for audit trail can be entered here
k. Column K Heading onwards: These can be fields in the form that need to be pre-populated during the import. Field headings must be formatted as “sectionID_fieldID”.
l. A frequency field must be created to be used in Auto-scheduling. The syntax should match the examples in col M below, ie only the number part of the frequency “30” = Monthly as is set up in the frequency field:

m. The file must be saved as a .csv

n. The data view needs to have the Import SMARTForm control active:

o. Using the control, select the .csv import file and use the Import menu option. Any issues will be flagged in the log:
