
Search Template Tab
Once a Search Template has been opened (by double-clicking on the Search Template), the tab shows the Search Template’s name.
Buttons (Above Attachments Toolbar)
When a search has been completed and search results have been returned, the following buttons are displayed, depending on configuration. For example, when the user does not have the permission to Store new document version, the Check Out button is not displayed.

Click on an icon or button in the graphic above to go to the relevant topic.
Document Routing
This button is displayed when the Display option Document Routing Toolbar is selected (see “Document Routing Toolbar”) in the Search Template and the selected search result can be transitioned to a new document state.
Click on the Document Routing button to display the available Transitions. Transitions are displayed below What would you like to do with this document? Selecting the required Transition displays the available reasons below Why have you chosen this action? Select the required reason.

When the reason is selected, a window is displayed asking if you want to notify users or add comments.
Click Yes to display the Transition Options window.
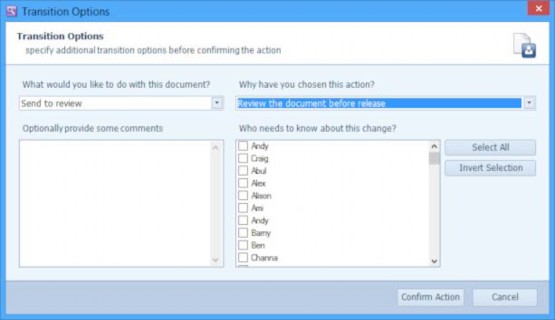
If required, enter comments in the Optionally provide some comments text box.
If required, select the users you want to be notified about the Transition. The selected users will receive an email when the required email configuration has been completed. See “Email Setup” for more information.
Click No to complete the Transition without providing comments or selecting users to notify.
A window is displayed indicating the Transition has been completed.
Revert Check Out
Click this button to discard any changes you have made to the document and check the document back in to DataStoreDSX. The document can then be edited by other users. (To save the changes you have made, click the Check In button. See “Check In”)
This button is displayed when you have checked out the selected document. See “Check Out”.
Check In
Click this button to upload the edited version of the document to DataStoreDSX.
This button is displayed when you have checked out the selected document. See See “Check Out”.
When the document has not been edited, the document is checked in and the version number remains unchanged.
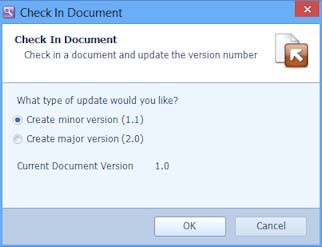
When the document has been edited, the Check In Document window is displayed.
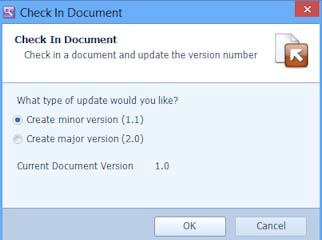
You can create a minor version change (for example, if the old version is 1.0, the new version will be 1.1) or you can create a major version change (for example, if the old version is 1.1, the new version will be 2.0). Select the new version and click OK.
A confirmation window is displayed. The new version will be displayed when you click Refresh or when you click Start Search.
Check Out
The Check Out button is used to prevent multiple users from editing a document at the same time. When one user checks out a document, other users can view the document, but they cannot edit it.
This button is displayed when Document Versioning is enabled for the Data Definition used to store the document and the Searching Client user has the Store new document version permission for the Data Definition used to store this document.
Document Already Checked Out
When another user selects the same document, they will see you have the document checked out.

When someone else has already checked out the document and you are allowed to unlock the document, the Unlock Document button is displayed.
Click Unlock Document to discard any changes the user has made to the document and check in the document to make it available to other users who may need to edit it.

Document can be Checked Out
When you select a document and there is no yellow status message displayed, the document can be checked out. Click the Check Out button. The status below the Attachments toolbar indicates you have checked out the document.

Once the document has been edited, use the Check In button to store the new version of the document in DataStoreDSX. It will then available to other users who may need to edit it. See “Check In” for more information.
Alternatively, use the New Revision button to upload an existing document as a new version of the document. See “New Revision: Scanning not Enabled” for more information.
Open
This button is displayed when the selected search result is an Office document. Click Open to open the selected Office document in the appropriate application.
Word, PowerPoint, Excel Document
When the selected search result is a Word, Excel or PowerPoint document, a window is displayed asking if you want to check-out the file and open it, open it (in read-only mode) or download it to your computer.
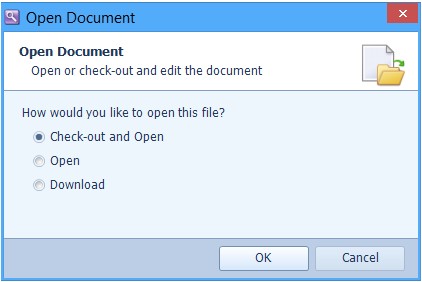
Select Check-out and Open if you want to edit the document or Open if you want to view the document but not make any changes. The document is then opened in the appropriate application. Make the required changes then save and close the document.
Non-Office Document
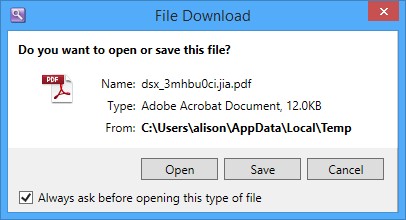
When the selected document is not a Word, Excel or PowerPoint document (for example, a .JPG file or a .PDF file), the File Download window is displayed.

Select Open to open the selected document, Save to save the document on your machine or Cancel to return to Searching Client without viewing the selected document.
New Revision: Scanning not Enabled
The New Revision button is used to check out the selected document and upload a new revision from the local machine (or a machine that can be accessed from the local machine).
Browse to the required folder. Select the new version of the document and click Open. When the document has been uploaded, a confirmation window is displayed.
The status below the Attachments toolbar indicates there are changes pending.

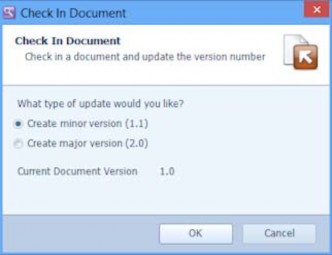
The Check In Document window is displayed.
You can create a minor version change (for example, if the old version is 1.0, the new version will be 1.1) or you can create a major version change (for example, if the old version is 1.1, the new version will be 2.0). Select the new version and click OK. To cancel the check-in, but keep the document checked out, click Cancel.
A confirmation window is displayed. The new version will be displayed when you click Refresh or when you click Start Search.
New Revision: Scanning Enabled
Click the New Revision button to scan or import a new version of the currently selected search result. The Scanning window is opened.

Scanning Application’s Menu
Click on the application’s icon to display the menu
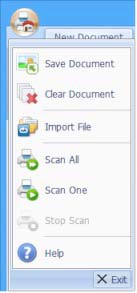
Save Document
See “Save Document”.
Clear Document
See “Clear Document”.
Import File
See “Import File”.
Scan All
See “Scan All”.
Scan One
See “Scan One”.
Stop Scan
See “Stop Scan”.
Help
Select Help to open the Help for the Scanning window.
Exit
To close the Scanning window without saving a scanned document, select Exit. The document check-out is automatically reverted.
Save Document
Click Save Document to save the scanned document or imported document, close the Scanning window and return to Searching Client. The Check In Document window is displayed.
You can create a minor version change (for example, if the old version is 1.0, the new version will be 1.1) or you can create a major version change (for example, if the old version is 1.1, the new version will be 2.0). Select the new version and click OK.
A confirmation window is displayed. The new version will be displayed when you click Refresh or when you click Start Search.
Clear Document
Click Clear Document to delete the scanned image or remove the imported document.
Scanner Settings
The name of the active scanner is displayed in the text box. A different scanner can be selected by clicking the scanner name to display a drop-down list of configured scanners. Select the scanner you want to use from the list.
Add Scanner Setting
Click the Add Scanner Setting button to open the New Scanner Setting window.

Click the Add Scanner Setting button to open the Scanner Setting window.
The Scanner Settings are described in Table 181.
Table 181. Terminology: Scanner Setting
|
Term |
Meaning |
||
|---|---|---|---|
|
Scanner Setting Name |
Enter a name for the scanner you are adding. Maximum 100 characters. |
||
|
Select Scanner |
Click Select Scanner to see a list of supported scanners. Select Show only connected scanners to list only those scanners which are currently connected and powered on.
|
||
|
Configure Scanner |
Click Configure Scanner to display the configuration window for the selected scanner. |
Edit Scanner Setting
Click the Edit Scanner Setting button to open the Edit Scanner Setting window for the active scanner.

The Edit Scanner window enables you to change the settings for:
- Scanner Setting Name
- Select Scanner
- Configure Scanner
See Table 181, “Terminology: Scanner Setting” for information on these settings. Change the fields as required. Click OK to save the changes made or Cancel to leave the Edit window without saving the changes.
Delete Scanner Setting
Click the Delete Scanner Setting button to delete the active scanner setting.

A window is displayed asking you confirm you want to delete the active scanner.
Click Yes to delete the scanner setting or No to close the window without deleting the active scanner.
Configure Scanner
Click the Configure Scanner button to open the scanner configuration window.

Make changes to the configuration of your scanner, as required.
Import Scanner Settings
Click the Import Scanner Settings button to import a file containing previously exported scanner settings.

Click Browse and navigate to the folder containing the exported scanner settings. Select the file and click Open to add the scanner settings in the file to the import list. Select the Scanner settings you want to import. (Use Ctrl and the mouse pointer to select non-sequential scanner settings.)
When you have selected all the scanner settings files you want to import, click the Start Import button.
If a scanner setting with the same name already exists, the imported scanner setting is saved with the date and time appended to the name. This name can be changed by selecting the scanner setting and clicking the Edit Scanner Setting button. See “Edit Scanner Setting” for more information.
Export Scanner Settings
Click the Export Scanner Settings button to export one or more scanner settings to a file.
Click Browse and navigate to the folder you want to use to store the exported scanner settings. Click Save. Select the scanner settings you want to export. (Use Ctrl and the mouse pointer to select non-sequential scanner settings.)
When you have selected the Scanner Setting(s) you want to export, click the Start Export button. Alternatively, click Close to close the Export Scanner Settings window without exporting the scanner settings.
A message is displayed indicating the scanner settings were successfully exported. Click OK to close the message.
Acquire
Import File
A new version of a document can be imported by clicking the Import File button.
A window is opened. Browse to the location of the file you want to import, select it and click Open. The selected file is displayed in the Scanning widow. To save the imported file, click Save Scanned Document.
To discard the imported file, click Clear Scanned Document.
Scan All
Click to scan all the pages in the attached scanner.
If you already have a scanned or imported file which is now displayed in the Scanning window, the image will be lost if you scan a document.
Scan One
Click to scan one page in the attached scanner.
If you already have a scanned or imported file which is now displayed in the Scanning window, the image will be lost if you scan a document.
Stop Scan
Click to stop the scan which is currently in progress.
Automatic Rotation
Automatic Rotation is applied to the images of all the scanned pages.
Automatic Rotation is not applied to imported files.
No Rotate
Do not rotate the next scanned image.
Rotate 90
Rotate the next scanned image 90 degrees clockwise.
Rotate 180
Rotate the next scanned image 180 degrees clockwise.
Rotate -90
Rotate the next scanned image 90 degrees anticlockwise.
Manual Rotation
Manual rotation is applied to the selected page only.
When files are imported (not scanned), the Manual Rotation options are only available when the file type can be rotated by DataStoreDSX. For example, TIFF files can be rotated, but TXT files cannot be rotated.
Rotate 90
Rotate the selected scanned image 90 degrees clockwise.
Rotate 180
Rotate the selected scanned image 180 degrees clockwise.
Rotate -90
Rotate the selected scanned image 90 degrees anticlockwise.
Document History
Click the Document History button to see a list containing the document versions, the names of the users who created them, the name of the Data Definition used to store each document and the revision of the Data Definition used.
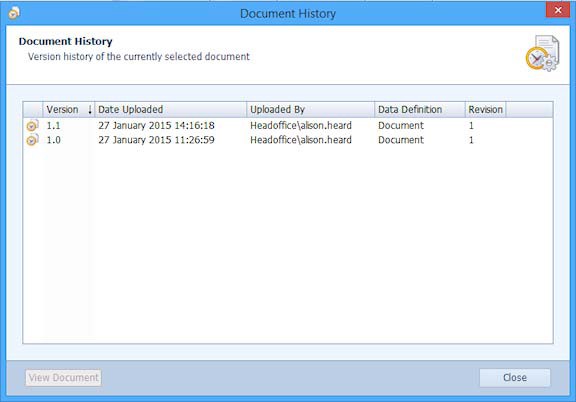
Select a version and click View Document to open the selected version.
Word, PowerPoint and Excel documents are opened in the appropriate application.
Other Office documents and PDF documents are downloaded.
Select Open to open the selected document, Save to save the document on your machine or Cancel to return to Searching Client without viewing the selected document.
Click Close to exit the window and return to Searching Client.
Refresh
Click the Refresh button to refresh the search results. This can be used when a document has changed state in the document route panel. (This button cannot be used to start a new search when the search criteria are changed.)
Options
Set as Default Search Template
Select this option to set the current Search Template as the Default Search Template. The Default Search Template is opened when Searching Client is first started (instead of the Standard Search tab). For more information about the Default Search Template (and how to open a different Search Template), see “Default Template”.
Add to Favourites
Select Add to Favourites to add the current Search Template to your list of Favourite Search Templates.
Remove from Favourites
Select Remove From Favourites to remove the current Search Template from your list of Favourite Search Templates.
Manage Favourite
If you have added too many Favourite Search Templates and their management is becoming inefficient or difficult, you can use the Manage Favourites window to select different views, sort the displayed list and remove some or all of the listed favourites. See “Manage Favourites”.
Full Screen
Click on the Full Screen Mode button to view the currently selected search result in full screen mode.

Press the ESC key to exit full screen mode.
Document Display
Click on the Document Display button to toggle the visibility of the document display. When the button is selected, it is highlighted and the document is displayed when the search results are returned.

When the button cleared, it is no longer highlighted and the document is not displayed when the search results are returned.
Document Thumbnails
Click on the Document Thumbnails button to toggle the visibility of the thumbnails. When the button is selected, it is highlighted and the thumbnails are displayed when the search results are returned.

When the button is cleared, it is no longer highlighted and the thumbnails are not displayed when the search results are returned.
Results View
Click on the Results View button to toggle the visibility of the results grid. When the button is selected, it is highlighted and the results are displayed in a grid when the search results are returned.

When the button is cleared, it is no longer highlighted and the search results are not displayed in a grid when the search results are returned.
Document Route
Click on the Document Route button to toggle the visibility of the document route panel. When the button is selected, it is highlighted and the document route panel is displayed when search results are returned.

When the button is cleared, it is no longer highlighted and the document route panel is not displayed when the search results are returned.
Find
The Find button is used to show or hide the navigation buttons for locating words entered as part of content full text searches, sub-searches and the Find operation.

This button is displayed only when the Show Find Text button is selected in the Search Template Editor. See “Show Find Text” for more information.
Click the Find button to display the Find options. Alternatively, press Ctrl+F on the keyboard.

The Find button is highlighted to indicate the Find text box and the navigation buttons are displayed.
When no matches are found in any of the documents which support highlighting, No matches found is displayed.

Click the arrow button to remove the message and display the Find text box and the navigation buttons.
The navigation buttons can also be used to highlight content full text search and sub- search results. See “Content Full Text Search” and “Text Sub-Search” for more information about these searches.
Find does not reduce the search results, it locates the entered word or phrase within the current list of search results. The text colour is changed to the font colour specified for Find Text Search Colour in the Style Sheet associated with the Data Definition used to index and store the search result. (See “On Screen Presentation – General Details” for information about associating a Style Sheet to a Data Definition.) When the Data Definition which was used to Index and Store the search result does not have an associated Style Sheet, the default colour, orange, is used for Find Text Search Colour.
Find can locate words in the following search result types:
- TEXT documents.
- PDF documents.
- Word documents stored with a Data Definition with the Storage Format set to Pageable MS Word (see “General Properties – Storage Formats” for more information).
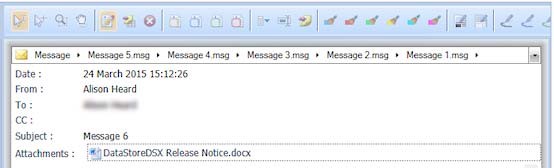
- Outlook messages.
- Word document attachments in Outlook messages when the Outlook message was stored with a Data Definition with the Storage Format set to Pageable MS Word.
Results will also be found in nested Outlook messages. That is, Outlook messages saved and added as attachments to other Outlook messages. Searching nested Outlook messages will take more time that searching other search results. Although there is no imposed limit to the number of nested emails that can be searched, we have verified that results are found when five emails are nested inside an Outlook message.
- TEXT document attachments in Outlook messages.
- PDF document attachments in Outlook messages.
Find does not locate words in the following search result types:
- Word documents which were stored with a Data Definition without a Storage Format set.
- RTF documents.
- PowerPoint documents.
- Excel Workbooks.
- Scanned Documents.
Enter the text you want to search for in the text box. Set the scope of the Find search and then use the navigation button to move to a new result. The word or phrase is located in the current list of search results.
The text in the Find text box is searched for literally. That is, wildcard characters are not supported and all characters (including * and %) are treated as text. Similarly, [AND], [OR] and [NEAR] are searched for literally.
Changing the Scope
Select whether you want to look in the list of search results for the entered text on the currently selected page, in the currently selected document, in all the documents or in the current attachment.
Current page – the page which is currently selected in the search results.
Current document – the document which is currently selected in the search results. This option is only displayed when a document-level search was performed and whole documents are returned in the results.
Current result – the result which is currently selected in the search results.
All results – all the listed search results.
Current attachment – the attachment which is currently open in the selected search result. This option is only displayed when a document-level search was performed and the currently selected result is an Outlook message which includes an email attachment.
Content match – This option is only displayed when a content full text search and/or a sub- search was performed. Select this option to use the navigation buttons to highlight the Content Full Text search and/or a sub-search results. See “Content Full Text Search” and “Text Sub-Search” for more information about navigating through these search results.
Navigation Buttons
These buttons are displayed only when the Show Find Text button is selected in the Search Template Editor. See “Show Find Text” for more information.
When a match is navigated to, the text is located on the page. When Automatically zoom Find Text, Content and Sub Search matches is selected, the page zoom is changed to 150%. See “Automatically zoom Find Text, Content and Sub Search matches” for information on changing this setting.
 – Navigate to the first occurrence of the text on the selected page, in the selected result, in the selected document or in all results, depending on what is selected for the scope – see “Changing the Scope” above.
 – Navigate to the previous occurrence of the text on the selected page, in the selected document or in all results, depending on what is selected for the scope – see “Changing the Scope” above.
 – Navigate to the next occurrence of the text on the selected page, in the selected document or in all results, depending on what is selected for the scope – see “Changing the Scope” above.
 – Navigate to the last occurrence of the text on the selected page, in the selected document or in all results, depending on what is selected for the scope – see “Changing the Scope” above.