Managing Roles and Role Permissions
- Last updated
-
-
Save as PDF
The top of this page introduces the Best Practice Roles and provides instructions for adding a new Role. The bottom of this page details how to grant Role permissions for various modules and processes and has a brief FAQ.
Introduction
Best Practice has the following Roles pre-configured, however, new Roles can be added.
- End User
- Contractor
- Reporter
- Supervisor
|
- General Manager
- Operational Manager
- HSEC Manager
- Client Administrator
|
- Employee
- Stakeholder
- RTW Coordinator
- Risk Manager
|
- Occupational Health Nurse
- Environmental Manager
- Permit to Work End User
|
Role Permissions
In order for users to access any information in CMO, their Role must be granted the respective permissions. This section details how to grant Role Permissions to various modules and processes that are commonly used in CMO.
Navigate to the CMO Role Permissions page to see a full list of the Role Permissions and their definition. Add link once finished.
Grant Role Permissions to:
- + A Role
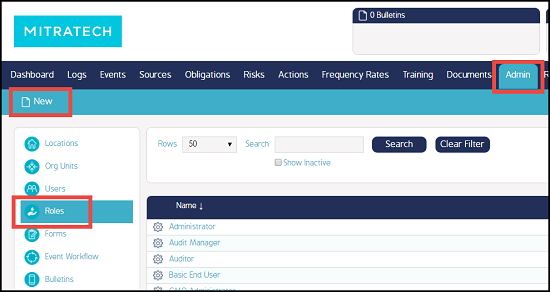
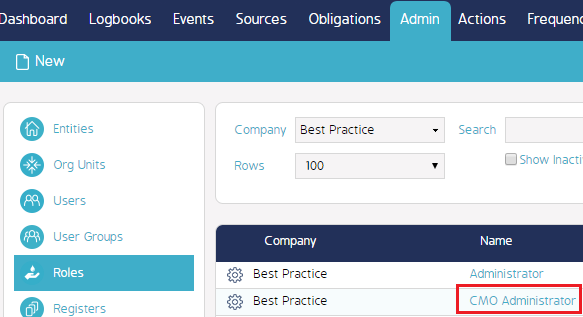
- 1. Log in as an Administrator and navigate to Admin > Roles.
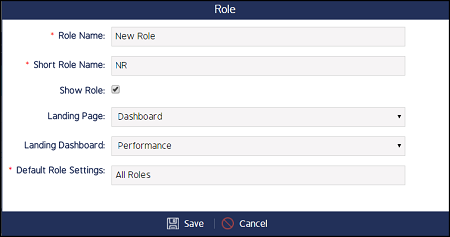
2. Click the hyperlinked name of the Role you want to edit.
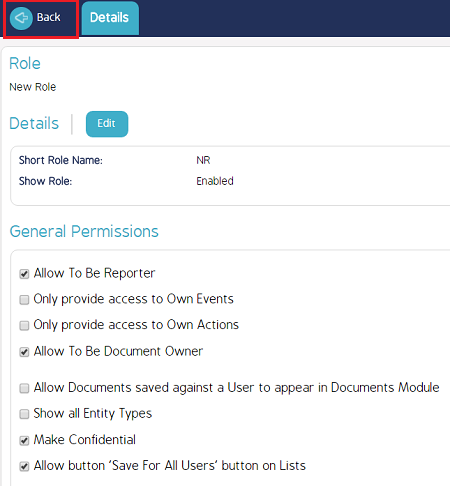
The Edit Permissions screen will appear.

3. Check/uncheck the permissions you want to grant/revoke.
- + Forms
- 1. Log in as an Admin and navigate to Admin > Forms.
2. Find the draft of the Form you want to edit, click the cog wheel, and select Edit.
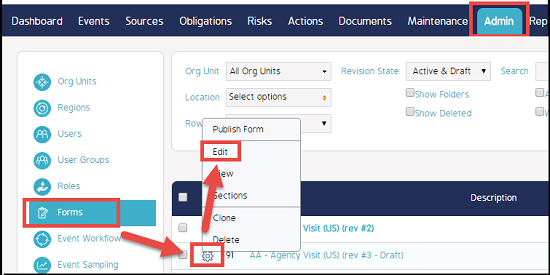
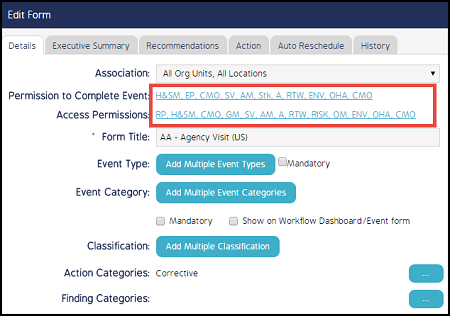
3. Click the Permission to Complete Form and the Access Permissions links from the Edit Form pop-up screen.
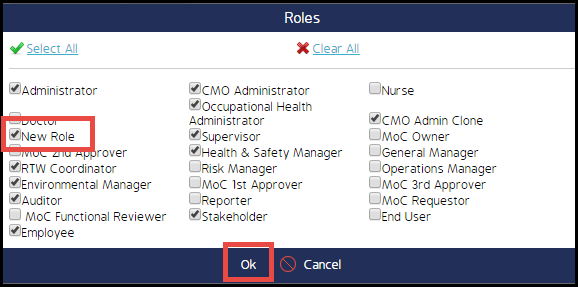
4. Select your Role from the Role pop-up screen and click Ok.
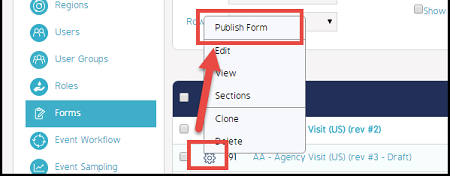
5. Navigate back to the Form Draft, click the cog wheel, and select Publish Form.
|
- + Workflows
- Note: This process will apply to each step in the Workflow.
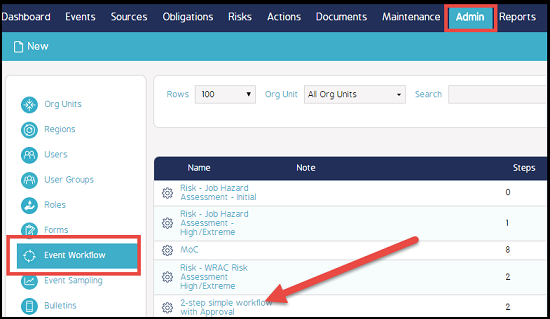
1. Log in as an Admin, navigate to the Admin module, and click Event Workflow.
2. Open the Workflow you want to edit by clicking the Workflow name.
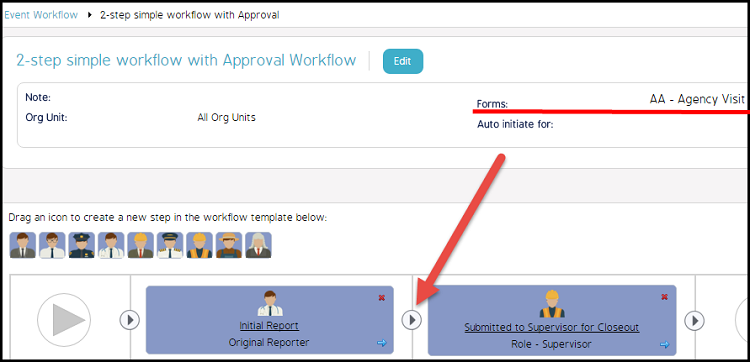
3. Take note of the Form your Workflow is using and click the triangle transition button found between steps.
Note: Any configuration at the transition point will apply to the step BEFORE it.
4. Click the Event Permissions Edit button in the Edit Stage pop-up screen.
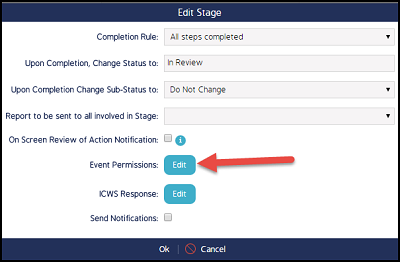
5. Select your Workflow's Form from the Form dropdown in the Event Permission pop-up screen.
6. Adjust the edit and view permissions by clicking the respective button for each category.
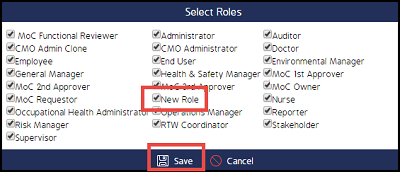
Once the Select Roles pop-up screen appears, check/uncheck the box next to the Role you want to grant/revoke permissions.
-
-
-
-
-
-
- + Event Status
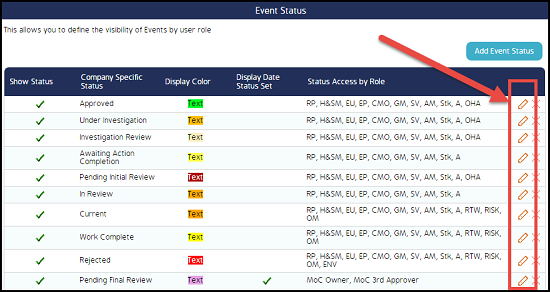
- Please note, if a Role is not added to an Event Status then the users assigned to that Role will not have access to the Event.
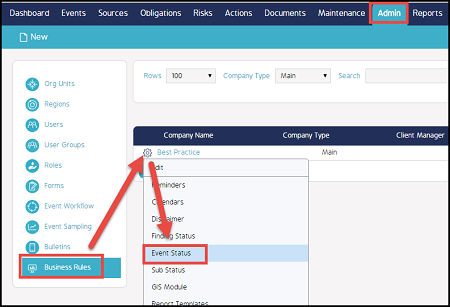
1. Log in as an Admin, navigate to the Admin module, and select Business Rules.
2. Click the cog wheel and select Event Status.
From the Event Status screen, click the edit (pencil) icon for each status you want the Role to have access to. The Status screen will appear.
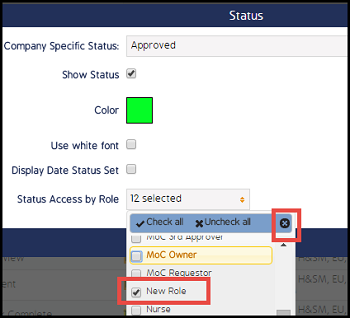
3. Click into the Status Access by Role field and place checkmarks next to the Roles you want this status to be available for. Click the X to save any edits.
|
Navigate to the Role Permission Index to see a list of the role permissions and their definition. (link this to topic page once the Google doc is finished).
FAQ
- + What are the most commonly assigned Role permissions?
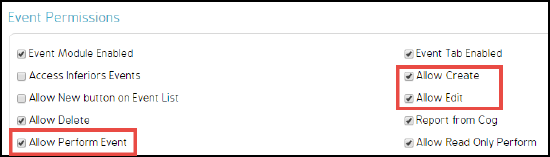
- Allow Perform, Allow Create, and Allow Edit are three of the most commonly granted/revoked Role permissions in CMO.
|
- + How do I allow a Role to Create and Edit users?
- Roles must have Administrative permissions in order to create and edit users in CMO. See the instructions below for grating administrative permissions.
1. Log in as an Admin.
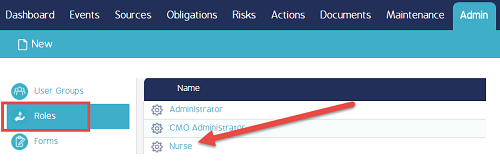
2. Navigate to the Admin module, click Roles, then click the name of the Role you want to grant access to.
3. Navigate to the User Permissions section on the Role Details page.
4. Ensure the Allow Edit and Allow Create permissions are checked. Click the link under the permissions to edit the Roles.
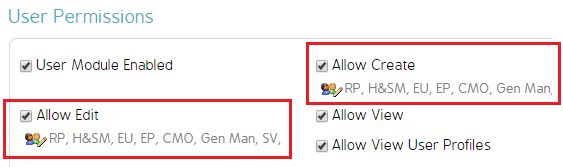
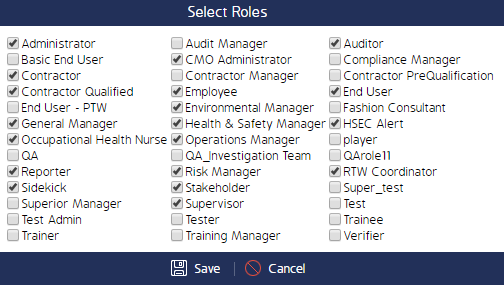
5. When the Select Roles pop-up screen appears, put a check mark next to all of the Roles you would like the initial Role to have access to Edit/Create.
|