
Installation Guide for TeamConnect Enterprise Add-in Versions 2.X
Introduction
The information and instructions on this page apply to version 2.X of TeamConnect Office Suite.
TeamConnect Office integrates into Microsoft Word, Excel, and PowerPoint.
TeamConnect Outlook integrates with Microsoft Outlook.
You must install each add-in separately
- First, you have to install the TeamConnect add-in module,
- Then, you install the Office add-in,
- Lastly, you install the Outlook add-in
Performance Note:
Performance will vary depending on the number of integrated search views and the number of projects returned by those search views. Testing of Office Suite 2.0 indicates the following results
- An environment with 23 integrated search views can be initialized in 5 seconds.
- An environment with 54 integrated search views can be initialized in 11 seconds.
These numbers might be affected by other factors such as PC configuration (RAM, CPU, etc.) as well as the network limitations (speed, latency, etc.).
Prerequisites and System Requirements
Prerequisites
- Users must have Administrative Access within the TeamConnect system in order to successfully install.
- Admins must enable the following permissions (in TeamConnect) for users and groups for Office Suite 2.0 to function:
- View Office Integration Settings Records
- View Office Integration Settings all categories
- View Office Integration Settings all custom fields
System Requirements
- Must be able to run installer as an administrator
- TeamConnect Enterprise 3.3 SP2 or later
- IMAP, POP3, or Google Sync
- For TeamConnect 32 & 64 bit Office: Microsoft Word, Excel, and PowerPoint 2007, 2010, 2013, and 2016
- For TeamConnect 32 & 64 bit Outlook: Microsoft Outlook 2007, 2010, 2013, and 2016.
Note: Please make sure you install the appropriate versions of the add-in with your version of Office/Outlook. Example: 32 bit add-in for 32 bit Office/Outlook - Prior to moving to Office Suite 2.X, users with the following versions of TeamConnect must download the respective patches or updates listed below:
| Version | Patch |
| TC 3.3 SP2 | TeamConnect 3.3 SP2 Office Suite 2.1 |
| TeamConnect 3.3 SP3 | TeamConnect 3.3 SP3 Office Suite 2.1 |
| TeamConnect 3.4 | TeamConnect 3.4 Office Suite 2.1 |
| TeamConnect 3.4 SP1 | TeamConnect 3.4 SP1 Office Suite 2.1 TeamConnect 3.4 SP1 Update 20 Patch 11 |
| TeamConnect 4.0 | TeamConnect 4.0 Office Suite 2.1 TeamConnect 4.0.10 Patch 3 |
| TeamConnect 5.0 | TeamConnect Office Suite 2.1 |
Know How to Determine Your Plugin Version.
Upgrade Considerations:
TeamConnect Office Suite 2.2.0 can be upgraded from any 2.1 version of TeamConnect Office Suite.
Users with versions prior to 2.2.0 must first upgrade through the 2.1 installer on the Available Updates in TeamConnect.
Users upgrading to Office Suite 2.2.0 from a version before Office Suite 2.1.0.1 must sync for pre-existing document to show up in searches. For more detail, please see Search Filtering in the Office Suite User Guide.
Installing the TeamConnect Add-ins
- Go to Available Updates, click the Install Now button.
- You should receive an "Installation Successful" message.
- If the installation is unsuccessful you will be redirected to the /fatalError.jsp page.
- After a successful installation, you won't be able to see anything in TeamConnect because you will not have the correct rights.
- All users wanting to connect to the Office Suite have to have the following rights:
a) View Office Integration Settings records
b) View Office Integration Settings all categories
c) View Office Integration Settings all custom fields - After you give yourself rights, you will need to access the Office Integration Settings object in the UI and click Save.
- After the module is installed in TeamConnect, you can download the add-in installers on the Available Updates page.
Installing the Office Add-in
- Select the appropriate x86 or x64 installer based on your version of Office.
- x86 is used for 32-bit Office
- x64 is used for 64-bit Office
Note: This is not based on your version of the Windows Operating System.
To find what version of Office you have, go to File > Account > About Word. You can check any Microsoft Office system, it doesn't have to be Word (e.g. PowerPoint, Excel, etc.)
- In the \\TeamConnect Office Add-ins\Office\x86 - For 32-bit Office installs, right-click the setup.exe file and select Run as Administrator. The add-in will not install correctly if you do not run as admin.
- Note: This is the recommended file to run regardless of if you have a 32- or a 64-bit machine
- Follow the steps in the Wizard to complete the install.
- Click Next from the Mitratech TeamConnect Outlook Add-in window.
- If you want to change the location of where this is stored, click the Browse button. Otherwise click the Next button to use the default folder.
- From the Mitratech Setup window, enter the URL for your instance of TeamConnect.
Be sure to include http:// at the beginning of the URL, and a / at the end of the URL (e.g. http://testsite:1234/4.0.2/).
Note: If you want to preset the login URL for your users, enter "false" in the URL editable entry field. This will ensure that users cannot edit the log-in URL. Entering "false" will not work if there is no log-in URL. Enter "true" if you would like to make the URL editable. All fields left blank will default to "true."
- Click Next to begin the installation.
- Click Next from the Mitratech Setup window.
- Click Close to exit the installer.
After successful installation, the TeamConnect tab appears in Microsoft Word, Excel, and PowerPoint.
Confirm that the Add-in was installed successfully
Once the add-ins are installed, open Office and/or Outlook and verify you can see the TeamConnect add-in pane. If you cannot see the pane on the right hand side, then you may need to confirm the add-in is enabled:
- Under File > Options > Add-ins > click "Go..."
- next to "Manage: COM Add-ins," verify the check box is checked for "TeamConnectOfficeAddIn"
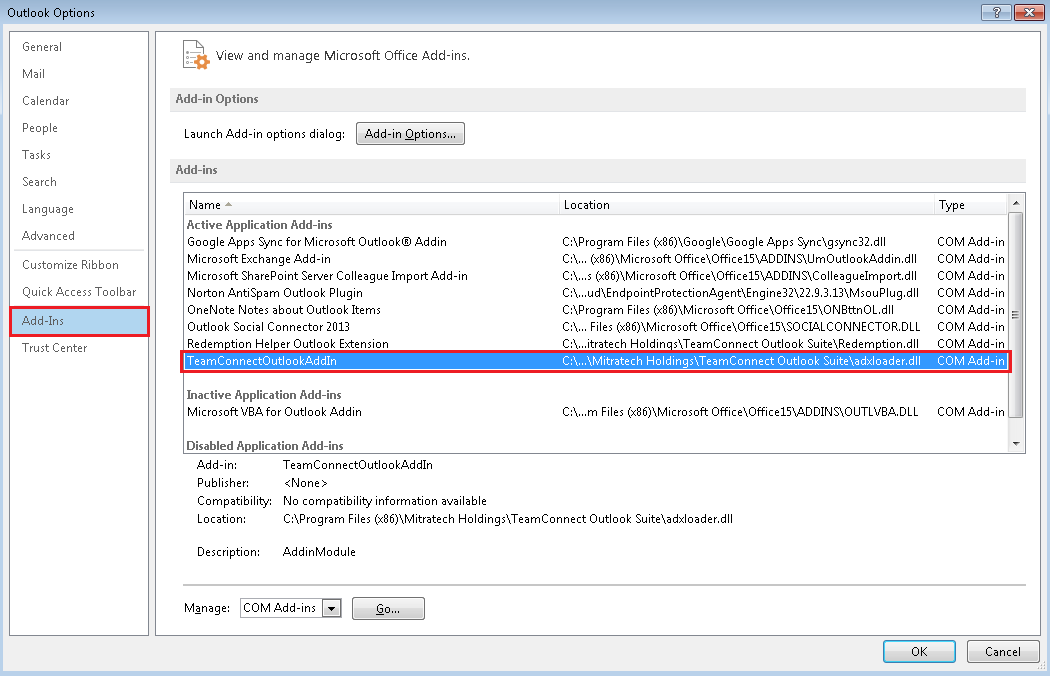
- next to "Manage: COM Add-ins," verify the check box is checked for "TeamConnectOfficeAddIn"
-
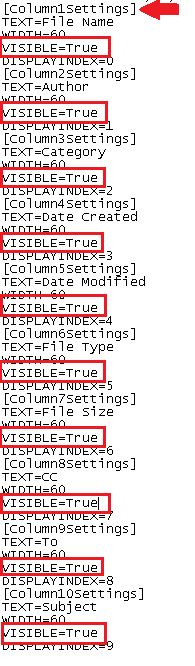
Once you have confirmed that the add-in is enabled in Office/Outlook, if the pane is still not showing, then check the .ini file for the user on the machine to verify that the views are enabled.
-
C:\Users\<user name>\AppData\Roaming\Mitratech\Office Settings\OfficeSettings.ini
-
Note: you may need to set Windows Explorer to show hidden items, in Windows X, this is done by going to View > checking the 'hidden items' box
-
- If the boolean is set to "True," then it will be visible within Outlook.
-
-
Once you have the TeamConnect pane visible in Office/Outlook, you can configure the connection to your TeamConnect instance. Open the settings by clicking on the Gear icon on the top of the TeamConnect pane. There will be three fields to fill out.
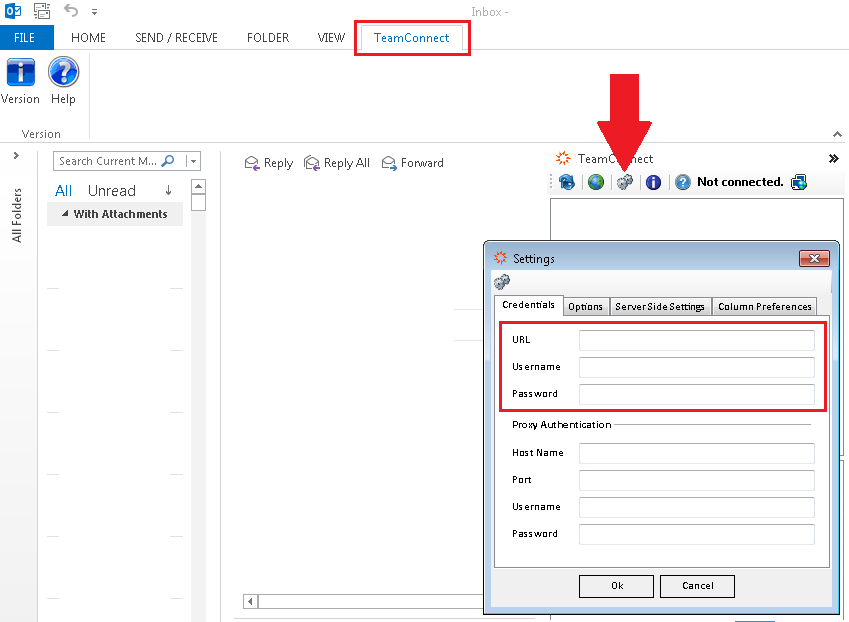
If you need to change your TeamConnect login information, click the Settings button from the TeamConnect pane. Entering your login information allows TeamConnect to integrate with the Office programs.
Note: You will need to input your username exactly as it appears on TeamConnect, including any capitalization.
Installing the Outlook Add-in
- Select the appropriate x86 or x64 installer based on your version of Office.
- x86 is used for 32-bit Office
- x64 is used for 64-bit Office
Note: This is not based on your version of the Windows Operating System.
To find what version of Office you have, go to File > Account > About Outlook.
- In the \\TeamConnect Office Add-ins\Outlook\x86 - For 32-bit Outlook installs, right-click the setup.exe file and select Run as Administrator. The add-in will not install correctly if you do not run as admin.
- Note: This is the recommended file to run regardless of if you have a 32- or a 64-bit machine
- Follow the steps in the Wizard to complete the install.
- Click Next from the Mitratech TeamConnect Outlook Add-in window.
- If you want to change the location of where this is stored, click the Browse button. Otherwise click the Next button to use the default folder.
- From the Mitratech Setup window, enter the URL for your instance of TeamConnect.
Be sure to include http:// at the beginning of the URL, and a / at the end of the URL (e.g. http://testsite:1234/4.0.2/).
Note: If you want to preset the login URL for your users, enter "false" in the URL editable entry field. This will ensure that users cannot edit the log-in URL. Entering "false" will not work if there is no log-in URL. Enter "true" if you would like to make the URL editable. All fields left blank will default to "true," with the exception of Browser Enabled.
Note: If you want to remove the built-in browser from Outlook, enter "false" in the Browser Enabled entry field. Enter "true" to leave the browser in the program.
- Click Next to begin the installation.
- Click Next from the Mitratech Setup window.
- Click Close to exit the installer.
After successful installation, the TeamConnect tab appears in Outlook.
If you need to change your TeamConnect login information, click the Settings button from the TeamConnect pane. Entering your login information allows TeamConnect to integrate with the Office programs.
Confirm that the add-in was installed successfully here.
Command Line Installation
Version 3.1.0+ offers the ability to install from the command line via Windows Powershell. Below is an example:
#sample commands for windows powershell
$url="" #<instance url everything up to but not including "/login" from the TC login >
$editableUrl=True #[True|False] whether or not the end user can modify the url through the Settings panel in the plugin
$proxyHost="" #<proxy host>
$proxyPort="" #<proxy port>
$outlookInstaller="MitratechOutlookAddInSetup.msi" #<outlook installer msi location>
$officeInstaller="MitratechOfficeAddInSetup.msi" #<office installer msi location>
#run the installers from the command line silently with no interaction
msiexec /i $outlookInstaller URL=$url URLEDIT=$editableUrl PROXYHOST=$proxyHost PROXYPORT=$proxyPort /qn
msiexec /i $officeInstaller URL=$url URLEDIT=$editableUrl PROXYHOST=$proxyHost PROXYPORT=$proxyPort /qn
URL, URLEDIT, PROXYHOST, PROXYPORT are each optional.